Cisco 7401ASR Installation and Configuration Guide Corporate Headquarters Cisco Systems, Inc. 170 West Tasman Drive San Jose, CA 95134-1706 USA http://www.cisco.
THE SPECIFICATIONS AND INFORMATION REGARDING THE PRODUCTS IN THIS MANUAL ARE SUBJECT TO CHANGE WITHOUT NOTICE. ALL STATEMENTS, INFORMATION, AND RECOMMENDATIONS IN THIS MANUAL ARE BELIEVED TO BE ACCURATE BUT ARE PRESENTED WITHOUT WARRANTY OF ANY KIND, EXPRESS OR IMPLIED. USERS MUST TAKE FULL RESPONSIBILITY FOR THEIR APPLICATION OF ANY PRODUCTS.
C O N T E N T S Preface ix Audience ix Organization x Document Conventions Warning Definition x xii Terms and Acronyms xv Related Documentation xvii Obtaining Documentation xvii Cisco.
Contents Replacing the Cover CHAPTER 2 1-14 Rack-Mounting, Tabletop Installation, and Cabling Preparing to Install the Cisco 7401ASR Router Tools and Parts Required 2-2 Electrical Equipment Guidelines 2-3 2-1 2-1 Safety Guidelines 2-4 Preventing Electrostatic Discharge Damage Electrostatic Discharge Prevention 2-4 Site Requirement Guidelines 2-4 2-4 Installing the Router 2-5 General Tabletop or Workbench Installation 2-5 Rack-Mounting a Cisco 7401ASR Router 2-6 Attaching the Chassis Rack-Mount and
Contents Online Insertion and Removal 3-3 Environmental Monitoring and Reporting Functions Environmental Monitoring 3-4 Reporting Functions 3-5 Fan Failures 3-8 Checking Conditions Prior to System Startup 3-4 3-9 Starting the System and Observing Initial Conditions 3-9 Configuring a Cisco 7401ASR Router 3-10 Performing a Basic Configuration Using AutoInstall 3-11 Performing a Basic Configuration Using the Setup Facility 3-11 Configuring Global Parameters 3-12 Configuring the Native Gigabit Ethernet an
Contents Troubleshooting the Power Subsystem 5-4 Troubleshooting the Cooling Subsystem 5-5 Troubleshooting the I/O Subsystem 5-6 Troubleshooting the Processor Subsystem 5-6 Troubleshooting the Port Adapter or Service Adapter Upgrading the Boot Helper (Boot Loader) Image PXF Troubleshooting Information APPENDIX A Specifications 5-6 5-7 5-8 A-1 System Specifications Software Requirements Processor Specifications A-1 A-2 A-3 Memory Specifications and Configurations A-3 Gigabit Ethernet GBIC Config
Contents Product Description C-2 Compatibility Requirements C-3 System Memory and Software Image Functions and Interactions Boot Environment Variables Sample Upgrade Process C-3 C-4 C-5 Working with a CompactFlash Disk C-5 Software Command Overview C-6 Using Software Commands C-7 Using the cd Command C-8 Using the show Command C-8 Using the pwd Command C-9 Using the dir Command C-9 Using the format Command C-9 Using the mkdir Command C-10 Using the rmdir Command C-11 Using the delete Command C-11 Enab
Contents Cisco 7401ASR Installation and Configuration Guide viii OL-5419-01 B0
Preface This preface describes who should read the Cisco 7401ASR Installation and Configuration Guide, how it is organized, and its document conventions.
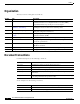
Preface Organization Organization The major sections of this guide are as follows: Chapter Title Description 1 Overview and Parts Installation This chapter provides a hardware overview as well as preparation and installation instructions for a Gigabit Interface Converter (GBIC), CompactFlash Disk, and port adapter or service adapter.
Preface Document Conventions ^ The symbol ^ represents the key labeled Control—for example, the key combination ^D in a screen display means hold down the Control key while you press the D key. < > Nonprinting characters, such as passwords, are in angle brackets. [ ] Default responses to system prompts are in square brackets. !, # An exclamation point (!) or a pound sign (#) at the beginning of a line of code indicates a comment line.
Preface Warning Definition Warning Definition Warning IMPORTANT SAFETY INSTRUCTIONS This warning symbol means danger. You are in a situation that could cause bodily injury. Before you work on any equipment, be aware of the hazards involved with electrical circuitry and be familiar with standard practices for preventing accidents. To see translations of the warnings that appear in this publication, refer to the translated safety warnings that accompanied this device.
Preface Warning Definition Attention IMPORTANTES INFORMATIONS DE SÉCURITÉ Ce symbole d'avertissement indique un danger. Vous vous trouvez dans une situation pouvant causer des blessures ou des dommages corporels. Avant de travailler sur un équipement, soyez conscient des dangers posés par les circuits électriques et familiarisez-vous avec les procédures couramment utilisées pour éviter les accidents.
Preface Warning Definition Advarsel VIKTIGE SIKKERHETSINSTRUKSJONER Dette varselssymbolet betyr fare. Du befinner deg i en situasjon som kan forårsake personskade. Før du utfører arbeid med utstyret, bør du være oppmerksom på farene som er forbundet med elektriske kretssystemer, og du bør være kjent med vanlig praksis for å unngå ulykker. For å se oversettelser av advarslene i denne publikasjonen, se de oversatte sikkerhetsvarslene som følger med denne enheten.
Preface Terms and Acronyms Terms and Acronyms To fully understand the content of this user guide, you should be familiar with the following terms and acronyms: • Cache—Memory with fast access and small capacity used to temporarily store recently accessed data; found either incorporated into the processor or near it.
Preface Terms and Acronyms • GB—gigabit • GBIC—Gigabit Interface Converter • Gbps—gigabits per second • Instruction and data cache—Instructions to the processor and data on which the instructions work. • Integrated cache—Cache that is built into the processor; sometimes referred to as internal cache. Cache memory that is physically located outside the processor is not integrated, and is sometimes referred to as external cache.
Preface Related Documentation Related Documentation Your Cisco 7401ASR router and the Cisco IOS software running on it contain extensive features and functionality, which are documented in the following resources: • Cisco Documentation CD-ROM package (See the “Obtaining Documentation” section on page xvii.) • Cisco.com (See the “Cisco.com” section on page xvii.) • Cisco 7401ASR Router Documentation Master Index provides a list of related documents and links at: http://www.cisco.
Preface Documentation Feedback You can order Cisco documentation in these ways: • Registered Cisco.com users (Cisco direct customers) can order Cisco product documentation from the Ordering tool: http://www.cisco.com/en/US/partner/ordering/index.shtml • Nonregistered Cisco.com users can order documentation through a local account representative by calling Cisco Systems Corporate Headquarters (California, USA) at 408 526-7208 or, elsewhere in North America, by calling 1 800 553-NETS (6387).
Preface Obtaining Technical Assistance or model name; by tree view; or for certain products, by copying and pasting show command output. Search results show an illustration of your product with the serial number label location highlighted. Locate the serial number label on your product and record the information before placing a service call. Submitting a Service Request Using the online TAC Service Request Tool is the fastest way to open S3 and S4 service requests.
Preface Obtaining Additional Publications and Information Obtaining Additional Publications and Information Information about Cisco products, technologies, and network solutions is available from various online and printed sources. • Cisco Marketplace provides a variety of Cisco books, reference guides, and logo merchandise. Visit Cisco Marketplace, the company store, at this URL: http://www.cisco.
C H A P T E R 1 Overview and Parts Installation The Cisco 7401ASR router provides application-specific features for broadband subscriber aggregation and network application services with high processing performance. This chapter provides a quick hardware overview and options installation instructions for the Cisco 7401ASR router. For functional information see Chapter 3, “Starting and Configuring,” the “Functional Overview” section on page 3-1.
Chapter 1 Overview and Parts Installation Hardware Overview The following sections provide illustrations and a brief overview of the Cisco 7401ASR router: • Front View, page 1-2 • LEDs, page 1-3 • Rear View, page 1-4 • System Board, page 1-4 • System Management Functions, page 1-5 Front View Figure 1-1 EN AB LE Cisco 7401ASR Router—Front View D S IER LL R RM CE CAR LA RX RX RX A 4 TX RX ENHANCED ATM 5 7 8 10 11 13 1 3 6 9 12 57606 2 1 Port adapter slot (with installed port
Chapter 1 Overview and Parts Installation Hardware Overview LEDs LED information is in Figure 1-2 and the table below Figure 1-2. Figure 1-2 LEDs on the Cisco 7401ASR Router 2 5 3 6 4 7 57605 1 9 10 8 In the Power Up state, the LED is LED flashes when there is traffic No.
Chapter 1 Overview and Parts Installation Hardware Overview Rear View Cisco 7401ASR Router—Rear View 50530 Figure 1-3 1 2 1 Fan vent 2 Grounding connector The rear of the Cisco 7401ASR router has five fan airflow vents and the chassis grounding connector that provides a chassis ground connection for ESD equipment or a two-hole grounding lug. (See Figure 1-3.) Five internal fans draw cooling air into the chassis and across internal components to maintain an acceptable operating temperature.
Chapter 1 Overview and Parts Installation Checking the Shipping Container Contents System Management Functions The Cisco 7401ASR processor performs the following system management functions: Note • Sending and receiving routing protocol updates • Managing tables, caches, and buffers • Monitoring interface and environmental status • Providing Simple Network Management Protocol (SNMP) management through the console and Telnet interface • Accounting for and switching of data traffic • Booting an
Chapter 1 Overview and Parts Installation Installation Checklist Note We no longer ship the entire router documentation set automatically with each system. You must specifically order the documentation as part of the sales order. If you ordered documentation and did not receive it, we will ship the documents to you within 24 hours. To order documents, contact a customer service representative.
Chapter 1 Overview and Parts Installation Installing the CompactFlash Disk, GBIC, and Port Adapter Table 1-2 Cisco 7401ASR Router Installation Checklist Verified By Task Date I/O ports and port adapter are operational (see Figure 1-2 on page 1-3 for specific LED information) Correct hardware configuration displayed after system banner appears Installing the CompactFlash Disk, GBIC, and Port Adapter You may have ordered a CompactFlash Disk, Gigabit Interface Converter (GBIC), and one of a variety of
Chapter 1 Overview and Parts Installation Installing the CompactFlash Disk, GBIC, and Port Adapter Information about CompactFlashDisks: • The larger the CompactFlash Disk size, the longer the system boot time. • The CompactFlash Disk supports online insertion and removal (OIR). • Use the CompactFlash Disk to store your configuration files and Cisco IOS software image. For complete information about using a CompactFlash Disk, see Appendix C, “Using the CompactFlash Disk.
Chapter 1 Overview and Parts Installation Installing the CompactFlash Disk, GBIC, and Port Adapter Warning Class 1 LED product. Figure 1-6 Inserting a GBIC into the Cisco 7401ASR Gigabit Ethernet Slot 0 3 2 4 57603 5 1 1 Gigabit Interface Converter (GBIC) 4 GBIC port 1 2 Alignment groove 5 Plug 3 GBIC port 0 Use the following procedure to install a GBIC: Step 1 Attach an ESD-preventive wrist strap between you and an unpainted chassis surface.
Chapter 1 Overview and Parts Installation Installing the CompactFlash Disk, GBIC, and Port Adapter Installing and Removing a Port Adapter or Service Adapter The information in this section also applies to service adapters. For information about configuring a port adapter, see the port adapter documentation at: http://www.cisco.com/univercd/cc/td/doc/product/core/7200vx/portadpt/index.htm. Warning When performing the following procedures, wear a grounding wrist strap to avoid ESD damage to the card.
Chapter 1 Overview and Parts Installation Replacing the SDRAM DIMM Step 2 Using a Phillips screwdriver, loosen the screw of the port adapter latch, and rotate the port adapter latch until it clears the faceplate of the port adapter. The latch can rotate 360o. Step 3 Pull the port adapter about halfway out of the port adapter slot. (If you remove a port adapter filler plate, keep the blank port adapter for use in the router if you should ever remove the port adapter.
Chapter 1 Overview and Parts Installation Replacing the SDRAM DIMM Warning When performing the following procedures, wear a grounding wrist strap to avoid ESD damage to the card. Some platforms have an ESD connector for attaching the wrist strap. Do not directly touch the system board with your hand or any metal tool, or you could shock yourself. To replace or upgrade the SDRAM DIMM, follow these instructions: Removing the Cover The Cisco 7401ASR router cover fits tightly on the chassis.
Chapter 1 Overview and Parts Installation Replacing the SDRAM DIMM Figure 1-9 AB LE D S IE R LL R RM C E C AR LA RX RX RX A TX RX ENHANCED ATM 66449 EN Removing the Cover Step 7 Slide the cover forward about one-half inch and then lift it from the chassis.
Chapter 1 Overview and Parts Installation Replacing the SDRAM DIMM Step 3 Press both spring latches outward to release the DIMM. See Figure 1-10. Step 4 Gently pull the DIMM free from the DIMM socket, taking care not to touch the pins that insert into the socket. Place the DIMM in an anti-static bag. Caution Forcing the DIMM into the socket can damage the DIMM. Use the notches on the DIMM to align the DIMM with the DIMM socket before inserting it.
C H A P T E R 2 Rack-Mounting, Tabletop Installation, and Cabling This chapter explains how to install a Cisco 7401ASR router in a rack in a general tabletop or workbench installation, how to attach cables, and how to power on the router.
Chapter 2 Rack-Mounting, Tabletop Installation, and Cabling Preparing to Install the Cisco 7401ASR Router Figure 2-1 Dimensions of Cisco 7401ASR Router 2 3 50537 1 1 12.875 in. (32.7cm) 2 17.3 in. (43.9 cm) 3 11.8 in. (30 cm) Table 2-1 provides dimensions and weight information. Table 2-1 Cisco 7401ASR Dimensions and Weight Cisco 7401ASR Dimensions (H x W x D) 1.72 in. x 17.3 in. x 11.80 in. (4.37 cm x 43.9 cm x 30 cm) Weight Chassis fully configured with a port adapter ~ 10.5 lb (4.
Chapter 2 Rack-Mounting, Tabletop Installation, and Cabling Preparing to Install the Cisco 7401ASR Router • Grounding lug and wires: – A grounding lug with two number-10 screw holes with a 0.63-inch (16.002-mm) spacing between them – A wire receptacle large enough to accept a 6-AWG multistrand, copper wire – Two Phillips machine screws with locking washers—M5 (metric), 0.031-inch (.08-mm) pitch, 0.
Chapter 2 Rack-Mounting, Tabletop Installation, and Cabling Safety Guidelines Safety Guidelines Following are safety guidelines that you should follow when working with any equipment that connects to electrical power, or which might be sensitive to electrostatic discharge (ESD) damage. Preventing Electrostatic Discharge Damage Electrostatic discharge (ESD) damage, which occurs when electronic cards or components are improperly handled, can result in complete or intermittent system failures.
Chapter 2 Rack-Mounting, Tabletop Installation, and Cabling Installing the Router Figure 2-2 Airflow Through the Chassis D R LE LS RIE M AB EL AR AR EN RX C RX C X AL TX RX ENHANCED ATM 50533 R When you plan the location and layout of your equipment rack or wiring closet, you need to consider how air flows through your router.
Chapter 2 Rack-Mounting, Tabletop Installation, and Cabling Installing the Router • A port adapter filler panel is installed if a port adapter or service adapter is not in place. • The router will receive adequate ventilation (it is not being installed in an enclosed cabinet where ventilation is inadequate). • If you plan to install the cable-management bracket, unpack and have handy the cable-management bracket and one M4 x 20-mm screw.
Chapter 2 Rack-Mounting, Tabletop Installation, and Cabling Installing the Router Attaching the Chassis Rack-Mount and Cable-Management Brackets This section explains how to install the rack-mount and cable-management brackets at the front and the rear of a Cisco 7401ASR router. Before installing the chassis in the rack, you must install a rack-mount bracket on each side of the front or rear of the chassis.
Chapter 2 Rack-Mounting, Tabletop Installation, and Cabling Installing the Router Attaching the Cable-Management Bracket Figure 2-4 Installing the Cable-Management Bracket 1 D LE AB S IER LL R RM CE CAR LA RX RX RX A TX RX 57578 EN 2 1 2 Cable-management bracket M4 x 20-mm screw Step 1 Align the cable-management bracket to the rack-mount bracket on the left side of the Cisco 7401ASR router.
Chapter 2 Rack-Mounting, Tabletop Installation, and Cabling Installing the Router Step 2 Align the rack-mount bracket to the side of the router. Depending on which set of holes on the rack-mount bracket that you use, the router will either be recessed in the rack or protrude from the rack. Step 3 Insert and tighten the screws. Step 4 Repeat Step 1 through Step 3 on the other side of the router.
Chapter 2 Rack-Mounting, Tabletop Installation, and Cabling Installing the Router Two-Post Rack Installation Figure 2-6 Installing the Cisco 7401ASR Router in a Two-Post Rack 1 R TX RX ENHANCED ATM 2 1 Two-post or four-post rack 2 Screw hole for the cable-management bracket 57572 D R LE LS RIE M AB EL AR AR EN RX C RX C X AL 3 3 Four 12-24 x 0.5-inch screws Step 1 Make sure that the port adapter latch is in the locked position and the screw is tightened.
Chapter 2 Rack-Mounting, Tabletop Installation, and Cabling Attaching a Chassis Ground Connection Four-Post Rack Installation Figure 2-7 Installing the Cisco 7401ASR Router in a Four-Post Rack 1 EN AB LE D S IER LL R RM CE CAR LA RX RX RX A TX RX ENHANCED ATM 2 50534 3 1 Four-post rack 3 2 Screw hole for the cable-management bracket Four 12-24 x 0.5-inch screws Step 1 Make sure that the port adapter latch is in the locked position and the screw is tightened.
Chapter 2 Rack-Mounting, Tabletop Installation, and Cabling Attaching a Chassis Ground Connection • One grounding lug—Must have two number-10 screw holes that have a 0.63-inch (16.002-mm) spacing between them, and a wire receptacle large enough to accept a 6-AWG multistrand, copper wire. This grounding lug is not available from Cisco Systems; electrical-connector vendors provide this type of grounding lug. • Two Phillips machine screws with locking washers—M5 (metric), 0.031-inch (0.8-mm) pitch, 0.
Chapter 2 Rack-Mounting, Tabletop Installation, and Cabling Connecting Port Adapter Cables Figure 2-9 Attaching a Grounding Lug to the Chassis Grounding Connector 3 2 50536 4 1 1 Chassis grounding connector 3 Screws 2 Grounding lug 4 Wire Step 2 Use the wire stripper to strip one end of the 6-AWG wire approximately 0.75 inches (19.05 mm). Step 3 Insert the 6-AWG wire into the wire receptacle on the grounding lug.
Chapter 2 Rack-Mounting, Tabletop Installation, and Cabling Connecting I/O Cables Connecting I/O Cables This section contains connection equipment information for the Fast Ethernet/Ethernet, Gigabit Ethernet, console, and auxiliary ports. Connecting Console and Auxiliary Port Cables The Cisco 7401ASR router has a DCE-mode console port for connecting a console terminal, and a DTE-mode auxiliary port for connecting a modem or other DCE device (such as a CSU/DSU or other router) to your router.
Chapter 2 Rack-Mounting, Tabletop Installation, and Cabling Connecting I/O Cables Figure 2-10 Identifying a Roll-Over Cable 2 3 84532 1 1 Pin 1 3 2 Pin 1 and pin 8 should be the same color Pin 8 The Cisco 7200 series routers ships with a rolled cable. Connection to a terminal or a modem will require an RJ-45-to-DB-25 adapter, and possibly a DB-25-to-DB9 adapter.
Chapter 2 Rack-Mounting, Tabletop Installation, and Cabling Connecting I/O Cables Figure 2-11 Console and Auxiliary Port RJ-45 Connectors 2 57577 1 3 4 5 1 Auxiliary port 4 Cable to modem or DCE 2 Console port 5 Cable to console terminal or DTE 3 RJ-45 connector Connecting Native Gigabit Ethernet and Fast Ethernet/Ethernet Cables Note See Chapter 3, “Starting and Configuring,” the “Configuring the Native Gigabit Ethernet and Fast Ethernet/Ethernet Interfaces” section on page 3-15, for in
Chapter 2 Rack-Mounting, Tabletop Installation, and Cabling Connecting I/O Cables Figure 2-12 Attaching the Fast Ethernet/Ethernet Cables 1 2 1 Fast Ethernet/Ethernet port 0 (RJ-45 connector) 2 Fast Etherne/Ethernett port 1 (RJ-45 connector) 57696 3 3 Fast Ethernet cables Attach either one or two Fast Ethernet/Ethernet 10/100 cables to the Fast Ethernet/Ethernet port 0 or port 1.
Chapter 2 Rack-Mounting, Tabletop Installation, and Cabling Connecting I/O Cables Table 2-4 GBIC Products, Description, and Operating Distance Product Number GBIC Description Operating Distance GBIC-SX= or Short wavelength (1000BASESX) Contains a Class 1 laser of 850 nm for 1000BASESX (short wavelength) applications. Operates on standard multimode fiber-optic link spans of up to 1804 ft (550 m).
Chapter 2 Rack-Mounting, Tabletop Installation, and Cabling Connecting I/O Cables Figure 2-13 GBIC Port Connections 1 5 6 7 3 57580 2 4 1 To external 1000BASEX network 5 TX (GE port 0) 2 1 duplex connector (TX and RX) 6 RX (GE port 0) 3 To external 1000BASEX network 7 GE port 1 4 2 simplex connectors Step 1 Remove the plug from the GBIC so that you can insert the cables. Keep the plug for use should you ever disconnect the optical fiber cables.
Chapter 2 Rack-Mounting, Tabletop Installation, and Cabling Connecting I/O Cables This degradation results in a decrease in the link span (the distance between a transmitter and a receiver) that can be supported reliably. The effect of DMD can be overcome by conditioning the launch characteristics of a laser source. A practical means of performing this conditioning is to use a device called a mode-conditioning patch cord.
Chapter 2 Rack-Mounting, Tabletop Installation, and Cabling Connecting I/O Cables Attaching the Mode-Conditioning Patch Cord Figure 2-14 GBIC Mode-Conditioning Patch Cord 6 2 RX 3 1 // // Offset // 7 8 6 9 57011 1 TX 4 5 1 Beige color identifier 6 Multimode bar 2 To GE interface 7 Single-mode bar 3 RX 8 Offset 4 TX 9 To cable plant 5 Blue color identifier 1 To use the mode-conditioning patch cord, follow these steps: Step 1 Attach the patch cord to the SC-type receptac
Chapter 2 Rack-Mounting, Tabletop Installation, and Cabling Attaching the Alarm Port Cable Attaching the Alarm Port Cable Figure 2-15 Connecting the Alarm Port Cable 57725 1 1 Alarm port If you have an alarm system, attach the alarm cable to the Cisco 7401ASR router alarm port. The alarm port cable is not provided by Cisco Systems. Insert the cable connector into the alarm port. The cable connector cannot be incorrectly inserted into the alarm port.
Chapter 2 Rack-Mounting, Tabletop Installation, and Cabling Connecting Power Proceed to the “Connecting Power” section on page 2-23 to complete the installation. Connecting Power This section provides the procedures for connecting AC-input and DC-input power to your Cisco 7401ASR router. Warning This unit might have more than one power cord. To reduce the risk of electric shock, disconnect the two power supply cords before servicing the unit.
Chapter 2 Rack-Mounting, Tabletop Installation, and Cabling Connecting Power Connecting DC-Input Power Note The color coding of the DC-input power supply leads depends on the color coding of the DC power source at your site. Make certain the lead color coding you choose for the DC-input power supply matches lead color coding used at the DC power source. Warning When you install the unit, the ground connection must always be made first and disconnected last.
Chapter 2 Rack-Mounting, Tabletop Installation, and Cabling Connecting Power b. Insert the +V lead (2) into the plug as shown in Figure 2-18, and tighten the screw to hold the lead to the plug. c. Insert the –V into the plug as shown in Figure 2-18, and tighten the screw to hold the lead to the plug. Step 5 If you have a dual DC power supply, repeat Step 4 for the second plug. Step 6 Insert the DC plug into the DC power connector on the chassis.
Chapter 2 Rack-Mounting, Tabletop Installation, and Cabling Connecting Power Cisco 7401ASR Installation and Configuration Guide 2-26 OL-5419-01 B0
C H A P T E R 3 Starting and Configuring This chapter describes how to start the system and perform a basic configuration for your Cisco 7401ASR router.
Chapter 3 Starting and Configuring Functional Overview The Media Access Control (MAC) or hardware address is a standardized data link layer address that is required for certain network interface types. These addresses are not used by other devices in the network; they are specific and unique to each port. The Cisco 7401ASR router uses a specific method to assign and control the MAC addresses of its port adapters. For a description of the MAC address, see the “MAC Address” section on page 3-3.
Chapter 3 Starting and Configuring Functional Overview For complete descriptions and instructions of the commands used to configure your Cisco 7401ASR router, refer to the Cisco IOS Configuration Fundamentals Configuration Guide and Cisco IOS Configuration Fundamentals Command Reference publications, which are available online, on the Documentation CD-ROM, and in print. MAC Address All LAN interfaces (ports) require unique MAC addresses, also known as hardware addresses.
Chapter 3 Starting and Configuring Functional Overview When you remove or insert a port adapter or service adapter in a Cisco 7401ASR router, the pins send signals to notify the system, which then performs as follows: 1. Rapidly scans the system for configuration changes. 2. Initializes all newly inserted port adapter or service adapter, noting any removed interfaces and placing them in the administratively shutdown state. 3.
Chapter 3 Starting and Configuring Functional Overview Table 3-1 lists the typical temperature thresholds for the Cisco 7401ASR router, and Table 3-2 lists the DC power thresholds for the normal, warning, and critical (power supply-monitored) levels.
Chapter 3 Starting and Configuring Functional Overview If the environmental status is not normal, the system reports the worst-case status level. Following is a sample overvoltage warning: Router# show environment Warning:+3.45 V measured at +3.27 V The show environment last command retrieves and displays the NVRAM log, which shows the reason for the last system shutdown (if the shutdown was related to voltage or temperature) and the environmental status at that time.
Chapter 3 Starting and Configuring Functional Overview Temperature readings: chassis inlet chassis outlet measured at 29C/84F measured at 26C/78F Voltage readings: +1.8 V (PXF) measured at +1.79 V +1.8 V (CPU) measured at +1.77 V +2.50 V measured at +2.47 V +3.30 V measured at +3.28 V +5.00 V measured at +4.98 V +5.20 V measured at +5.18 V +12.25 V measured at +12.21 V -12.00 V measured at -12.
Chapter 3 Starting and Configuring Functional Overview +2.50 V +3.30 V +5.00 V +5.20 V +12.25 V -12.00 V measured measured measured measured measured measured at at at at at at +2.47 V +3.28 V +4.98 V +5.18 V +12.36 V -12.
Chapter 3 Starting and Configuring Checking Conditions Prior to System Startup For complete descriptions and instructions for the environmental monitor commands, refer to the Cisco IOS Configuration Fundamentals Configuration Guide and Cisco IOS Configuration Fundamentals Command Reference publications, which are available online, on the Documentation CD-ROM, and in print.
Chapter 3 Starting and Configuring Configuring a Cisco 7401ASR Router Step 5 When you start up the router for the first time, the system automatically enters the setup facility, which determines which port adapter is installed and prompts you for configuration information.
Chapter 3 Starting and Configuring Configuring a Cisco 7401ASR Router Performing a Basic Configuration Using AutoInstall The AutoInstall process is designed to configure the Cisco 7401ASR router automatically after connection to your WAN. For AutoInstall to work properly, a TCP/IP host on your network must be preconfigured to provide the required configuration files. The TCP/IP host may exist anywhere on the network as long as the following two conditions are maintained: 1.
Chapter 3 Starting and Configuring Configuring a Cisco 7401ASR Router If the serial (WAN) cable is connected to the CSU/DSU and the router does not have a configuration stored in NVRAM, the router attempts to run AutoInstall at startup. The router may take several minutes to determine that AutoInstall is not set up to a remote TCP/IP host. Once the router determines that AutoInstall is not configured, it defaults to the setup facility.
Chapter 3 Starting and Configuring Configuring a Cisco 7401ASR Router --- System Configuration Dialog --At any point you may enter a question mark '?' for help. Use ctrl-c to abort configuration dialog at any prompt. Default settings are in square brackets '[]'.
Chapter 3 Starting and Configuring Configuring a Cisco 7401ASR Router Step 7 For the following queries, enable routing on AppleTalk and IPX: Configure AppleTalk? [no]: yes Multizone networks? [no]: yes Configure IPX? [no]: yes Step 8 In most cases you use IP routing. If you are using IP routing, you must also select an interior routing protocol.
Chapter 3 Starting and Configuring Configuring a Cisco 7401ASR Router Configuring the Native Gigabit Ethernet and Fast Ethernet/Ethernet Interfaces The Cisco 7401ASR router reports both the Fast Ethernet/Ethernet and the Gigabit Ethernet ports as GE 0/0 and GE 0/1. Before configuring either port type, you must first use the media-type interface command to select the media type, either Gigabit Ethernet (gbic) or Fast Ethernet/Ethernet (rj45).
Chapter 3 Starting and Configuring Configuring a Cisco 7401ASR Router Debugging Cisco IOS provides two commands to provide information on your interfaces: show interface GigabitEthernet 0/X (where X is either 0 or 1) and show controllers GigabitEthernet 0/X (where X is either 0 or 1). The output of the show interface command is useful for determining the current operating mode of the interface (speed/duplex/media-type) and the current interface statistics.
Chapter 3 Starting and Configuring Configuring a Cisco 7401ASR Router Number of bits in subnet field [0]: Class C network is 1.1.1.0, 0 subnet bits; mask is /24 Step 2 Determine if you are going to enable IPX on this interface; if you are, enter the unique IPX network number: Configure IPX on this interface? [no]: yes IPX network number [2]: Step 3 If you are using AppleTalk on the interface, enter yes. Enter yes to configure for extended AppleTalk networks, and then enter the cable range number.
Chapter 3 Starting and Configuring Configuring a Cisco 7401ASR Router Step 4 Note Save your settings to NVRAM. (See the “Saving the Running Configuration to NVRAM” section on page 3-21.) If you do not save the configuration settings you created in the router using configuration mode and the setup facility, your configuration will be lost th enext time yuou load the router. If additional Fast Ethernet interfaces are available in your system, you are prompted for their configurations as well.
Chapter 3 Starting and Configuring Configuring a Cisco 7401ASR Router The following sample display includes a continuous listing of all interface configuration parameters selected for ATM, Fast Ethernet, and synchronous serial interfaces. Configuring interface parameters: Configuring interface ATM1/0: Is this interface in use? [yes]: Configure IP on this interface? [yes]: IP address for this interface: 1.1.1.10 Number of bits in subnet field [0]: 0 Class C network is 1.1.1.
Chapter 3 Starting and Configuring Configuring a Cisco 7401ASR Router ip address 1.1.1.10 255.0.0.1 appletalk cable-range 0-0 0.0 appletalk discovery ! interface FastEthernet1/0 media-type 100BaseX half-duplex ip address 1.1.1.20 255.0.0.2 appletalk cable-range 0-0 0.0 appletalk discovery ! interface serial3/0 ip address 1.1.1.30 255.0.0.3 ip route-cache cbus no keepalive ! ! router igrp 15 network 1.0.0.0 ! end Use this configuration? [yes/no]: yes Building configuration...
Chapter 3 Starting and Configuring Performing Other Configuration Tasks Step 4 Enter the config terminal command at the enable prompt to enter configuration mode from the terminal: Router# config terminal Enter configuration commands, one per line. Router(config)# End with CNTL/Z.
Chapter 3 Starting and Configuring Replacing or Recovering a Lost Password • Understanding and working with the user interface on your router • Booting and rebooting the router • Setting the configuration register—see the Cisco IOS Configuration Fundamentals Configuration Guide • Loading configuration files or system images using remote copy protocol (rcp) or Trivial File Transfer Protocol (TFTP) • Reloading the operating system Replacing or Recovering a Lost Password This section describes how
Chapter 3 Starting and Configuring Replacing or Recovering a Lost Password Step 7 Recover or replace the displayed passwords. Step 8 Change the configuration register back to its original setting. Note To recover a lost password if the Break function is disabled on the router, you must have physical access to the router.
Chapter 3 Starting and Configuring Replacing or Recovering a Lost Password Router# show startup-config Step 12 Scan the configuration file display looking for the passwords (the enable passwords are usually near the beginning of the file, and the console login or user EXEC password is near the end). The passwords displayed look something like this: enable secret 5 $1$ORPP$s9syZt4uKn3SnpuLDrhuei enable password 23skiddoo . .
Chapter 3 Starting and Configuring Viewing Your System Configuration Caution Do not execute the next step unless you have changed or replaced a password. If you skipped Step 13 through Step 16, skip to Step 20. Failure to observe this caution causes you to erase your router configuration file. Step 19 Enter the copy running-config startup-config command to save the new configuration to NVRAM. Step 20 Enter the reload command to reboot the router.
Chapter 3 Starting and Configuring Viewing Your System Configuration 64256K bytes of ATA PCMCIA card at slot 0 (Sector size 512 bytes). 8192K bytes of Flash internal SIMM (Sector size 256K). Configuration register is 0x100 Use the show diag command to determine what type of Fast Ethernet/Ethernet port is active or what type of port adapter is installed in your Cisco 7401ASR router. You can also use the show diag slot command to display information about the port adapter slot.
Chapter 3 Starting and Configuring Performing Complex Configurations For specific information on the show version, show diag, and other software commands, refer to the modular configuration and modular command reference publications in the Cisco IOS software configuration documentation set that corresponds to the software release installed on your Cisco hardware.
Chapter 3 Starting and Configuring Performing Complex Configurations Cisco 7401ASR Installation and Configuration Guide 3-28 OL-5419-01 B0
C H A P T E R 4 Configuring the VPN Acceleration Module This chapter contains the information and procedures needed to configure the VPN Acceleration Module (VAM) in Cisco 7401ASR routers. This chapter contains the following sections: • Overview, page 4-1 • Configuration Tasks, page 4-1 Overview The VAM provides encryption services for Cisco 7401ASR routers. You must configure IPSec on the router for the VAM to provide encryption services. Note There are no interfaces to configure on the VAM.
Chapter 4 Configuring the VPN Acceleration Module Configuration Tasks Using the EXEC Command Interpreter You modify the configuration of your router through the software command interpreter called the EXEC (also called enable mode). You must enter the privileged level of the EXEC command interpreter with the enable command before you can use the configure command to configure a new interface or change the existing configuration of an interface. The system prompts you for a password if one has been set.
Chapter 4 Configuring the VPN Acceleration Module Configuration Tasks Configuring IPSec After you have completed IKE configuration, configure IPSec at each participating IPSec peer.
Chapter 4 Configuring the VPN Acceleration Module Configuration Tasks Defining Transform Sets A transform set is a combination of security protocols and algorithms. During the IPSec security association negotiation, peers agree to use a specific transform set to protect a particular data flow.
Chapter 4 Configuring the VPN Acceleration Module Configuration Tasks Table 4-1 Allowed Transform Combinations (continued) AH Transform1 ah-sha-hmac AH with SHA (HMAC variant) authentication algorithm ESP Encryption Transform1 ESP Authentication Transform2 esp-des ESP with 56-bit DES encryption algorithm esp-sha-hmac esp-null ESP transform without cipher ESP with SHA (HMAC variant) authentication algorithm 1. Pick one transform option. 2.
Chapter 4 Configuring the VPN Acceleration Module Configuration Tasks Verifying the Configuration Some configuration changes take effect only after subsequent security associations are negotiated. For the new settings to take effect immediately, clear the existing security associations.
Chapter 4 Configuring the VPN Acceleration Module Configuration Tasks remote ident (addr/mask/prot/port): (172.21.114.67/255.255.255.255/0/0) current_peer: 172.21.114.67 PERMIT, flags={origin_is_acl,} #pkts encaps: 10, #pkts encrypt: 10, #pkts digest 10 #pkts decaps: 10, #pkts decrypt: 10, #pkts verify 10 #send errors 10, #recv errors 0 local crypto endpt.: 172.21.114.123, remote crypto endpt.: 172.21.114.
Chapter 4 Configuring the VPN Acceleration Module Configuration Tasks Cisco 7401ASR Installation and Configuration Guide 4-8 OL-5419-01 B0
C H A P T E R 5 Troubleshooting Your Cisco 7401ASR router went through extensive testing before leaving the factory. However, if you encounter problems starting the router, use the information in this chapter to help isolate the cause of the problems.
Chapter 5 Troubleshooting Problem Solving Using a Subsystems Approach Action Yes No Step 1 Turn power on. Go to Step 2. — — Step 2 Green STATUS LED on? Go to Step 4. Troubleshoot power system, and go to Step 3. Step 3 Green STATUS LED on? Go to Step 4. Obtain technical assistance. Step 4 Fans operating? Go to Step 6. Troubleshoot cooling subsystem, and go to Step 5. Step 5 Fans operating? Go to Step 6. Obtain technical assistance.
Chapter 5 Troubleshooting Problem Solving Using a Subsystems Approach Identifying Startup Problems Startup problems are commonly due to the source power or to a port adapter or service adapter that is dislodged from the system board. Although an over temperature condition is unlikely at initial startup, the environmental monitoring functions are included in this chapter because they also monitor internal voltages.
Chapter 5 Troubleshooting Problem Solving Using a Subsystems Approach Troubleshooting the Power Subsystem Check the following to help isolate a problem with the power subsystem: Note Table 5-1 If the system powers off, wait at least one minute before manually rebooting the system, or it will pause indefinitely. Troubleshooting the Power Subsystem Symptom Possible Cause Possible Solution System begins power on, amber STATUS LED comes on.
Chapter 5 Troubleshooting Problem Solving Using a Subsystems Approach Troubleshooting the Cooling Subsystem Check the following to help isolate a problem with the cooling subsystem: Table 5-2 Troubleshooting the Cooling Subsystem Symptom Possible Cause Possible Solution System displays the following message: One or more fans are not operating. Contact a service representative.
Chapter 5 Troubleshooting Problem Solving Using a Subsystems Approach Troubleshooting the I/O Subsystem The procedures in this section assume that you have not made changes to your configuration file.
Chapter 5 Troubleshooting Upgrading the Boot Helper (Boot Loader) Image Upgrading the Boot Helper (Boot Loader) Image The boot helper (boot loader) image resides in Flash memory and contains a subset of the Cisco IOS software. This image is used to boot your router from the network or to load Cisco IOS images onto the router. This image is also used if the system cannot find a valid system image.
Chapter 5 Troubleshooting PXF Troubleshooting Information PXF Troubleshooting Information Note The VPN Acceleration Module (VAM) is not compatible with the PXF processor.
Chapter 5 Troubleshooting PXF Troubleshooting Information Packets ignored: shadow ring full: in ring full: PXF inactive: tx credits: holdq enqueues: interrupts: interrupt packets: pending read bytes: Interface Fa0/0 Et1/0 Et1/1 Et1/2 Et1/3 Se2/0 Se2/1 Se2/2 Se2/3 Fa3/0 PO4/0 AT5/0 Vi1 Vt1 Vi2 Vt2 Note 0 0 0 0 | | | ring space: shadow ring: inring: 16230330 0 40538 53326 0 | | | delayed credits: requeue drops: interrupt misses: Pkts In Chars In 0 0 0 0 0 0 0 0 0 0 0 0 0 0 0 0 0 0 0 0 30000000 14400
Chapter 5 Troubleshooting PXF Troubleshooting Information No Buffers If there are too many buffers configured for the output hold queue on an interface, this can use memory and result in dropped input packets. Enter the show running-config command and the show interfaces command to display the status of the incoming packet interfaces. Priority and Policing Configured in the Class Policy PXF does not support a configured priority and policing in the same class of a policy.
A P P E N D I X A Specifications This appendix provides system and component specifications for the Cisco 7401ASR router.
Appendix A Specifications Software Requirements Table A-1 Cisco 7401ASR System Specifications (continued) Description Specification AC-input cable 18 AWG6 three-wire cable, with a three-lead IEC-320 receptacle on the power supply end, and a country-dependent plug on the power source end DC Power Supply Information DC-input power 75W maximum configuration 24V DC-input voltage ratings +24 VDC nominal. Maximum range +20 to +36 VDC 24V DC-input current ratings Rated for 5A. 3.0A at +24 VDC, 3.
Appendix A Specifications Processor Specifications Processor Specifications Table A-2 Processor Specifications Memory Type Size Quantity Description SDRAM 128 MB, 256 MB, 512 MB 1 128-MB, 256-MB, or 512-MB DIMM Boot ROM 512 KB 1 OTP1 ROM for the ROM monitor program Primary cache 16 KB (instruction), 16 KB (data) — RM7000 processor, internal cache Secondary cache 256 KB — RM7000 processor; internal, unified cache Tertiary cache 2 MB (fixed) — RM7000 processor, external cache2 1.
Appendix A Specifications Gigabit Ethernet GBIC Configurations and Port and Cabling Specifications Gigabit Ethernet GBIC Configurations and Port and Cabling Specifications The Gigabit Interface Converter (GBIC) port is a 1000-Mbps optical interface in the form of an SC-type duplex port that supports IEEE 802.3z interfaces compliant with the 1000BASEX standard. Note The GBIC is a separately orderable part and does not ship installed in your Cisco 7401ASR router.
Appendix A Specifications Gigabit Ethernet GBIC Configurations and Port and Cabling Specifications Table A-7 GBIC Port Cabling Specifications GBIC GBIC-SX or WS-G5484 GBIC-LX/LH or WS-G5486 3,4 GBIC-ZX or WS-G5487 Extended distance (1000BASEZX)5 Wavelength (nm) Fiber Type Core Size (micron) Modal Bandwidth (MHz/km) Maximum Cable Distance 850 MMF1 62.5 160 722 ft (220 m) 62.5 200 902 ft (275 m) 50.0 400 1640 ft (500 m) 50.0 500 1804 ft (550 m) 62.5 500 1804 ft (550 m) 50.
Appendix A Specifications Fast Ethernet/Ethernet RJ-45 Port Pinouts GBIC-ZX or WS-G5487 The 1000BASEZX (extended wavelength) GBIC operates on ordinary single-mode fiber-optic link spans of up to 43.5 miles (70 km). Link spans of up to 62.
Appendix A Specifications Fast Ethernet/Ethernet RJ-45 Port Pinouts Figure A-1 RJ-45 Port and Connector 57574 12345678 1 1 RJ-45 connector Table A-8 RJ-45 Receptacle Pinouts Pin1 Description 1 TxD+2 2 TxD– 3 RxD+3 6 RxD– 1. Any pin not referneced is not connected. 2. TxD = Transmit Data 3. RxD = Receive Data Note With reference to the RJ-45 pinouts in Table A-8, proper common-mode line terminations should be used for the unused Category 5 UTP cable pairs 4/5 and 7/8.
Appendix A Specifications Console and Auxiliary Port Signals and Pinouts To determine whether a UTP cable is a crossover cable or a straight-through cable, hold the two RJ-45 connectors next to each other so you can see the colored wires inside the ends. Examine the sequence of colored wires to determine the type of cable, as follows: • Straight-through—The colored wires are in the same sequence at both ends of the cable.
Appendix A Specifications Alarm Port Alarm Port The dry relay alarm port operates up to 50V AC/DC maximum and up to 80 mA maximum. Total power dissipation should not exceed 300 milliwatts. The normally closed position will have from 15 to 30 ohms resistance. The open position will be greater than 1 megohm. The Alarm condition is the closed position. This port is a switch so that the cable connector can be inserted in either orientation.
Appendix A Specifications Lithium Battery Caution Cisco 7401ASR Installation and Configuration Guide A-10 OL-5419-01 B0
A P P E N D I X B PXF Information The PXF processor is turned on by default. If it is ever disabled, you must enable it to take advantage of IP packet switching and feature acceleration. Note The VPN Acceleration Module (VAM) is not compatible with the PXF processor. Note Before enabling the PXF processor, you must have IP routing and IP CEF switching turned on.
Appendix B PXF Information Using show Commands Using the show version Command Use the show version command to display the configuration of the system hardware and the software version. The following example of the show version command provides information about a Cisco 7401ASR router: Router# show version Cisco Internetwork Operating System Software IOS (tm) 7400 Software (C7400-JS-M), Version 12.2 Copyright (c) 1986-2001 by cisco Systems, Inc.
Appendix B PXF Information Using the show pxf Commands Using the show c7400 Command Use the show c7400 command to obtain information about the router. Router# show c7400 Network IO Interrupt Throttling: throttle count=0, timer count=0 active=0, configured=1 netint usec=4000, netint mask usec=200 Midplane EEPROM: Hardware revision 2.0 Board revision UNKNOWN Serial number 0000000000 Part number 00-0000-00 Test history 0xFF RMA number 000-000-000 MAC Pool Size 64 MAC Addr Base 0000.000.
Appendix B PXF Information Using the show pxf Commands • show pxf interface • show pxf feature ? Sample output for these commands follows. Using the show pxf accounting ? Command and Subcommands The following is an example of the show pxf accounting ? command with sample output: Router# show pxf accounting ? ATM Ethernet FastEthernet Hssi Null POS Serial summary ATM interface IEEE 802.3 FastEthernet IEEE 802.
Appendix B PXF Information Using the show pxf Commands Fa4/0 Vt1 Lo0 0 0 0 0 0 0 0 0 0 0 0 0 0 0 0 0 0 0 The following is an example of the show pxf accounting interface command with sample output: Router# show pxf accounting POS4/0 Interface POS4/0 Pkts In 19 Chars In 1064 Pkts Out 0 Chars Out 0 Punted 44 Using the show pxf crash Command The following is an example of the show pxf crash command with sample output: Router#show pxf crash EX_Type = 0x80000000 EX_ID(b0~3,16~17) = 0x00400 CPU_EX_
Appendix B PXF Information Using the show pxf Commands Using the show pxf info Command The following is an example of the show pxf info command with sample output: Router# show pxf info pxf:tmc type TMC ASIC Pass1 (no ECC) revision 3 ucode:filename 'system:pxf/ucode0' revision 1.
Appendix B PXF Information Using the show pxf Commands • show pxf feature cef ? Router# show pxf feature cef ? entry Shadow 16-4-4-8 PXF Mtrie: 41 leaves, 1968 leaf bytes, 15 nodes, 267000 node bytes 5 invalidations 46 prefix updates refcounts: 66746 leaf, 66720 node Prefix/Length 0.0.0.0/0 0.0.0.0/32 171.69.12.128/27 171.69.12.128/32 171.69.12.129/32 171.69.12.130/32 171.69.12.131/32 171.69.12.132/32 171.69.12.138/32 171.69.12.139/32 171.69.12.140/32 171.69.12.141/32 171.69.12.142/32 171.69.12.
Appendix B PXF Information Using the show pxf Commands Cisco 7401ASR Installation and Configuration Guide B-8 OL-5419-01 B0
A P P E N D I X C Using the CompactFlash Disk This appendix describes installation prerequisites you should observe before you can use the CompactFlash Disk in your system, and includes the following sections: • Hardware and Software Requirements, page C-1 • Tools and Parts Required, page C-1 • “Product Description” section on page C-2 • Compatibility Requirements, page C-3 • Boot Environment Variables, page C-4 • Sample Upgrade Process, page C-5 • Product Description, page C-2 • Working wi
Appendix C Using the CompactFlash Disk Product Description Product Description CompactFlash Disks are designed with Flash technology, a nonvolatile storage solution that does not require a battery to retain data indefinitely. CompactFlash Disks provide complete PCMCIA-ATA functionality and compatibility as defined by the CompactFlash Association in their CF+ and CompactFlash Specification, revision 1.4.
Appendix C Using the CompactFlash Disk Compatibility Requirements Compatibility Requirements This section discusses CompactFlash Disk compatibility and use between supported systems. In order to boot a Cisco IOS software image from the CompactFlash Disk, when the system is executing from the ROM monitor software image, your ROM monitor software image and your boot image must be from one of the minimum Cisco IOS releases listed in the “Hardware and Software Requirements” section on page C-1.
Appendix C Using the CompactFlash Disk Boot Environment Variables Boot Environment Variables The contents of the boot environment variables, which are stored in the configuration file in NVRAM, determine the actions your system takes on bootup.
Appendix C Using the CompactFlash Disk Sample Upgrade Process Sample Upgrade Process This section applies to users who want to use CompactFlash Disks for simple file storage. Step 1 Format your onboard Flash memory—called boot flash memory. (See the format command description in the “Software Command Overview” section on page C-6.) Step 2 Upgrade your onboard Flash memory by copying the Cisco IOS Release 12.x boot image (the c7400-kboot-mz) into onboard Flash memory.
Appendix C Using the CompactFlash Disk Working with a CompactFlash Disk Software Command Overview This section lists some of the basic software commands you can use with the CompactFlash Disk. Examples of these commands are included in the sections that follow. The CompactFlash Disk and other memory devices and locations in your system are defined as file systems, which are locations where you can store, use, or retrieve files and software images.
Appendix C Using the CompactFlash Disk Working with a CompactFlash Disk Table C-2 CompactFlash Disk-Related Software Commands for the Cisco 7401ASR (continued) Command and Arguments Purpose delete [disk0:]filename Deletes a file. Allows you to delete any file you designate, where filename designates the name of the file. dir [/all | disk0: ] Lists files on a file system. Allows you to list the contents of the CompactFlash Disk in slot 0.
Appendix C Using the CompactFlash Disk Working with a CompactFlash Disk • Using the mkdir Command, page C-10 • Using the rmdir Command, page C-11 • Using the delete Command, page C-11 Using the cd Command Use the cd command by defining a specific path name. Then to verify your working directory, use the pwd command: System# cd disk0: System# pwd disk0:/ You can also move up (or back) one level in the Flash Disk directory hierarchy using the cd ..
Appendix C Using the CompactFlash Disk Working with a CompactFlash Disk • Number of FAT Sectors is the number of sectors used to track allocation of clusters to files. • Sectors Per Cluster is the number of sectors contained in each cluster. (Files grow by a minimum of one cluster.) • Number of Clusters is the total number of clusters available for use by files. • Number of Data Sectors is the number of sectors available for files.
Appendix C Using the CompactFlash Disk Working with a CompactFlash Disk Disk on another router before you format the new CompactFlash Disk. A CompactFlash Disk that was shipped as part of a configured system contains a CompactFlash Disk-compatible Cisco IOS software image; therefore, you do not need to format it to use it in the system in which it was shipped. Note If you order a spare CompactFlash Disk, it is shipped blank; therefore, you must format it before you can use it.
Appendix C Using the CompactFlash Disk Working with a CompactFlash Disk 48755200 bytes total (48751104 bytes free) System# Note If you create a directory and place a file in it that you plan to access or use later on, be sure to define the entire directory path to the file as you enter the appropriate software commands. For example, if you placed the file itsa.
Appendix C Using the CompactFlash Disk Working with a CompactFlash Disk Step 3 Verify that the file fun1 is deleted: System# dir Directory of disk0:/ No files in directory. 48755200 bytes total (48742912 bytes free) System# Enabling Booting from a CompactFlash Disk This section explains how to enable booting from a CompactFlash Disk.
Appendix C Using the CompactFlash Disk Working with a CompactFlash Disk Step 3 • Enables the system to boot the default boot ROM software if the CompactFlash Disk-based image fails to boot—hexadecimal value 0x2000 • Disables Break—hexadecimal value 0x0100 • Enables the image myfile as the default boot image—hexadecimal value 0x0002 Press Ctrl-Z to exit configuration mode: System(config)# Crtl-Z System# Step 4 Save the new configuration to NVRAM by using the copy system:running-config nvram:startu
Appendix C Using the CompactFlash Disk Working with a CompactFlash Disk Cisco 7401ASR Installation and Configuration Guide C-14 OL-5419-01 B0
A P P E N D I X D Configuration Register Information The following information is found in this appendix: • Configuration Bit Meanings, page D-1 • Displaying the Configuration Register While Running Cisco IOS, page D-5 • Displaying the Configuration Register While Running ROM Monitor, page D-5 • Setting the Configuration Register While Running Cisco IOS, page D-6 • Setting the Configuration Register While Running ROM Monitor, page D-6 Configuration Bit Meanings Use the processor configuration re
Appendix D Configuration Register Information Configuration Bit Meanings Table D-1 Configuration Register Bit Settings (continued) Bit No. Hex Meaning 11–12 0x800–0x1000 Console line speed 13 0x2000 Boots default ROM software if initial boot fails 14 0x4000 IP broadcasts do not have network numbers 15 0x8000 Enables diagnostic messages and ignores NVRAM contents Bits 0–3 The lowest four bits of the processor configuration register (bits 3, 2, 1, and 0) form the boot field.
Appendix D Configuration Register Information Configuration Bit Meanings in ROMmon. If bit 13 is not set, the router will continue to netboot images indefinitely. The default setting for bit 13 is 0. If bit 13 is set, the system boots the boot helper image found in boot flash memory without any retries. The server creates a default filename as part of the automatic configuration processes.
Appendix D Configuration Register Information Configuration Bit Meanings Bit 8 Bit 8 controls the console Break key. Setting bit 8 (the factory default) causes the processor to ignore the console Break key. Clearing bit 8 causes the processor to interpret Break as a command to force the system into the bootstrap monitor, halting normal operation. A Break can be sent in the first sixty seconds while the system reboots, regardless of the configuration settings.
Appendix D Configuration Register Information Displaying the Configuration Register While Running Cisco IOS Bit 15 Bit 15 enables diagnostic messages and ignores NVRAM contents. Displaying the Configuration Register While Running Cisco IOS The configuration register can be viewed by using the show version or show hardware command. The following is sample output of the show version command from a Cisco 7401ASR router.
Appendix D Configuration Register Information Setting the Configuration Register While Running Cisco IOS 14 13 12-11 10 09 08 07 06 05 04 03-00 IP broadcasts do not have network numbers Boot default ROM software if network boot fails Console speed is 9600 baud IP broadcasts with ones Do not use secondary bootstrap Break disabled OEM disabled Ignore configuration disabled Fast boot disabled Fan boot disabled Boot to ROM monitor If the prompt is “rommon1”, the confreg command displays the virtual configu
Appendix D Configuration Register Information Setting the Configuration Register While Running ROM Monitor enable “use net in IP bcast address”? y/n [n]: n disable “use rom after netboot fails”? y/n [n]: n enable “use all zero broadcast”? y/n [n]: n enable “break/abort has effect”? y/n [n]: n enable “ignore system config info”? y/n [n]: n change console baud rate? y/n [n]: n change the boot characteristics? y/n [n]:y enter to boot: 0 = ROM Monitor 1 = the boot helper image 2 - 15 = boot system [0]: 2 Conf
Appendix D Configuration Register Information Setting the Configuration Register While Running ROM Monitor Cisco 7401ASR Installation and Configuration Guide D-8 OL-5419-01 B0
I N D EX boot system flash command A access-list (encryption) command 4-3 C access lists See also IPSec, crypto access lists AC power supply specifications acronyms list of A-1 cable-management kit 2-2 cables connecting port adapter xv fiber-optic addresses, MAC 3-2, 3-3 A-4 fiber-optic link distance chassis clearance 3-5 I/O 3-5 through the chassis A-5 swapping power 5-5 troubleshooting power subsystem ambient site temperature 2-4 cache memory xv blank port adapter use 3-14 1
Index clearance 3-5 dimensions 2-2, A-1 ground connection procedure ground lug connector rack-mounting weight 4-4 interface type slot/port 3-21 ip pxf 2-11 B-1 line con 0 1-4 3-24 media-type 2-6 3-15 negotiation auto A-1 Cisco Documentation CD-ROM no ip pxf xvii Cisco IOS 3-15 B-1 no negotiation auto Cisco 7401ASR requirements documentation no shutdown A-2 password xvii clearance reload chassis 3-5 clear crypto sa command 4-6 command interpreter, EXEC 3-24 3-25 reset
Index config-register command 3-24, C-12 confreg command config terminal command 3-21 console port configuration bit meanings pinout and signals D-1 configuration file saving system banner display 3-21 description 3-20 A-3 SDRAM A-3 A-3 configure command environmental monitor 3-25 3-5 crossover cable, Ethernet pinout 3-20 configure memory command 3-24 configure terminal command 3-24 A-7 crypto access lists creating 4-3 crypto sa command, clear configuring 4-6 3-17, 3-18 A
Index electrostatic discharge damage online insertion and removal plug See ESD prevention enable command enable secret command Gigabit Interface Converter 3-24 configuring 5-5 error messages environmental shutdown ESD 1-4 procedure 2-11 H 2-4 2-4 hardware EXEC command interpreter exhaust air connector 5-5 5-5 ESD prevention 3-14 ground connection 3-5 environmental monitoring error message fan failure A-4 3-12 sample configuration 3-4 show commands 3-15 global parameters 3-24
Index connecting power 2-23 grounding the chassis interface parameters site requirements LEDs 3-16 enabled on interface processors 2-4 starting the router tools for L 2-11 identification and status 3-9 native I/O ports 2-2 workbench or tabletop parameters port adapter 3-16 5-3 M Internet Packet Exchange MAC addresses See IPX description Internet Protocol 3-2, 3-3 3-3 make a directory command See IP media-type command interpreter, EXEC command IOS documentation IOS requirements
Index environmental monitor no shutdown command console and auxiliary 3-5 Fast Ethernet/Ethernet 3-24 numbering GBIC specifications logical interface 3-1 port adapter slot 3-1 connecting A-5 2-23 subsystem for troubleshooting 5-2, 5-4 power cord 3-4 saving and viewing contents size A-6 power NVRAM log A-8 troubleshooting 3-21 5-4, 5-5 power supply A-3 and environmental monitor disabled O 3-4 shutdown 3-4 troubleshooting OIR functional description 5-3 procedures 3-3 che
Index show pxf features show pxf info contents B-4 show commands B-3 show pxf interface 1-5 show c7400 B-4 B-3 show controller 3-16 show crypto ipsec sa R 4-6 show crypto ipsec transform-set show crypto map rack-mounting front mounted show diag 2-7 4-6 3-25 rear mounted 2-8 show environment rack-mount kit 2-2 show environment all reload command replacing or recovering a lost password reset command 3-22 3-6 3-25 show interfaces show pxf 3-14 A-7 Routing Information Protoco
Index SNMP thresholds configuring 3-4 terms 3-13 software requirements list of A-2 specifications xv terms and acronyms AC power supply alarm port tools A-1 for installation A-9 chassis dimensions A-1 CompactFlash Disk A-3 DC power supply Flash memory 2-2 transform sets allowed combinations defining A-2 4-4 cooling subsystem A-1 5-2, 5-5 humidity A-2 port adapter NVRAM A-3 power subsystem processor A-3 processor subsystem temperature weight PXF A-2 troubleshooting
Index safety information SELV circuits 1-1, 2-4 2-17 trained service personnel 1-11 warning status level environmental monitor weight of system 3-5 A-1 workbench installation 2-5 Cisco 7401ASR Installation and Configuration Guide OL-5419-01 B0 IN-9