
User's Manual


33
8.10 Exclusive Data Editing
If this parameter is enabled, all data read by the scanner must be processed by the
editing format. If the data is not eligible for all enabled editing formats, the scanner
will not accept the reading and the data will not be transmitted.
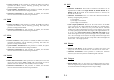
8.11 Programming Examples
Example 1: Extracts data from the 10th character to the 19th character.
Total Number of Fields: 3
Field 1: Divide field by field length, set field length to 9
Field 2: Divide field by field length, set field length to 10
Field Transmission Sequence: F2
Example 2: Extract the date code, item number, and quantity information from
barcodes. Data is encoded in the barcode like this: From the first character to the
6th character is the date code. From the 7th character is the item number, its
length is not fixed but is delimited by a ‘-’ character. After the ‘-’ character is the
quantity information.
Data should be transmitted like this: Item number goes first, then a TAB character,
and then the date code, and then another TAB character and finally the quantity.
Total Number of Fields: 3
Field 1: Divide fields by field length and set the field length to 6.
Field 2: Divide fields by field terminating string. Set terminating string to ‘-’,
and discard the terminating string.
Additional Field 1: Set to one TAB character.
Field Transmission Sequence:
F2 AF1 F1 AF1 F3
34
9. Configuring your 1166/1266
The configuration of 1166/1266 Scanner is done by reading the setup labels
contained in the Configuration Manual (the second part of this manual). This
section describes the procedure of configuring the scanner. Some configuration
examples are also given in this section for illustration.
9.1 Enter Configuration Mode
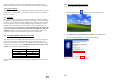
To start the configuration, the “Enter Setup” label must be read. This will put the
scanner in the configuration mode. The scanner will respond with 6 beeps and the
indicator will turn blue after the label is read. This “Enter Setup” label is located at
the bottom of almost every even page of the Configuration Manual.
9.2 Default
All the parameters of the scanner will return to their default values by reading the
“Default” label. The scanner will beep twice when the “Default” label is read.
9.3 List Setting
The current setting of all scanner parameters can be sent to the host computer for
user inspection. The listing is separated into ten pages. User can select the page of
interest by reading the “Page x” label
Page 1: Interface, Buzzer, and Scanner Parameters
Page 2: Prefix, Postfix, and Length Code Setting
Page 3: Code ID
Page 4: Readable Symbologies
Page 5: Symbology Parameters (1/3)
Page 6: Symbology Parameters (2/3)
Page 7: Symbology Parameters (3/3)
Page 8: Editing Format 1
Page 9: Editing Format 2
Page 10: Editing Format 3