
User Manual

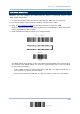
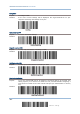
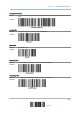
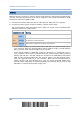
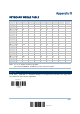


Table Of Contents
- IMPORTANT NOTICES
- RELEASE NOTES
- INTRODUCTION
- QUICK START
- UNDERSTANDING THE BARCODE SCANNER
- SELECTING OUTPUT INTERFACE
- SETTING UP A WPAN CONNECTION
- CHANGING SYMBOLOGY SETTINGS
- 4.1 CODABAR
- 4.2 CODE 25 – INDUSTRIAL 25
- 4.3 CODE 25 – INTERLEAVED 25
- 4.4 CODE 25 – MATRIX 25
- 4.5 CODE 39
- 4.6 CODE 93
- 4.7 CODE 128
- 4.8 EAN-8
- 4.9 EAN-13
- 4.10 GS1-128 (EAN-128)
- 4.11 ISBT 128
- 4.12 MSI
- 4.13 FRENCH PHARMACODE
- 4.14 ITALIAN PHARMACODE
- 4.15 PLESSEY
- 4.16 GS1 DATABAR (RSS FAMILY)
- 4.17 TELEPEN
- 4.18 UPC-A
- 4.19 UPC-E
- DEFINING OUTPUT FORMAT
- APPLYING FORMATS FOR DATA EDITING
- SPECIFICATIONS
- Appendix I - FIRMWARE UPGRADE
- Appendix II - HOST SERIAL COMMANDS
- Appendix III - KEYBOARD WEDGE TABLE
- Appendix IV - NUMERAL SYSTEMS

186
Enter Setup
1560 Series Barcode Scanner User Guide
KEY STATUS
Decide whether or not to change key status when “Normal Key” is selected for Key Type.
USER-DEFINED SCAN CODE
1) Read the “Set Scan Code” label to define new scan code.
2) Read the “Hexadecimal Value
” label on page 188 for the desired character string.
3) Read the “Validate” label to complete this setting.
4) Read the “Confirm” label to confirm the action.
Scan Code
S
et Scan Code
C
onfirm
Add Shift
Add Left Ctrl
A
dd Right Ctrl
Add Left Alt
A
dd Right Alt