
User Manual
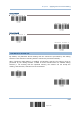

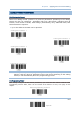
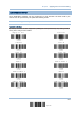

Table Of Contents
- IMPORTANT NOTICES
- RELEASE NOTES
- INTRODUCTION
- QUICK START
- UNDERSTANDING THE BARCODE SCANNER
- SELECTING OUTPUT INTERFACE
- SETTING UP A WPAN CONNECTION
- CHANGING SYMBOLOGY SETTINGS
- 4.1 CODABAR
- 4.2 CODE 25 – INDUSTRIAL 25
- 4.3 CODE 25 – INTERLEAVED 25
- 4.4 CODE 25 – MATRIX 25
- 4.5 CODE 39
- 4.6 CODE 93
- 4.7 CODE 128
- 4.8 EAN-8
- 4.9 EAN-13
- 4.10 GS1-128 (EAN-128)
- 4.11 ISBT 128
- 4.12 MSI
- 4.13 FRENCH PHARMACODE
- 4.14 ITALIAN PHARMACODE
- 4.15 PLESSEY
- 4.16 GS1 DATABAR (RSS FAMILY)
- 4.17 TELEPEN
- 4.18 UPC-A
- 4.19 UPC-E
- DEFINING OUTPUT FORMAT
- APPLYING FORMATS FOR DATA EDITING
- SPECIFICATIONS
- Appendix I - FIRMWARE UPGRADE
- Appendix II - HOST SERIAL COMMANDS
- Appendix III - KEYBOARD WEDGE TABLE
- Appendix IV - NUMERAL SYSTEMS

151
Update
Chap
t
er 6
Applying Formats for Data Editin
g
6.2.1 SELECT FORMAT TO CONFIGURE
Start Programming Format
Select one editing format (Format 1~5) and the parameters pertaining to the editing
format can then be configured – applicable code type, data length, matching string &
location, total number of fields, field settings (field-dividing rule), additional fields, and
field transmission sequence.
Up to five different formats can be specified.
Note: Before you complete the programming of an editing format, if you have the
scanner read any label for parameters other than those pertaining to the editing
format, it will automatically abort the programming process.
End Programming Format
After having configured all the desired parameters, you must have the scanner read the “End
Programming Format” label, which can be located at the bottom of every even page in this
chapter.
End Programming Format
Configure Format 1
Configure Format 3
C
onfigure Format 4
Configure Format 5
C
onfigure Format 2