
Product Info
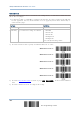
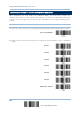


Table Of Contents
- Important Notices
- Introduction
- Quick Start
- Understanding the Barcode Scanner
- 1.1 Battery
- 1.2 Memory
- 1.3 LED Indicator
- 1.4 Beeper
- 1.5 Vibrator
- 1.6 Send “NR” to Host
- 1.7 Scan Modes
- 1.8 Scanning Timeout
- 1.9 Delay between Re-read
- 1.10 Read Redundancy for All Symblogies
- 1.11 Addon Security for UPC/EAN Barcodes
- 1.12 Negative Barcodes (1664 Only)
- 1.13 Use Direct USB Cable
- 1.14 Picklist Mode (1664 Only)
- 1.15 Pager Beep Duration
- 1.16 Time Stamp
- 1.17 2D Decode Setting (1664 Only)
- 1.18 Hardware Reset
- 1.19 Mobile Phone/Display Mode
- 1.20 Serial Number Stamp
- Selecting Output Interface
- 2.1 Bluetooth® HID
- 2.1.1 Activate Bluetooth® HID & Select Keyboard Type
- 2.1.2 Reset Connection
- 2.1.3 Keyboard Settings
- 2.1.4 Inter-Character Delay
- 2.1.5 Inter-Function Delay
- 2.1.6 HID Character Transmit Mode
- 2.1.7 Special Keyboard Feature
- 2.1.8 Keypad Support for iPhone/iPad
- 2.1.9 HID Keyboard Layout (Apple & Non-Apple System)
- 2.1.10 Transmit Speed
- 2.1.11 BT HID Slave/Master Switching
- 2.1.12 BT HID Auto-Reconnection
- 2.2 Bluetooth® SPP Slave
- 2.3 Bluetooth® SPP Master
- 2.4 USB HID via 3610 A
- 2.5 USB Virtual COM via 3610 A
- 2.6 Direct USB HID
- 2.7 Direct USB Virtual COM
- 2.1 Bluetooth® HID
- Set up a WPAN Connection
- Change Symbology Settings
- 4.1 Codabar
- 4.2 Code 25 – Industrial 25
- 4.3 Code 25 – Interleaved 25
- 4.4 Code 25 – Matrix 25
- 4.5 Code 25 – Chinese 25
- 4.6 Italian Pharmacode (Code 32)
- 4.7 Code 39
- 4.8 Trioptic Code 39
- 4.9 Code 93
- 4.10 Code 128
- 4.11 GS1-128 (EAN-128)
- 4.12 ISBT 128
- 4.13 GS1 DataBar (RSS Family)
- 4.14 MSI
- 4.15 EAN-8
- 4.16 EAN-13
- 4.17 UCC Coupon Extended Code
- 4.18 UPC-A
- 4.19 UPC-E
- 4.20 Code 11
- 4.21 Composite Code
- 4.22 US Postal Code
- 4.23 UK Postal Code
- 4.24 More Postal Code
- 4.25 2D Symbologies
- 4.26 Macro PDF
- Defining Output Format
- Applying Formats for Data Editing
- Specifications

246
End Programming Format
1662/1664 Barcode Scanner User Guide
6.5 CONFIGURE FORMAT — DEFINE TRANSMISSION SEQUENCE
After configuring the data fields and additional fields, you must now program the
transmission sequence of these fields that comprise the final data. This field transmission
sequence can be assigned in any desired order and fields can be assigned multiple times
as well.
Note: Up to twelve fields can be assigned.
1) Read the “Start” barcode to begin with programming the field transmission sequence.
Start Programming…
2) Program the transmission sequence by reading the desired fields as well as additional
fields.
Field 1
Field 2
Field 3
Field 4
Field 5
Field 6
Additional Field 1