
User's Manual
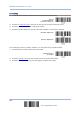
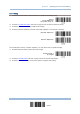
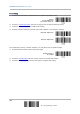

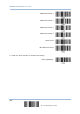

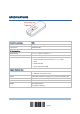
Table Of Contents
- IMPORTANT NOTICES
- RELEASE NOTES
- INTRODUCTION
- QUICK START
- UNDERSTANDING THE BARCODE SCANNER
- 1.1 BATTERY
- 1.2 MEMORY
- 1.3 LED INDICATOR
- 1.4 BEEPER
- 1.5 VIBRATOR
- 1.6 SEND “NR” TO HOST
- 1.7 SCAN MODES
- 1.8 SCANNING TIMEOUT
- 1.9 DELAY BETWEEN RE-READ
- 1.10 READ REDUNDANCY FOR ALL SYMBLOGIES
- 1.11 ADDON SECURITY FOR UPC/EAN BARCODES
- 1.12 NEGATIVE BARCODES
- 1.13 EFFECTIVE DECODING AREA
- 1.14 USE DIRECT USB CABLE
- 1.15 PAGER BEEP DURATION
- 1.16 TIME STAMP
- 1.17 HARDWARE RESET
- SELECTING OUTPUT INTERFACE
- SET UP A WPAN CONNECTION
- CHANGE SYMBOLOGY SETTINGS
- 4.1 CODABAR
- 4.2 CODE 25 – INDUSTRIAL 25
- 4.3 CODE 25 – INTERLEAVED 25
- 4.4 CODE 25 – MATRIX 25
- 4.5 CODE 39
- 4.6 CODE 93
- 4.7 CODE 128
- 4.8 EAN-8
- 4.9 EAN-13
- 4.10 GS1-128 (EAN-128)
- 4.11 ISBT 128
- 4.12 MSI
- 4.13 FRENCH PHARMACODE
- 4.14 ITALIAN PHARMACODE
- 4.15 PLESSEY
- 4.16 GS1 DATABAR (RSS FAMILY)
- 4.17 TELEPEN
- 4.18 UPC-A
- 4.19 UPC-E
- DEFINING OUTPUT FORMAT
- APPLYING FORMATS FOR DATA EDITING
- SPECIFICATIONS
- FIRMWARE UPGRADE
- HOST SERIAL COMMANDS
- KEYBOARD WEDGE TABLE
- NUMERAL SYSTEMS

198
End Programming Format
1663 Barcode Scanner User Guide
6.6.2 EXAMPLE II
Extract the date code, item number, and quantity information from barcodes.
Data in a barcode is encoded like this:
From the 1
st
character to the 6
th
character is the date code.
From the 7
th
character to the dash ‘-’ character is the item number.
After the dash ‘-’ character is the quantity information.
Data will be transmitted like this:
The item number goes first, then a TAB character, followed by the date code, then another TAB
character, and finally the quantity information.
The editing format should be configured as follows:
1) Read the “Enter Setup” barcode to enter the Configuration Mode.
2) Read the “Configure Format 2” barcode.
3) Read the “Three Fields” barcode.
4) Read the “Divide Field 1 by Length” barcode, and set length to 6.
Field 1 data starts from the 1
st
character to the 6
th
character.
5) Read the “Select Field Separator to Divide Field 2” barcode, and use a dash ‘-’ character.
Field 2 data starts from the 7
th
character until the dash ‘-’ character is met.
6) Read the “Additional Field 1” barcode, and use a tab character for the field.
7) Read the “Start (Programming)” barcode to program the transmission sequence.
8) Read the “Field 2”, “Additional Field 1”, “Field 1”, “Additional Field 1”, “Field 3” barcodes.
9) Read the “End” barcode to complete the transmission sequence (F2 A1 F1 A1 F3) setting.
10) Read the “End Programming Format” barcode to complete the setting of Editing Format 1.
11) Read the “Enable Format 2” barcode to apply Editing Format 2 to all code types.
12) Read the “Update” barcode to exit the Configuration Mode.