
User Manual
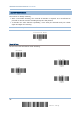
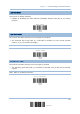
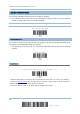


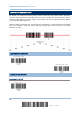
Table Of Contents
- IMPORTANT NOTICES
- RELEASE NOTES
- INTRODUCTION
- QUICK START
- UNDERSTANDING THE BARCODE SCANNER
- SELECTING OUTPUT INTERFACE
- SETTING UP A WPAN CONNECTION
- CHANGING SYMBOLOGY SETTINGS
- 4.1 CODABAR
- 4.2 CODE 25 – INDUSTRIAL 25
- 4.3 CODE 25 – INTERLEAVED 25
- 4.4 CODE 25 – MATRIX 25
- 4.5 CODE 39
- 4.6 CODE 93
- 4.7 CODE 128
- 4.8 EAN-8
- 4.9 EAN-13
- 4.10 GS1-128 (EAN-128)
- 4.11 ISBT 128
- 4.12 MSI
- 4.13 FRENCH PHARMACODE
- 4.14 ITALIAN PHARMACODE
- 4.15 PLESSEY
- 4.16 GS1 DATABAR (RSS FAMILY)
- 4.17 TELEPEN
- 4.18 UPC-A
- 4.19 UPC-E
- DEFINING OUTPUT FORMAT
- APPLYING FORMATS FOR DATA EDITING
- SPECIFICATIONS
- Appendix I - FIRMWARE UPGRADE
- Appendix II - HOST SERIAL COMMANDS
- Appendix III - KEYBOARD WEDGE TABLE
- Appendix IV - NUMERAL SYSTEMS

38
Enter Setup
1560 Series Barcode Scanner User Guide
1.10 AUTO-SENSE MODE (1560 ONLY)
This mode is only available when you want to seat the scanner in the Auto-Sense Stand.
When you enable this mode, it will force the scanner to apply Laser mode as the scan
mode. However, it works differently from the original Laser mode. Now the scanner will
be scanning as long as it is seated in the Auto-Sense Stand, as shown below. Whenever
a barcode is brought within range, the scanner will be able to decode it.
Warning: When you disable this mode later, the scan mode remains unchanged. If
Laser mode is not desired, proceed to select a scan mode best suits your
application.
Note: For Auto-Sense mode to work, you must connect (1) the power supply cord and (2)
the interface cable to the Auto-Sense Stand. USB power is insufficient.
When the ambient light is too dim to activate the sensor, you may have the scanner read
the “High Sensitivity” label to improve performance.
*Disable
Enable
*Normal
High Sensitivity