
User guide


Pocket Verifier • Smartphone Edition • User Guide and Tutorial 21 of 27
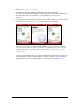
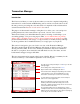
At this point you are ready to verify the information and process the transaction. If you
do not want to process the transaction at this time or you are in a location where a
Cingular wireless connection is not available, select Menu > Save Transaction… The
transaction will be saved and you can process at a later date by selecting it from the
Transaction Manager screen. See the Transaction Manager section for details.
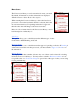
6. Select Next.
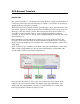
7. Verify that the information and amount are correct and select Charge…
The account information is encrypted and sent to the processing bank for
approval. Once an approval is issued the Approved Transfer screen will appear. If
the Automatically Print Approvals feature is on under the Settings screen, then an
approved receipt will automatically be printed. Otherwise, you can print a receipt
by selecting the Print menu.
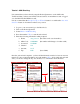
8. Select Done when finished to return back to the Main Index screen.
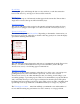
Note: You cannot issue voids or credits on ACH/Checking sales. In addition, the
Transaction ID and Authorization Code are the same, so the Approved Transfer screen
only displays the Transaction ID.