
User manual


8.0 ADJUSTING THE IMAGE
R599791 - FORCE 3D User Manual 63
never the PIP image. Free Run sets the output to close to 60Hz for all sources.
NOTE: When switching to a new input with framelocking enabled, the image will appear black for a short duration
while the system locks onto the new input.
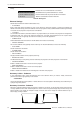
• Frame Delay
This control delays the output signal timing relative to the input signal timing by a fraction of a frame, and up to
several frames. The minimum latency can vary based on the amount of scaling applied to the image. When using
keystone or warping, an additional latency is required, depending on the amount of warp. The control is only
available when the input signal is frame locked. In free run mode, or in cases where the signal cannot be frame
locked, the minimum latency defined by the scaling and keystone/warp is applied to the signal.
• Free Run Frequency
This control sets the output video vertical frequency.
• HDMI Output Loop Source
This control is used to configure the HDMI output options. Selecting Direct Loop will directly pass-through the HDMI
input signals: on the same Twin HDMI Input Card, the Input1 signal is looped to Output1 and the Input2 signal is
looped to Output2. Selecting Main/PIP Loop will loop the Main & PIP video to the outputs, regardless from which
card these signals originate. The Main video signal is looped to Output1 and the PIP video signal is looped to
Output2. Selecting Disable will shut off the HDMI outputs completely.
•Fade to Black Time
This control sets the amount of time (in seconds) that it takes to fade the image to/from black. NOTE: The OSD only
allows the fade time to be set. To initiate a Fade to Black, the Serial command should be used.
Lens Settings
• Intelligent Lens System
Check this box to enable the Intelligent Lens System (ILS). When enabled, the lens position (horizontal, vertical,
focus, and zoom offsets) are stored per channel. If you change channels, the lens position will change as the new
signal is being displayed.When ILS is not enabled, the lens is controlled independently of channels or input signals.
•Manual Zoom and Focus
When this control is selected, the holding current is removed from the zoom and focus motors so that they can be
changed manually.
NOTE: Zoom and Focus should not be adjusted manually when this control is not selected, as this will result in
damage to the motors.
• Calibrate
The lens calibration procedure is needed each time a new lens is installed in order for the ILS feature to perform
reliably. This procedure calibrates; horizontal, vertical, focus, and zoom offset movements.
• Lock all Lens Motors
Select this check box to prevent all lens motors from moving. It will disable the Zoom, Focus, Horizontal and Vertical
Position settings, effectively locking out any changes and overriding all other lens features. This feature is
particularly useful to prevent accidental lens position changes in multi-projector installations.
• Calibrate on new Lens
Check this box to prompt for a lens calibration each time a lens is inserted. The user will always be prompted before
starting the calibration.
• Calibrate on Startup
Check this box to initiate a ‘Lens Reset’ procedure on every power-up. This is useful if the lens is subject to manual
movement between power sessions.
• Home Position
Return the lens to the horizontal and vertical home position. Focus and zoom are unaffected.
• Calibration Status
This control displays the current lens calibration status.
Power Management
• LCD Backlight
The backlight for the LCD has 3 states. Always On, Always Off, or Timer. The backlight will turn on again when any
key on the LCD is pressed or if an alarm is raised.