
User Manual


35
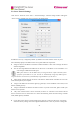
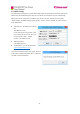
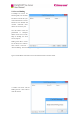
5.2 Server Network Settings
Click “Server” menu bar of the client > “Network Settings”. Network settings window will appear.
“Server” menu is available only when you login as the administrator.
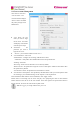
IP addresses are set by “Assigned by DHCP” by default in our latest software version. If you’d
like to manually specify an IP address to the server, please follow the steps below:
● Assign the Server’s IP address in the field of “Main IP address”. Other users will login the Server
with the assigned IP.
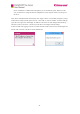
● You can also assign different IP addresses for the Server in “IP address 2” and “IP address 3” in
event of login in different network spans.
Note: please make sure the IP address that you assigned will not conflict with that of other
equipment. If IP addresses on your network are automatically assigned by DHCP, please
assign an IP that is not in the list of automatically assigned addresses for the Server.
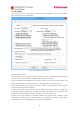
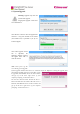
● Please assign a subnet mask for the Server in the field of “Subnet mask” and make sure it is in the
same network span of your computer.
● Assign an IP address for the Internet gateway (generally it is the IP address of the router) in the
field of “Default gateway”.
● Assign an IP address for DNS in the field of “DNS”. If you don’t know that, please consult your
Internet service provider.
● Only when “Internet status” shows connected, the Server is connected to the Internet and the
Server’s function of fax to email works. If it shows disconnected, please check the setting of subnet
mask, default gateway and DNS.
● If you check on the option “Undo the change if the client can’t connect to the Server”, the settings
will restore factory settings when new assigned IP address doesn’t work. If you have to change the