
User Manual


Table Of Contents
- Manual
- Preface
- Chapter 1: Quick Start Guide
- Chapter 2: Storage Devices, Mouse, Audio & Printer
- Chapter 3: Power Management
- Chapter 4: Drivers & Utilities
- What to Install
- Driver Installation
- Manual Driver Installation
- Updating/Reinstalling Individual Drivers
- User Account Control (Win Vista)
- Windows Security Message
- New Hardware Found
- Driver Installation Procedure
- Chipset
- Video
- Audio
- Modem
- LAN
- TouchPad
- Card Reader/ExpressCard
- Hot Key
- Intel MEI Driver
- e-SATA Support
- Optional Drivers
- Wireless LAN
- PC Camera
- 3.5G Module
- Fingerprint Reader Module
- Intel Turbo Memory Technology Driver
- Chapter 5: BIOS Utilities
- Overview
- The Power-On Self Test (POST)
- The Setup Utility
- Main Menu
- Advanced Menu
- Installed O/S (Advanced Menu)
- SATA Mode Selection (Advanced Menu)
- DFOROM (Robson) Support (Advanced Menu > SATA Mode Selection [AHCI]
- Boot-time Diagnostic Screen: (Advanced Menu)
- Legacy OS Boot: (Advanced Menu)
- Reset Configuration Data: (Advanced Menu)
- Power On Boot Beep (Advanced Menu)
- Battery Low Alarm Beep: (Advanced Menu)
- Fan Control (Advanced Menu)
- Security Menu
- Boot Menu
- Exit Menu
- Chapter 6: Upgrading The Computer
- Chapter 7: Modules
- Chapter 8: Troubleshooting
- Appendix A: Interface (Ports & Jacks)
- Appendix B: NVIDIA Video Driver Controls
- Appendix C: Specifications
- Appendix D: Windows XP Information
- DVD Regional Codes
- Windows XP Start Menu & Control Panel
- Audio Features
- Function/Hot Key Indicators
- Video Features
- NVIDIA Video Driver Controls
- Power Management Features
- Configuring the Power Button
- Battery Information
- Driver Installation
- Bluetooth Module
- Wireless LAN Module
- PC Camera Module
- 3.5G Module
- Fingerprint Reader Module
Windows XP Information
NVIDIA Video Driver Controls D - 9
D
Display Devices and Modes (NVIDIA)
Note that you can use a DVI cable connected to the DVI-Out port, or an HDMI
(High-Definition Multimedia Interface) cable connected to the HDMI-Out port to
connect an external display (if you are using an older type of monitor you can use an
adapter to convert the signal from DVI to VGA). See your display device manual to
see which formats are supported.
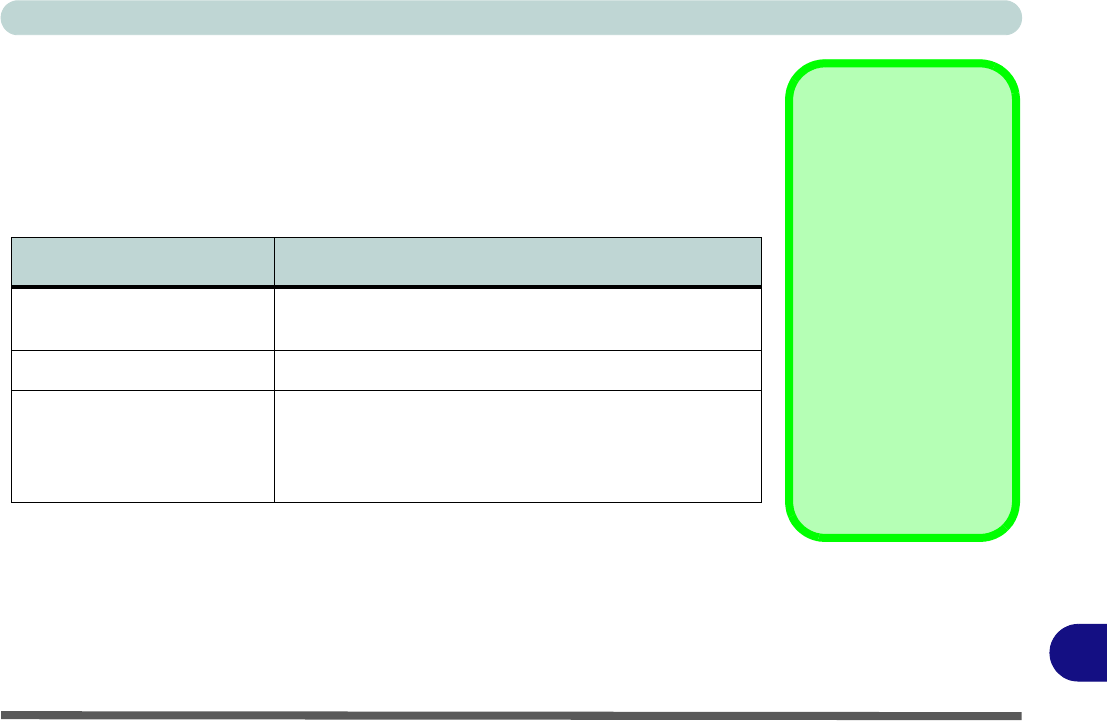
Table D - 3 - Display Modes
See “HDMI Audio Configuration” on page D - 12 for instructions on configuring
audio when setting up an HDMI display as an external device.
nView Display Mode Description
Single
One of the connecte d displays is used as the display
device
Clone Both connected displays output the same view
Dualview
Both connected displays are treated as separate
devices, may be configured in dependently and act
as a virtual desktop (this is similar to Extended
Desktop in Windows)
Display Devices
You can use the Fn + F7
key combination to tog-
gle through the display
options (see over).
• The built-in LCD.
• An external disp lay
connected to the DVI-
Out port.
• An external disp lay
connected to the
HDMI-Out port.
Note that HDMI sup-
ports video and audio
signals.