
Installation Guide Part 1


NGL FX Installation Manual Rev. *
27 of 84
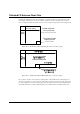
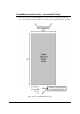
Wood Surface Installation
For mounting to wood, use a #7 x ½” (0.38cm x 1.3cm) hex head screw (CKP P/N 7939172).
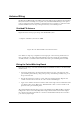
Figure X***: Wood Surface Installation
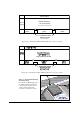
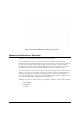
Drywall Surface Installation
For mounting to drywall, use a #8 x 1” (0.42cm x 2.5cm) panhead screw (CKP P/N 7308823),
which is a Power Fastener Zip-it (P/N 02348).
Figure X***: Drywall Installation
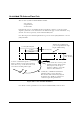
Using the proper diameter bit, drill a hole into the base
material to a depth of at least 0.6cm [1/4”] deeper than
the embedment required. Blow the hole clean of dust
and other material.
Select the installation tool and drive socket to be used.
Insert the head of the screw into the hex head socket
driver.
Place the point of the screw through the fixture into
the pre-dilled hole and drive the anchor in one steady
continuous motion until it is fully seated at the proper
embedment.
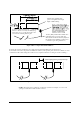
Insert either # 2 or # 3 Phillips driver bit into the
recess of the ZiP-It anchor head. Use a manual
screwdriver or a low-rpm battery-powered electric
screw gun.
Push the ZiP-It anchor into the surface of the
wallboard until the two cutting blades penetrate the
surface. Using gentle forward pressure, rotate the
ZiP-It until the collar sets flush to the surface of the
wall.
Put the fixture in place, insert screw and tighten until
it feels secure. As the screw is threaded into the nylon
versions, the point will expand resulting in increased
load capacity in thicker wallboard.
Note: When using an electric screw gun for
application, set clutch and use slow speed (do not
exceed approximately 300-400 RPM).