
Manual


Dakota Ultrasonics
74
11) Use the UP and DOWN arrow keys to scroll through the sub menu
items until AUTO SET is highlighted.
Note: Alternatively, the Auto Set key on the keypad can be pressed.
12) Apply a drop of couplant to the bolt or transducer, and attach it to one
end of the bolt. Rotate the transducer clockwise and counter clockwise
applying a small amount of pressure to eliminate any excess couplant
between the transducer and bolt surface. Be sure to always place the
transducer in the same location. This will help to eliminate any potential
measurement errors caused by changing the sound path.
13) Press the ENTER key and the MINI-MAX will locate and measure the
Ultrasonic Length of the first cal bar.
14) Press the MENU key once to activate the menu items tab. Press the
MENU key multiple times to tab right, and the ESC key multiple times to
tab left, until the CAL menu is highlighted and displaying the submenu
items.
15) Use the UP and DOWN arrow keys to scroll through the sub menu
items until MEASURE ZERO is highlighted.
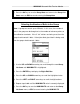
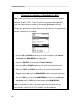
16) Press the ENTER key to display the Two Point Zero list box.
17) Press the UP and DOWN arrow keys to scroll through the Two Point
Zero list box until ULTRASONIC 1 is highlighted.
Note: ULTRASONIC 1 is the ultrasonic length of the first calibration
standard.
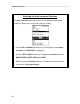
18) Press the ENTER key to insert the ultrasonic length being measured in
the ULTRASONIC 1 field.