
Technical data


Configuring VSX
Check Point VSX Administration Guide NGX R67 | 51
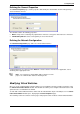
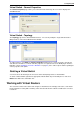
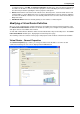
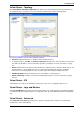
Virtual System - Advanced
These pages contain a variety of configuration options for SNMP, connection persistence and permissions
to install policies. For further information regarding these options, please refer to the online help and the R75
IPS Administration Guide (http://supportcontent.checkpoint.com/documentation_download?ID=11663).
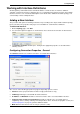
Deleting a Virtual System
To delete a Virtual System, right-click the appropriate Virtual System object on the Object Tree and select
Delete. Click Yes in the confirmation box.
Working with Virtual Switches
Virtual Switches provide level-2 connectivity between Virtual Systems and internal or external networks. This
section describes how to define and configure a Virtual Switch. As with physical switches, each Virtual
Switch maintains a forwarding table containing entries that describe known networks and directions for
reaching them.
You can define Virtual Switches for external and internal communications.
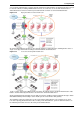
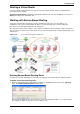
Figure 3-15 Typical Virtual Switch deployment
The above figure shows a typical deployment using a Virtual Switch for external connections and a VLAN
trunk leading to the internal, protected network.
Adding Virtual Switches
You use the Virtual Switch Wizard to create a new Virtual Switch. You can modify the initial definition and
configure advanced options after completing the wizard. The definition procedure consists of two steps,
each represented by a separate wizard window:
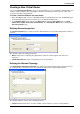
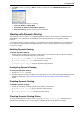
To create a new Virtual Switch using the wizard, perform the following steps:
1. Open SmartDashboard. If you are using Multi-Domain Security Management, open SmartDashboard
from the Domain Management Server in which you are creating the Virtual Switch.
2. In the Network Objects tab, located in the Objects Tree, right-click Check Point and select New
Check Point > VPN-1 Power VSX > Virtual Switch. The Virtual Router Wizard opens, displaying the
General Properties page. The Virtual Switch Wizard opens.