
Manual

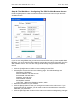
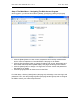
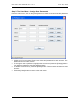
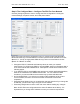
Table Of Contents
- INTRODUCTION
- HOW TO USE THIS MANUAL
- INSTALLATION CHECKLIST
- INSTALLATION GUIDE
- Preparation
- Hardware Installation
- Serial Setup – Access The PDU Using The Serial Connection
- Step 1: Download the PDU Serial Access Program
- Step 2: Connect the Computer to the PDU
- Step 3: The Main Menu – Navigating The Serial Access Program
- Step 4a: The Configure Menu – Configuring The PDU For SEMA Or SNMP
- Step 4b: The Web Menu – Configuring The PDU For Web Browser Access
- Step 5: The Monitor Menu – Monitoring The PDU With A Serial Connection
- Ethernet Setup – Access The PDU Using The Ethernet Connection
- Step 1: Configuring the Browser
- Step 2: Connect the PDU to the Network
- Step 3: Logging onto the PDU
- Step 4: The Main Menu – Navigating The Web Access Program
- Step 5: The User Menu – Assign User Passwords
- Step 6: The Configure Menu – Configure The PDU For Your Network
- Step 7: The Monitor Menu – Monitoring The PDU Using A Web Browser
- TROUBLESHOOTING GUIDE
- APPENDIX
CPI PDU User Manual Rev. 10.0. June 28, 2010
19
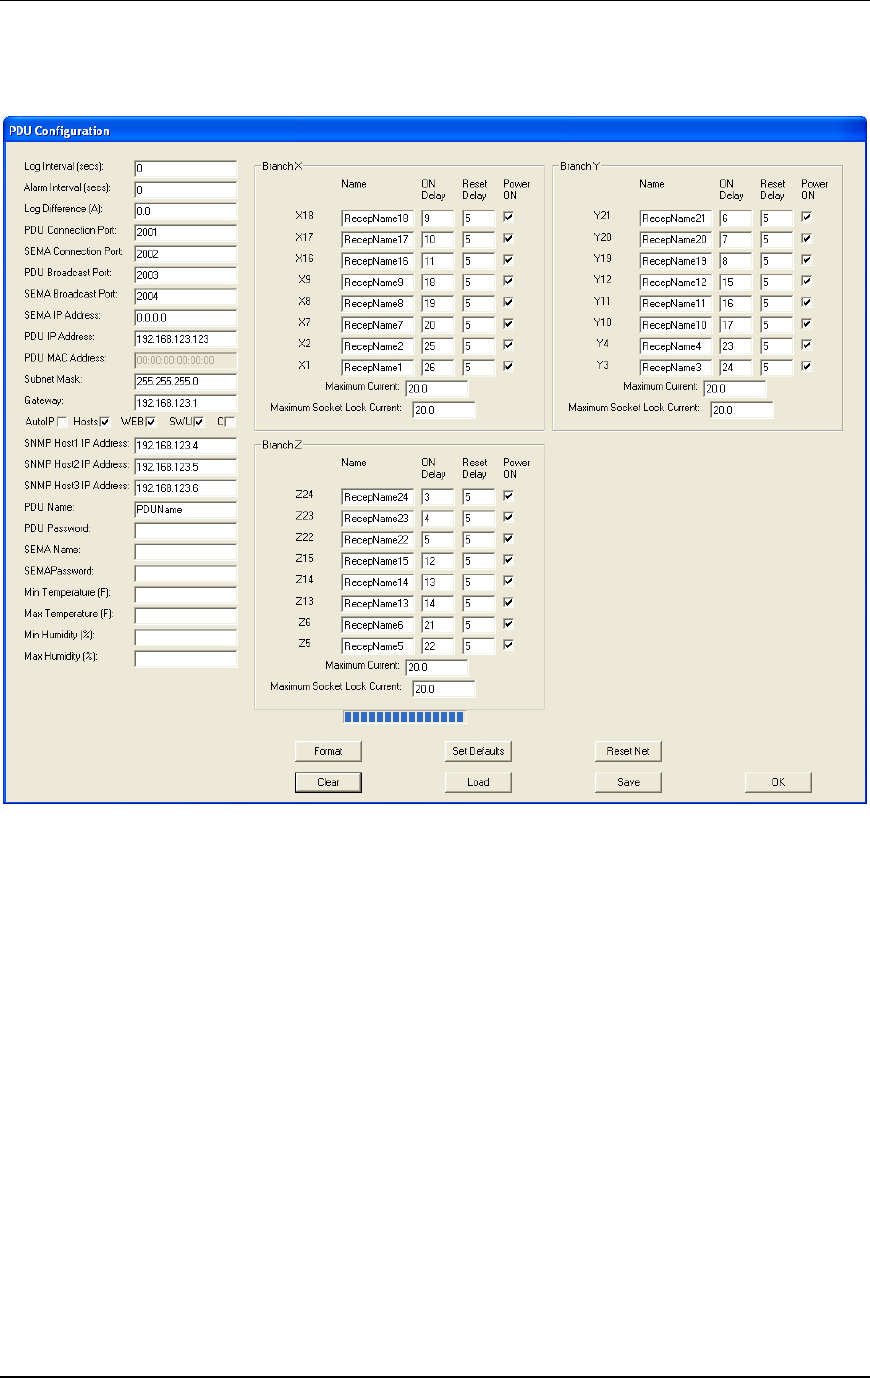
• The purpose of each button on the PDU Configuration screen is described below:
Format: Manufacturing initialization of the non-volatile storage for the configuration
variables. This action will destroy any previous values that were saved.
Set Defaults: Sets all the configuration variables to some pre-set default
manufacturing values.
Clear: Clears all the configuration variables.
Reset Net: Makes effective the changes made to the network parameters. If you
change the IP address, it will become effective immediately if this button is clicked.
Save: Saves all the displayed configuration data into the PDU’s non-volatile storage
and apply the newly configured values. If you change the IP address, it will become
effective immediately if this button is clicked.
Cancel: Discards all the changes made in the current session
Load: Shows all the current PDU configuration data.