P RODUCT G U I DE G U I DES DES P RODU ITS GUíA DEL PRODUCTO M O D EL M O D ÈLE P E RFORMANCE M O D ELO 2-BURNER INFRARED GAS GRILL GRIL AU GAZ À 2 BRÛLEURS INFRAROUGE ASADOR INFRARROJO A GAS DE 2 QUEMADORES 463672019 463672219 463672419 S E R IA L N U M B E R N U MÉ R O D E S É R I E NÚM E R O D E S E R I E • See rating Label on grill for serial number. • Ce numéro se trouve sur l´étiquette signalétique sur i´appareil.
TABLE OF CONTENTS CAUTION For Your Safety . . . . . . . . . . . . . . . . . . . . . . . . . . . . . . . . . 2-4 For residential use only. Do not use for commercial cooking. Use and Care . . . . . . . . . . . . . . . . . . . . . . . . . . . . . . . . . . 4-10 THIS GRILL IS FOR OUTDOOR USE ONLY. Limited Warranty . . . . . . . . . . . . . . . . . . . . . . . . . . . . . . . . . 11 Parts Diagram . . . . . . . . . . . . . . . . . . . . . . . . . . . . . . . . . . . 32 Parts List . . . . . . . . . . . . . .
WARNING CAUTION Using pots larger than 6 quarts in capacity could exceed weight limit of the side burner shelf or side shelf, resulting in failure of grill cart components. Failure to follow all manufacturer’s instructions could result in serious personal injury and/or property damage. CAUTION Read and follow all safety statements, assembly instructions, and use and care directions before attempting to assemble and cook. CAUTION Some parts may contain sharp edges. Wear protective gloves if necessary.
Installation Safety Precautions LP Cylinder •Use grill, as purchased, only with LP (propane) gas and the regulator/valve assembly supplied. If your grill is Dual Fuel ready, a conversion kit must be purchased for use with natural gas. •Grill installation must conform with local codes, or in their absence of local codes, with either the National Fuel Gas Code, ANSI Z223.1/ NFPA 54, Natural Gas and Propane Installation Code, CSA B149.1, or Propane Storage and Handling Code, B149.2.
LP Cylinder Exchange Connecting Regulator to the LP Cylinder • Many retailers that sell grills offer you the option of replacing your empty LP cylinder through an exchange service. Use only those reputable exchange companies that inspect, precision fill, test and certify their cylinders. Exchange your cylinder only for an OPD safety feature-equipped cylinder as described in the "LP Cylinder" section of this manual. 1.LP cylinder must be properly secured onto grill. (Refer to assembly section.) 2.
WARNING WARNING • Do not use grill until leak-tested. • If a leak is detected at any time, STOP! Turn off gas at source and correct leak. • If you cannot stop a gas leak by closing the LP cylinder valve leave area and call your fire department! • Outdoor gas appliance is not intended to be installed in or on a boat. • Outdoor gas appliance is not intended to be installed in or on an RV. • Never attempt to attach this grill to the self-contained LP gas system of a camper trailer or motor home.
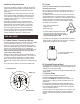
STOP! ! WARNING ! LP GAS CYLINDER RUBBER SEAL INSPECTION. Inspect the LP gas cylinder valve rubber seal for cracks, wear or deterioration prior to each use. A damaged rubber seal can cause a gas leak, possibly resulting in an explosion, fire, or severe bodily harm. Ÿ Ÿ It is recommended that you inspect the rubber seal each time the LP gas cylinder is connected to the appliance, each time it has been refilled, or if it has not been used for more than 60 days.
Ignitor Lighting WARNING • Do not lean over grill while lighting. 1. Turn gas burner control valves to (off). 2. Open lid during lighting or re-lighting. 3. Turn ON gas at LP cylinder. 4. To ignite, push and turn IGNITION BURNER knob to HIGH. Immediately, push and hold ELECTRONIC IGNITOR button until the burner lights. 5. If ignition does NOT occur in 5 seconds, turn the burner controls off , wait 5 minutes and repeat the lighting procedure. 6.
Storing Your Grill CAUTION • Clean cooking grates. • Store in dry location. • When LP cylinder is connected to grill, store outdoors in a well-ventilated space and out of reach of children. • Cover grill if stored outdoors. Choose from a variety of grill covers offered by Char-Broil at charbroil.com. • Store grill indoors ONLY if LP cylinder is turned off and disconnected, removed from grill and stored outdoors.
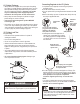
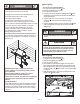
Cleaning the Burner Assembly Follow these instructions to clean and/or replace parts of burner assembly or if you have trouble igniting grill. 1. Turn gas off at control knobs and LP cylinder. 2. Remove cooking grates and heat tents. 3. Remove carryover tubes and hardware securing burners. 4. Detach electrode from burner. NOTE: Removal/Detachment method will depend on the burner configuration. See different configurations in illustrations below. 5. Carefully lift each burner up and away from valve openings.
LIMITED WARRANTY This warranty only applies to units purchased from an authorized retailer. Manufacturer warrants to the original consumer-purchaser only that this product shall be free from defects in workmanship and materials after correct assembly and under normal and reasonable home use for the periods indicated below beginning on the date of purchase*.
ATTENTION TABLE DES MATIÈRES Pour votre sécurité . . . . . . . . . . . . . . . . . . . . . . . . . . . . . 12-14 Pour utilisation domestique uniquement. Ne pas utiliser à des fins commerciales. Utilisation et entretien . . . . . . . . . . . . . . . . . . . . . . . . . . . 14-20 CET APPAREIL EST CONÇU POUR UN USAGE À L'EXTÉRIEUR UNIQUEMENT Garantie limitée . . . . . . . . . . . . . . . . . . . . . . . . . . . . . . . . . . 21 Schéma des pièces . . . . . . . . . . . . . . . . . . . . . . . . . . . . . .
AVERTISSEMENT ATTENTION Ne pas suivre toutes les instructions du fabricant pourrait causer des préjudices physiques graves et des dommages matériels. Utiliser des pots de plus de 6 quarts de la capacité pourrait dépasser le poids limite du plateau brûleur latéral ou Côté plateauce qui entraîne la défaillance du gril panier composants.
Réservoir de gaz. Mesures de sécurité pendant l'installation Ÿ Utilisez grill, comme l'achat, avec seulement LP (propane) du gaz et le régulateur / valve de montage fourni. Si votre barbecue est prêt Dual Fuel, un kit de conversion doit être acheté pour une utilisation avec du gaz naturel. Ÿ L'installation du gril doit se conformer aux codes locaux, ou en leur absence, au National Fuel Gas Code, ANSI Z223.1/ NFPA 54, Natural Gas and Propane Installation Code, CSA B149.
Connexion du régulateur au réservoir de GPL Échange de réservoir de GPL 1. Le réservoir de GPL doit être attaché à l’appareil de façon sécuritaire. (Reportez-vous à la section sur l'assemblage.) 2. FERMEZ tous les boutons de réglage. 3. Fermez le réservoir de gaz en tournant le volant de manœuvre de la valve à fond dans le sens des aiguilles d'une montre. 4. Enlever le capuchon de protection du robinet de la bouteille de gaz propane. Toujours utiliser le capuchon et la sangle fournis avec le robinet.
AVERTISSEMENT AVERTISSEMENT • L'appareil d'utilisation extérieure du gaz n'est pas conçu pour être installé sur ou dans un bateau. • L'appareil d'utilisation extérieure du gaz n'est pas conçu pour être installé sur ou dans un VR. • Ne tentez jamais de raccorder ce gril au système de GPL autonome d'une tente-caravane ou d'une autocaravane. • N'utilisez pas le gril avant d'en avoir vérifié l'étanchéité. • Si une fuite est détectée, STOP! Fermer le gaz à la source et remédier à la fuite.
ARRÊT! ! AVERTISSEMENT! ! INSPECTION DU JOINT D'ÉTANCHÉITÉ EN CAOUTCHOUC DE LA BONBONNE DE GAZ PROPANE Inspectez le joint d'étanchéité en caoutchouc de la bonbonne de gaz propane à la recherche de fissures, d'usure ou de dégradation avant chaque usage. Un joint de caoutchouc endommagé peut entraîner une fuite de gaz, pouvant possiblement causer une explosion, un incendie ou des blessures graves.
Allumage • Ne pas se pencher sur le gril au moment de l'allumage. 1. Tourner le bouton de commande du brûleur à gaz vers (« arrêt »). 2. Ouvrir le couvercle avant de l'allumer l'appareil ou du réallumer. 3. Ouvrir le robinet de la bouteille de gaz propane. 4. Pour allumer, pousser et tourner le bouton BRÛLEUR D'ALLUMAGE vers HAUTE.
Entreposage de votre gril ATTENTION • Nettoyez les grilles de cuisson. • Entreposez le gril dans un endroit sec. • Lorsque le réservoir de GPL est connecté au gril, entreposezles à l'extérieur dans un endroit bien aéré et hors de portée des enfants. • Couvrez le gril s'il est entreposé à l'extérieur. Le fabricant offre un choix complet de couvertures de gril à charbroil.com. • Entreposez le gril à l'intérieur SEULEMENT si le réservoir de GPL est fermé, détaché du gril et entreposé à l'extérieur.
Nettoyage de l'assemblage du brûleur ATTENTION Suivez ces instructions pour nettoyer ou remplacer des pièces du brûleur ou si vous éprouvez de la difficulté à allumer le gril. 1. Fermez tous les boutons de réglage, ainsi que la valve du réservoir de gaz. 2. Enlevez les grilles et les couvre-brûleurs. 3. Suppression de report des tubes et de pièces de fixation brûleurs. 4. Détacher électrode de brûleur. REMARQUE: la suppression / Détachement de la méthode dépend de la configuration du brûleur.
GARANTIE LIMITÉE La présente garantie n'est valide que pour les appareils achetés auprès d'un détaillant autorisé. Le fabricant garantit à l'acheteur initial, et uniquement celui-ci, que le produit est exempt de tout défaut de matériel et de main-d'œuvre, dans la mesure où il a été assemblé correctement, qu'il est utilisé de façon normale et raisonnable à des fins personnelles, et ce, pendant la durée de la période indiquée ci-dessous et commençant le jour de la d'achat du produit*.
ÍNDICE DE MATERIAS ADVERTENCIA PELIGRO Por su propia seguridad. . . . . . . . . . . . . . . . . . . . . . . . . 22-24 Sólo para uso particular. No lo use para fines comerciales. Uso y mantenimiento . . . . . . . . . . . . . . . . . . . . . . . . . . . 24-30 ESTA PARRILLA SOLO SE PUEDE USAR EN EXTERIORES. Garantía limitada. . . . . . . . . . . . . . . . . . . . . . . . . . . . . . . . . 31 Vista esquemática de las piezas. . . . . . . . . . . . . . . . . . . . . 32 PELIGRO Lista de piezas . . . . . .
ADVERTENCIA ADVERTENCIA PELIGRO El no cumplir con todas instrucciones del fabricante puede ocasionar graves y/o daños materials. El uso de macetas de más de 6 cuartos de la capacidad podría superar límite de peso de lado el quemador plataforma o lado plataforma lo que resulta en el fracaso de la parrilla carrito componentes.
Tanque de gas propano Medidas de seguridad para la instalación • El tanque de gas que use con su parrilla debe cumplir los siguientes requisitos: • Use únicamente tanques de gas que tengan las siguientes medidas obligatorias: 12 PULGADAS (30.5 cm) (diámetro) x 18 PULGADAS (45.7 cm) (altura), con una capacidad máxima de 20 lb. (9 kg).
Cambio del tanque de gas Como conectar el regulador al tanque de gas propano • Muchos comerciantes minoristas que venden parrillas, le ofrecen la opción de cambiar su tanque de gas vacío mediante un servicio de recambio. Emplee únicamente empresas de recambio de buena reputación, que inspeccionen, carguen con precisión, verifiquen y certifiquen sus cilindros.
ADVERTENCIA ADVERTENCIA • El aparato a gas para uso al aire libre no ha sido diseñado para ser instalado en embarcaciones. • El aparato a gas para uso al aire libre no ha sido diseñado para ser instalado en vehículos de recreo. • Nunca trate de conectar esta parrilla al sistema de gas propano independiente de un remolque de recreo o de una casa rodante. • No use la parrilla sin antes haber verificado que no tenga fugas.
ALTO! ! ADVERTENCIA ! INSPECCIÓN DEL SELLO DE GOMA DEL CILINDRO DE GAS LP. Inspeccione el sello de goma de la válvula del cilindro de gas LP para detectar grietas, desgaste o deterioro antes de cada uso. Un sello de goma dañado puede causar una fuga de gas, lo que posiblemente puede resultar en una explosión, incendio o lesiones corporales graves.
Cómo usar el encendedor ADVERTENCIA • No se incline sobre la parrilla al encenderla. 1. Gire las válvulas de control de gas del quemador a (apagado). 2. Abra la tapa durante el encendido o al volver al encender. 3. ABRA el gas en el cilindro de gas LP. 4. Para encender, presione y gire la perilla del QUEMADOR DE ENCENDIDO a la posición ALTO. Inmediatamente, presione y mantenga presionado el botón de ENCENDIDO ELECTRÓNICO hasta que el quemador encienda. 5.
Cómo guardar su parrilla • Limpie las parrillas de cocción. • Guárdela en un lugar seco. • Cuando el tanque de gas esté conectado a la parrilla, guárdela al aire libre, en un lugar bien ventilado y fuera del alcance de los niños. • Cubra la parrilla si la guarda al aire libre. El fabricante tiene a su disposición una variedad de cubiertas para parrillas en charbroil.
Cómo limpiar la unidad del quemador ADVERTENCIA PELIGRO Siga estas instrucciones para limpiar o cambiar piezas de la unidad del quemador, o si tiene problemas para encender la parrilla. 1. Cierre el paso de gas en las perillas de control y desde el tanque de gas. 2. Retire las parrillas de cocción y los reguladores de llama. 3. Quitar los tubos de prórroga y piezas de fijación quemadores 4. Separar electrodo de lesión del plexo braquial.
GARANTÍA LIMITADA Esta garantía es válida únicamente para las unidades adquiridas de los distribuidores autorizados. El fabricante le garantiza únicamente al consumidor-comprador original, que este producto no presentará defectos de mano de obra ni de materiales por el período indicado a continuación, contado desde la fecha de compra*, si se arma correctamente y se usa en el hogar, en condiciones normales y razonables.
PARTS DIAGRAM / SCHÉMA DES PIÈCES / VISTA ESQUEMÁTICA DE PIEZAS ASSEMBLY / ASSEMBLAGE / ASAMBLEA #7 #2 #3 #5 #6 #1 #28 #10 #26 #12 #11 #4 #27 #9 #19 #18 #17 #14 #16 #15 #8 #46 #20 #43 #23 #46 #24 #25 #31 #32 #13 #21 #22 #44 #45 #35 #36 #42 #33 #39 #41 #34 #29 #37 #38 #30 Page 32 #40 CHARBROIL.
PARTS LIST / ASSEMBLAGE / ASAMBLEA ASSEMBLY Key Qty Description Key Qty Description 1 1 TOP LID 36 1 GREASE CLIP 2 1 LOGO PLATE F/ LID 37 2 CASTER, LOCKING 3 4 RUBBER BUMPER, W/ HOLE, F/ TOP LID 38 2 CASTER, FIXED 4 1 HANDLE F/ LID 39 1 MATCH HOLDER 5 1 THERMOMETER 40 1 DOOR, NO HANDLE 1 DOOR HANDLE 6 1 BEZEL, F/ THERMOMETER 41 7 1 TOP LID HARDWARE 42 1 MAGNET ASSEMBLY 8 1 FIREBOX 43 1 SHIELD, F/ TANK 9 2 BURNER BRACE 44 1 DOOR PIN, FIXED 10 2 MAIN
LISTE DES PIÈCES ASSEMBLY / ASSEMBLAGE / ASAMBLEA Réf. Qté. Description Réf. Qté.
LISTA DE PARTES ASSEMBLY / ASSEMBLAGE / ASAMBLEA Clave Cant. Descripción Clave Cant. Descripción 1 1 TAPA SUPERIOR 33 1 ESTANTE INFERIOR 2 1 PLACA DE LOGOTIPO PARA TAPA 34 1 TORNILLO DEL TANQUE 3 4 TOPE DE LA TAPA, C.
HARDWARE LIST / LISTA DE HERRAJES / LISTE DES FERRURES ASSEMBLY / ASSEMBLAGE / ASAMBLEA Key/ Réf./ Clave Description/ Description/ Descripción Picture/ Illustré/ Ilustra Qty/ Qté/ Cant 4 B 1/4-20 Flange Nut Écrou à embase ¼ -20 Tuerca con brida de 1/4 -20 4 C 1/4-20x1/2" Screw Vis ¼-20×½ po Tornillo de 1/4 -20 x 1/2" 24 D #10-24x3/8" Screw Vis nº 10-24×3/8 po Tornillo No.
ASSEMBLY / ASSEMBLAGE / ASAMBLEA NOTE: DO NOT over tighten screws and washers that come into contact with porcelain coated surfaces. Over tightening may cause the porcelain coating to crack and break, resulting in exposed metal that will be prone to rust. REMARQUE: NE serrez PAS excessivement les vis et les rondelles qui sont en contact avec les surfaces au revêtement en porcelaine.
ASSEMBLY / ASSEMBLAGE / ASAMBLEA 3 Cx4 #32 C C 4 Cx4 #31 C C Page 38 CHARBROIL.
ASSEMBLY / ASSEMBLAGE / ASAMBLEA 5 Cx4 #8 #14 #16 C Note: If installing a replacement EI module, ensure it is oriented horizontally within the UFC. Remarque : si vous installez un module EI de rechange, assurez-vous qu'il est orienté horizontalement dans l'ensemble UFC. Nota: si instala un módulo EI de reemplazo, asegúrese de que esté orientado horizontalmente dentro del UFC. 6 C Cx8 C #25 C C #47 #24 C C C #23 C #24 #25 #47 #20 Page 39 CHARBROIL.
ASSEMBLY / ASSEMBLAGE / ASAMBLEA 7 #20 Ax4 #23 Bx4 1ST 2ND A B Page 40 CHARBROIL.
ASSEMBLY / ASSEMBLAGE / ASAMBLEA 8 463672019 463672219 / 463672419 #26 #26 9 463672019 463672219 / 463672419 #27 #27 Page 41 Inspect your infrared grate before each use to ensure that the openings are not covered with debris. See the Grilling Guide for detailed cleaning instructions. Inspectez votre grille infrarouge avant chaque utilization pour vous assurer que les orifices ne sont pas recouverts de débris.
ASSEMBLY / ASSEMBLAGE / ASAMBLEA 10 463672019 463672219 / 463672419 #28 #28 11 - + Hx1 + H #15 Page 42 CHARBROIL.
ASSEMBLY / ASSEMBLAGE / ASAMBLEA 12 1ST #35 #36 2ND ! CAUTION/ ATTENTION/ ADVERTENCIA ! Failure to install grease cup clip and cup will cause hot grease to drip from bottom of grill with risk of fire or property damage. À défaut d'attacher un récipient à graisse à son agrafe, la graisse chaude s'égouttera du fond du gril, entraînant un risque d'incendie ou de dommages matériels.
ASSEMBLY / ASSEMBLAGE / ASAMBLEA 14 2ND PRESS APPUYEZ OPRIMA 1ST #40 15 Gx1 G Page 44 CHARBROIL.
ASSEMBLY / ASSEMBLAGE / ASAMBLEA 16 3RD LP Cylinder (not included) Réservoir de gaz (non compris) Tanque de gas (no viene incluido) 2ND 1ST ! CAUTION/ ATTENTION/ ADVERTENCIA ! Cylinder valve must face to front of cart once tank is attached. Failure to install cylinder correctly may allow gas hose to be damaged in operation, resulting in the risk of fire. Le robinet du réservoir doit être orienté vers le devant du chariot une fois le réservoir fixé en position.
EMERGENCIES: If a gas leak cannot be stopped, or a fire occurs due to gas leakage, call the fire department. Emergencies Possible Cause Prevention/Solution Gas leaking from cracked/cut/burned hose. • Damaged hose. •Turn off gas at LP cylinder or at source on natural gas systems. Discontinue use of product and replace valve/hose/regulator. Once valve/hose/regulator replaced conduct complete leak check per manual. Gas leaking from LP cylinder. • Mechanical failure due to rusting or mishandling.
Troubleshooting (continued) Problem Possible Cause Prevention/Solution • Out of gas. • Check for gas in LP cylinder. • Excess flow valve tripped. • Turn off knobs, wait 30 seconds and light grill. If flames are still low, turn off knobs and LP cylinder valve. Disconnect regulator. Reconnect regulator and leak-test. Turn on LP cylinder valve, wait 30 seconds and then light grill. • Vapor lock at coupling nut/LP cylinder connection. • Turn off knobs and LP cylinder valve.
URGENCES : si une fuite de gaz ne peut pas être arrêtée, ou si un incendie se propage en raison d'une fuite de gaz, appelez le service d'incendie. Urgences Cause possible Prévention/Solution Fuite de gaz sur un tuyau cassé, coupé ou brûlé. • Tuyau endommagé. • Fermez l'alimentation en gaz au niveau du réservoir ou à la source au niveau du système de distribution du gaz naturel. Cessez d'utiliser ce produit et remplacer la vanne / tuyau / régulateur.
Dépannage (suite) Problème Cause possible Prévention/Solution Baisse subite du flux de gaz ou flamme faible. • Le gaz est épuisé. • La soupape de remplissage excessif a été déclenchée. • Vérifiez que le réservoir de GPL contient bien du gaz. • Fermez les boutons, attendez 30 secondes et allumez le gril. Si les flammes sont toujours faibles, fermez les boutons et la valve du réservoir. Débranchez le régulateur. Rebranchez le régulateur et faites un essai d'étanchéité.
CASOS DE EMERGENCIA: Si no se puede detener una fuga de gas, o si ocurre un incendio debido a una fuga de gas, llame a los bomberos. Emergencias Causas probables Medidas de prevención / solución Fugas de gas de mangueras agrietadas, cortadas o quemadas. • Manguera dañada. • Cierre el gas en el cilindro o en la fuente de los sistemas de gas natural.Deje de utilizar el producto y vuelva a colocar la válvula / la manguera / el regulador.
Resolución de problemas (continuación) Problema Caída repentina del flujo de gas o llama reducida. Llamas que se apagan. Causas probables Medidas de prevención / solución • Se acabó el gas. • Verifique que el tanque de gas esté cargado. • Se activó la válvula por sobrecarga de gas. • Cierre las perillas, espere 30 segundos y encienda la parrilla. Si las llamas siguen siendo bajas, cierre la perilla y la válvula del tanque de gas. Desconecte el regulador.
NOTES/ REMARQUES/ NOTAS Pa g e 5 2
NOTES/ REMARQUES/ NOTAS Pa g e 5 3
NOTES/ REMARQUES/ NOTAS Pa g e 5 4
PRODUCT REG ISTRATION Two convenient ways to register your product: Deux manières pratiques d’enregistrer votre produit: Dos maneras convenientes de registrar su producto: 1 Online En ligne @ WWW.CHARBROIL.COM/REGISTER En línea 2 By Mail | Par la poste | Por correo Please fill out this card and attached a copy of your sales receipt. Return it within 10 days of purchase for warranty service. Proof of purchase will be required. The warranty is not transferable.
2018 Char-Broil, LLC. Columbus, GA, 31904. Printed in China. Imprimé en China. Impreso en China. 2018 Assembly instructions. ©2018 Assemblée des instructions. ©2018 Instrucciones de ensamblado. The product associated with this guide was manufactured in China. Le produit associé à ce guide a été fabriqué en Chine. Tel producto asociado con esta guía ha sido fabricado en China. © © 2018 Char-Broil, LLC. Columbus, GA, 31904. Printed in China. Imprimé en Chine. Impreso en China.