
User Manual
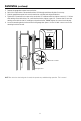
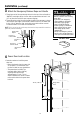
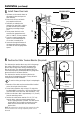
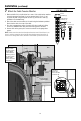
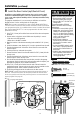
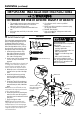

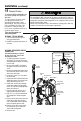
Table Of Contents
- Wall Mount Garage Door Opener Model RJO20
- Table of Contents
- Preparation
- Installation
- 1 Attach the Collar to the Garage Door Opener
- 2 Position and Mount the Garage Door Opener
- 3 Attach the Emergency Release Rope and Handle
- 4 Power Door Lock Location
- 5 Install Power Door Lock
- 6 Position the Cable Tension Monitor (Required)
- 7 Attach the Cable Tension Monitor (Required)
- 8 Install the Door Control (myQ Control Panel)
- 9 Install Remote Light
- 10 Install the Protector System®
- 11 Connect Power
- 12 Align the safety reversing sensors
- Adjustment
- Operation
- Programming
- Getting Connected
- Maintenance
- Troubleshooting
- Automatic Garage Door OpenerSafety & Maintenance Guide
- Accessories
- Warranty
- Repair Parts
- Contact Information

11
5. Remove the garage door opener from torsion bar.
6. Drill 3/16 inch pilot holes at the marked locations. Drill through metal door rail plates if necessary.
7. Slide the garage door opener back onto the torsion bar until pilot holes align with bracket.
8. Tighten the 2 square head set screws on the torsion bar. For a hollow torsion bar, tighten screws 3/4 - 1 full turn
after making contact with the bar. For a solid shaft torsion bar, tighten screws 1/4 - no more than 1/2 turn after
making contact with the shaft. If installing on a keyed torsion bar, DO NOT tighten the screws into the keyway.
9. Secure the mounting bracket to the wall and to the garage door opener. Use the 14-10x2" screws to secure the
mounting bracket to the wall.
Installation (continued)
Screws 14-10x2"
Set screws
(Torsion bar)
Mounting Bracket
NOTE: Due to torsion bars being out-of-round, the operator may wobble during operation. This is normal.