
User Guide
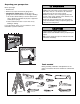
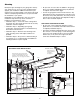
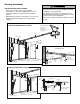
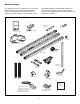
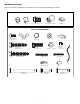
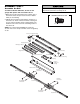
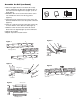
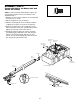
Table Of Contents
- Model PD432D 1/2 HP
- TABLE OF CONTENTS
- INTRODUCTION
- ASSEMBLY
- INSTALLATION
- STEP 1 Determine the Header Bracket Location
- STEP 2 Install the Header Bracket
- STEP 3 Attach the Rail to the Header Bracket
- STEP 4 Install The Protector System®
- STEP 5 Position the Opener
- STEP 6 Hang the Opener
- STEP 7 Install the Door Control
- STEP 8 Install the Lights
- STEP 9 Attach the Emergency Release Rope and Handle
- STEP 10 Electrical Requirements
- STEP 11 Complete the Safety Reversing Sensor Installation
- STEP 12 Fasten the Door Bracket
- STEP 13 Connect Door Arm to Trolley
- ADJUSTMENT
- OPERATION
- CARE OF YOUR OPENER
- HAVING A PROBLEM?
- PROGRAMMING
- REPAIR PARTS
- ACCESSORIES
- CHAMBERLAIN® SERVICE IS ON CALL
- HOW TO ORDER REPAIR PARTS
- WARRANTY
9
Assemble the Rail (continued)
3. Attach rail support braces to the back rail. Loosely
insert 1/4-20x7/16" hex bolts into the aligned holes of
the end rail and rail support brace (Figure 1). Do not
finger tighten.
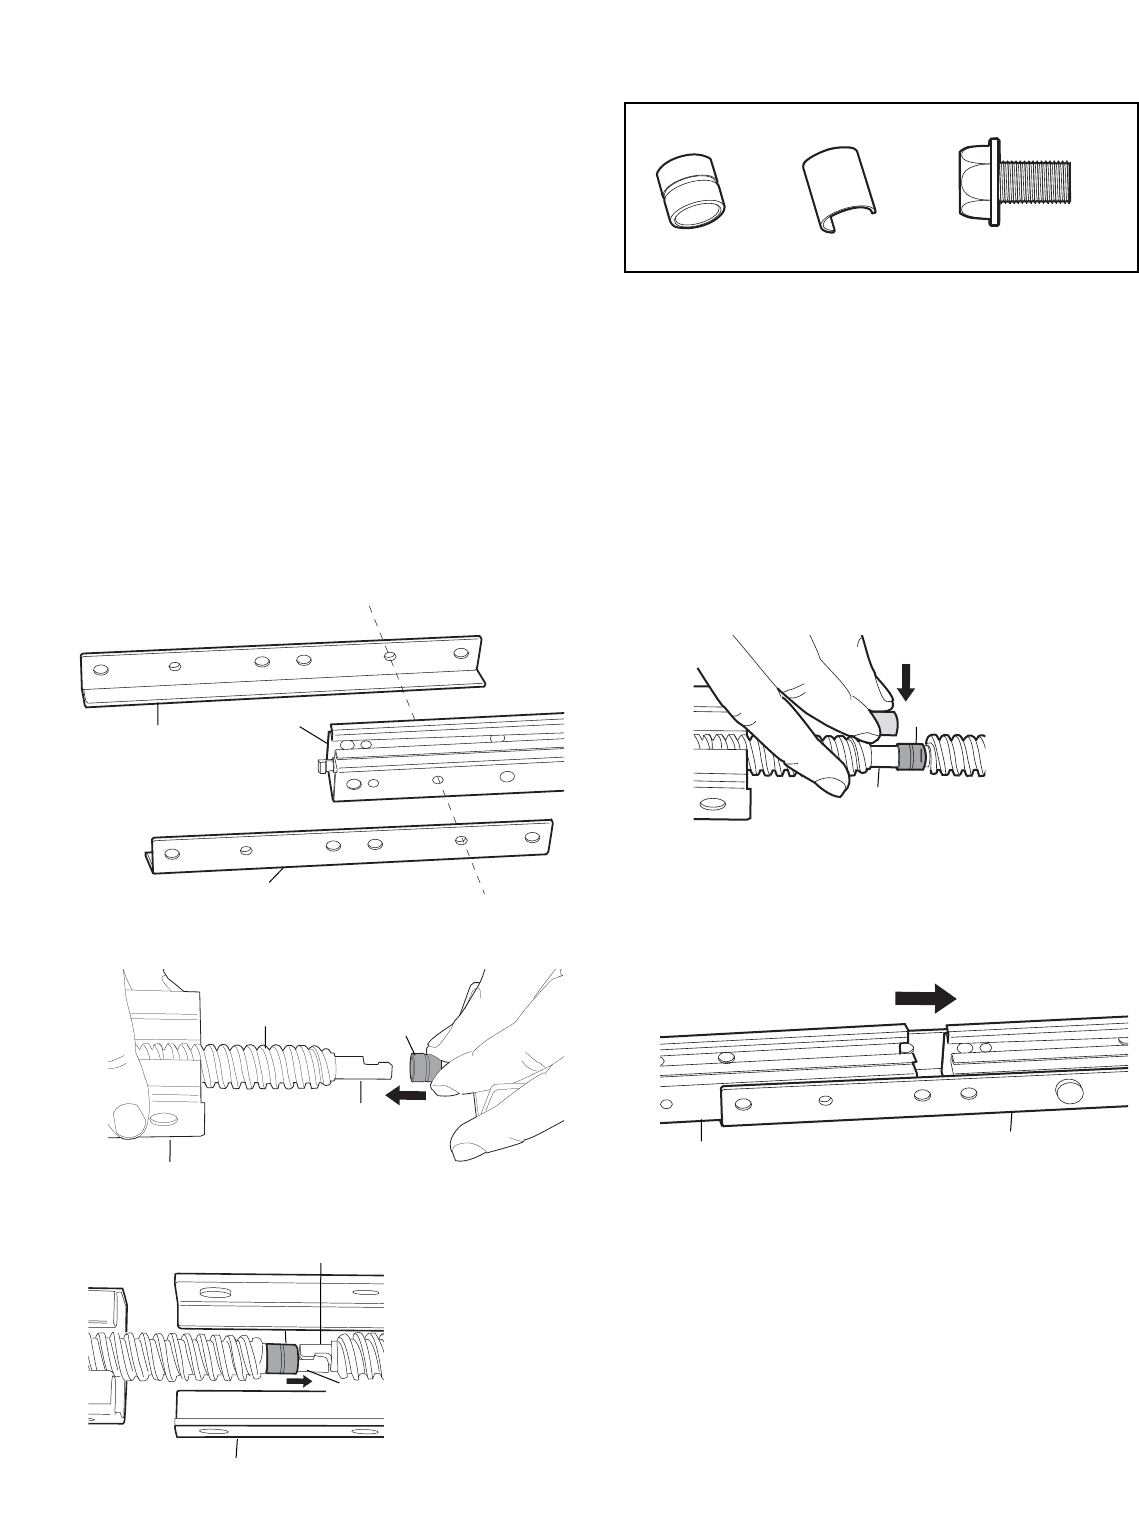
4. Extend the drive screw a few inches from the center
rail, and slide the sleeve onto the long journal
(Figure 2).
5. Interlock the long and short journal of the center and
back rails. Slide the sleeve over the journal connection
(Figure 3).
6. Place the c-clip onto the long journal shaft (center rail)
to ensure that the sleeve does not slide (Figure 4).
7. Slide the center rail so that the center rail and rail
brace holes are aligned (Figure 5). Secure with bolts.
8. Tighten all hex bolts.
9. Repeat steps 3-8 for header section.
Metal Sleeve
Metal Sleeve
Long Journal
Drive Screw
Rail Support Brace
Rail Support Brace
Rail
Long Journal
Short Journal
C-Clip
Center Rail
Center Rail
Figure 1
Figure 2
Figure 3
Figure 4
Figure 5
Center Rail
Rail Support Brace
Rail Support Brace
Sleeve Clip
Hex bolt 1/4-20x7/16"
HARDWARE SHOWN ACTUAL SIZE
Metal Sleeve