
User Guide
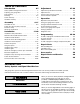
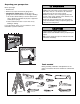
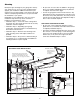
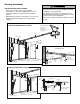
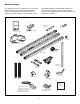
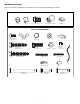
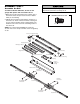
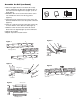
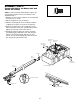
Table Of Contents
- Model PD432D 1/2 HP
- TABLE OF CONTENTS
- INTRODUCTION
- ASSEMBLY
- INSTALLATION
- STEP 1 Determine the Header Bracket Location
- STEP 2 Install the Header Bracket
- STEP 3 Attach the Rail to the Header Bracket
- STEP 4 Install The Protector System®
- STEP 5 Position the Opener
- STEP 6 Hang the Opener
- STEP 7 Install the Door Control
- STEP 8 Install the Lights
- STEP 9 Attach the Emergency Release Rope and Handle
- STEP 10 Electrical Requirements
- STEP 11 Complete the Safety Reversing Sensor Installation
- STEP 12 Fasten the Door Bracket
- STEP 13 Connect Door Arm to Trolley
- ADJUSTMENT
- OPERATION
- CARE OF YOUR OPENER
- HAVING A PROBLEM?
- PROGRAMMING
- REPAIR PARTS
- ACCESSORIES
- CHAMBERLAIN® SERVICE IS ON CALL
- HOW TO ORDER REPAIR PARTS
- WARRANTY
8
To prevent INJURY from pinching, keep hands and fingers
away from the joints while assembling the rail.
WARNING
CAUTION
WARNING
WARNING
ASSEMBLY STEP 1
Assemble the Rail
To avoid installation difficulties, do not run the
garage door opener until instructed to do so.
1. Open the rail carton and remove the contents onto a
level work surface. Keep it clean and free of debris
while you are working.
2. Identify the rail sections and orient the sections on a
flat surface as shown. The back rail has a black gear
on one end. The header rail has a black plastic rack
inside the rail on the screw. The remaining section is
the center rail.
NOTE: Use caution when handling the center rail
section. The screw can slip out if the section is tipped up
too far.
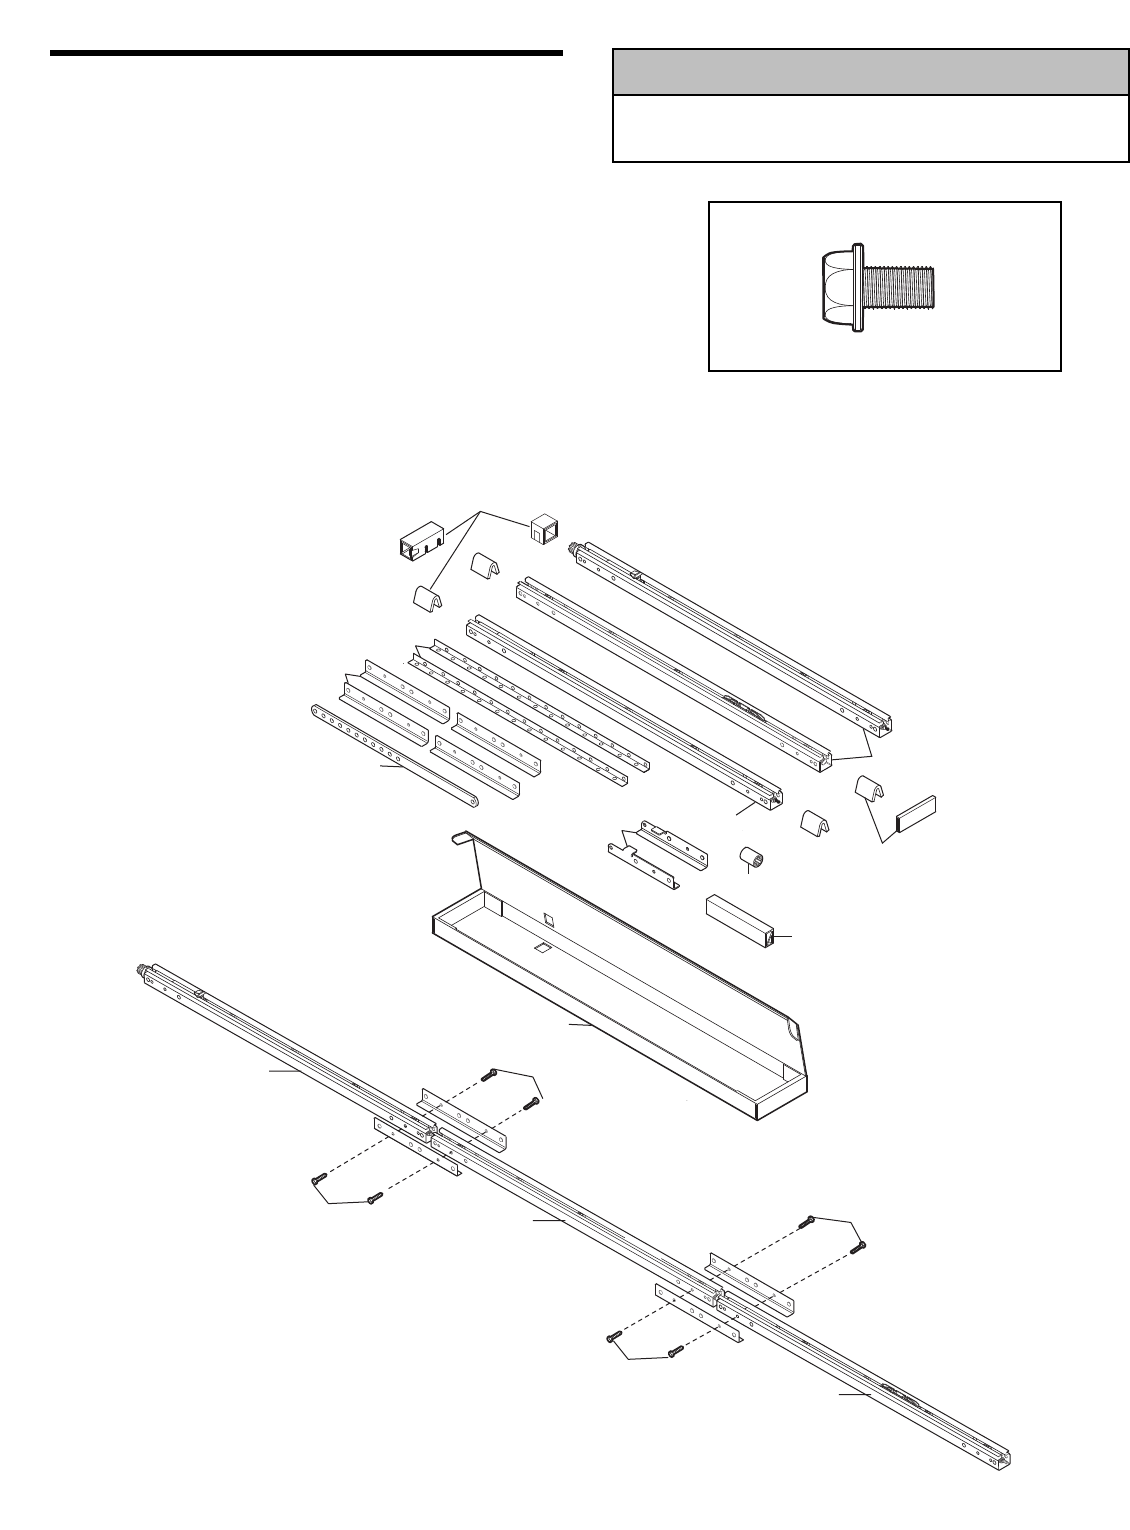
Hex bolt 1/4-20x7/16"
HARDWARE SHOWN ACTUAL SIZE
Hex Bolts
1/4-20x7/16"
Center Rail
Header Rail
Back Rail
Straight Door Arm
Rail Support Braces
Hanging Brackets
Rail Assembly
Sprocket Coupling
Header Rail Brackets
Remove Cardboard Packing
Rail Assembly Carton
Remove Cardboard Packing
Rail Assembly
Remove
Cardboard
Packing
Hex Bolts
1/4-20x7/16"
Hex Bolts
1/4-20x7/16"
Hex Bolts
1/4-20x7/16"