
User Guide
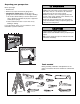
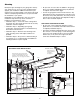
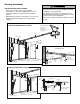
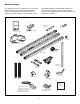
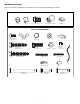
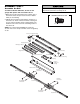
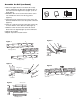
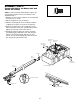
Table Of Contents
- Model PD432D 1/2 HP
- TABLE OF CONTENTS
- INTRODUCTION
- ASSEMBLY
- INSTALLATION
- STEP 1 Determine the Header Bracket Location
- STEP 2 Install the Header Bracket
- STEP 3 Attach the Rail to the Header Bracket
- STEP 4 Install The Protector System®
- STEP 5 Position the Opener
- STEP 6 Hang the Opener
- STEP 7 Install the Door Control
- STEP 8 Install the Lights
- STEP 9 Attach the Emergency Release Rope and Handle
- STEP 10 Electrical Requirements
- STEP 11 Complete the Safety Reversing Sensor Installation
- STEP 12 Fasten the Door Bracket
- STEP 13 Connect Door Arm to Trolley
- ADJUSTMENT
- OPERATION
- CARE OF YOUR OPENER
- HAVING A PROBLEM?
- PROGRAMMING
- REPAIR PARTS
- ACCESSORIES
- CHAMBERLAIN® SERVICE IS ON CALL
- HOW TO ORDER REPAIR PARTS
- WARRANTY
6
Straight Door
Arm Section
Curved Door
Arm Section
Header Bracket
U
P
C
E
I
L
I
N
G
M
O
U
N
T
O
N
L
Y
Sprocket
Coupling
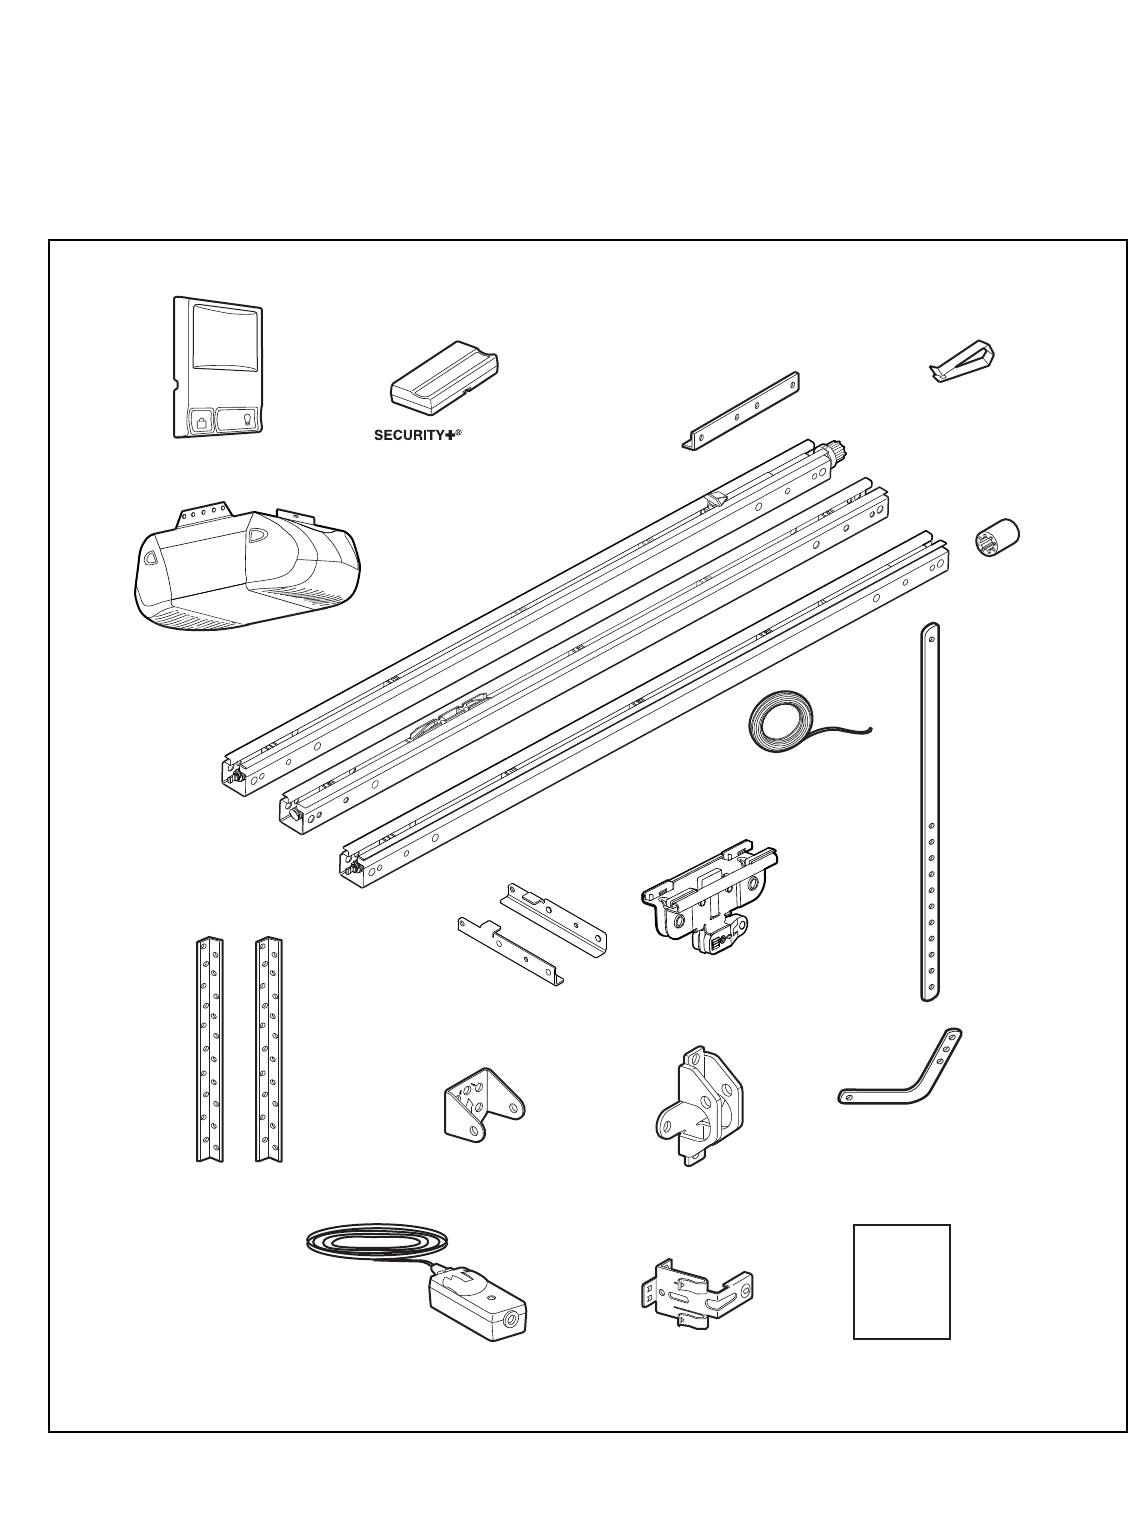
Remote Control
Visor Clip
Trolley
Rail Support
Braces (4)
Rail Assembly
Hanging Brackets
Door Bracket
Multi-Function
Door Control Panel
L
O
C
K
LIGHT
Safety Labels
and
Literature
The Protector System
®
(2) Safety Reversing Sensors
(1 Sending Eye and 1 Receiving Eye)
with attached 2-Conductor
White & White/Black Bell Wire
Safety Reversing Sensor
Mounting Bracket (2)
2-Conductor Bell Wire
White & White/Red
1-Button Remote Control (2)
Motor Unit with 2 Light Lenses
Header/Rail
Brackets
Your garage door opener is packaged in one carton which
contains the motor unit and all parts illustrated below.
Accessories will depend on the model purchased. If
anything is missing, carefully check the packing material.
PARTS MAY BE STUCK IN THE FOAM. Hardware for
assembly and installation is shown on the next page.
Save the carton and packing material until installation and
adjustment is complete.
Carton Inventory