
User Guide
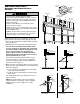


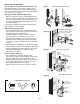


Table Of Contents
- Model PD432D 1/2 HP
- TABLE OF CONTENTS
- INTRODUCTION
- ASSEMBLY
- INSTALLATION
- STEP 1 Determine the Header Bracket Location
- STEP 2 Install the Header Bracket
- STEP 3 Attach the Rail to the Header Bracket
- STEP 4 Install The Protector System®
- STEP 5 Position the Opener
- STEP 6 Hang the Opener
- STEP 7 Install the Door Control
- STEP 8 Install the Lights
- STEP 9 Attach the Emergency Release Rope and Handle
- STEP 10 Electrical Requirements
- STEP 11 Complete the Safety Reversing Sensor Installation
- STEP 12 Fasten the Door Bracket
- STEP 13 Connect Door Arm to Trolley
- ADJUSTMENT
- OPERATION
- CARE OF YOUR OPENER
- HAVING A PROBLEM?
- PROGRAMMING
- REPAIR PARTS
- ACCESSORIES
- CHAMBERLAIN® SERVICE IS ON CALL
- HOW TO ORDER REPAIR PARTS
- WARRANTY
14
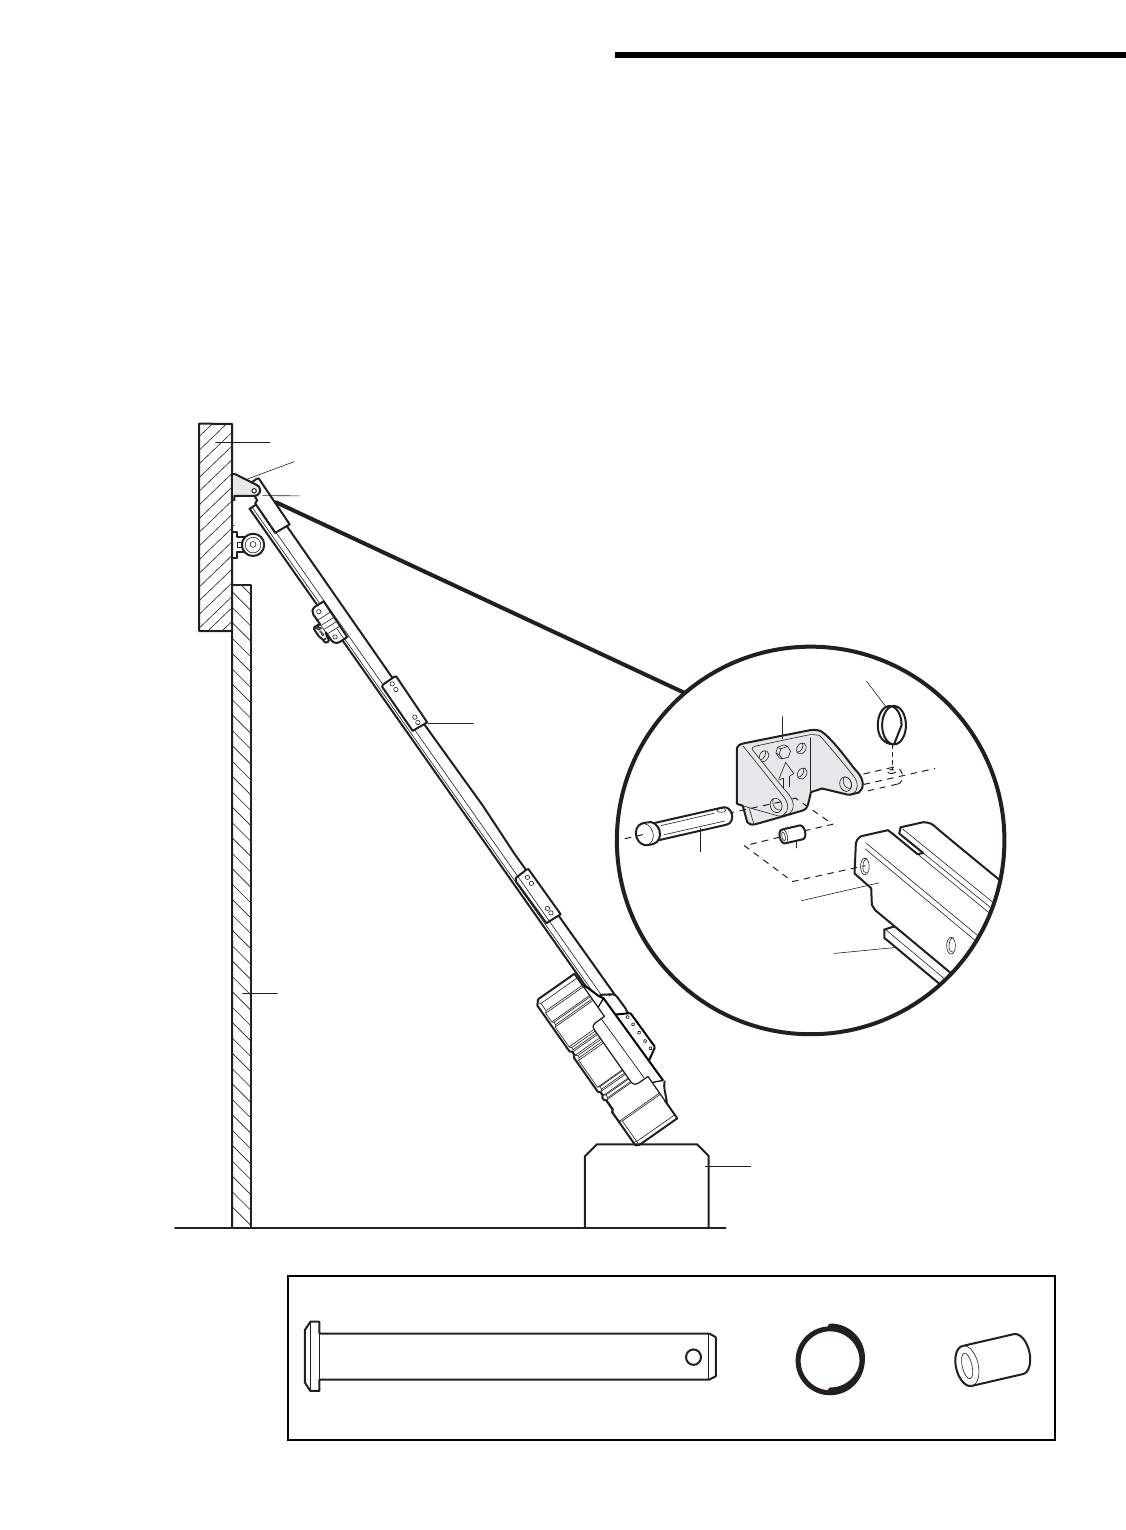
INSTALLATION STEP 3
Attach the Rail to the Header Bracket
• Position the opener on the garage floor below the
header bracket. Use packing material as a protective
base. NOTE: If the door spring is in the way you’ll
need help. Have someone hold the opener securely on
a temporary support to allow the rail to clear the
spring.
• Position the header/rail bracket against the header
bracket.
• Align the bracket holes and join with a clevis pin
5/16"x2-3/4" as shown. Spacer can be installed on
either side of rail.
• Insert a ring fastener to secure.
Header Bracket
Header/Rail Bracket
Opener Carton or
Temporary
Support
Header Wall
Garage
Door
Rail
Clevis Pin
5/16"x2-3/4"
Ring Fastener
Spacer
Header Bracket
Header/Rail
Bracket
Rail
Clevis Pin
5/16"x2-3/4"
Ring Fastener
Spacer
HARDWARE SHOWN ACTUAL SIZE