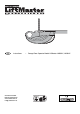
GB Instructions Chamberlain GmbH D66793 Saarwellingen www.chamberlain.de info@chamberlain.
WARNING Start by Reading These Important Safety Instructions Failure to comply with the following instructions may result in serious personal injury or property damage. • Read these instructions carefully These safety alert symbols mean Warning – a personal safety or property damage instruction. Read these instructions carefully. Warning: If your garage has no service entrance door, Model 1702E Outside Quick Release must be installed.
6 Install the Chain/Belt Before You Begin 1. Look at the wall or ceiling above the garage door. The header bracket must be securely fastened to structural supports. 2. Do you have a finished ceiling in your garage? If so, a support bracket and additional fastening hardware (not supplied) may be required. 3. Depending on your door's construction, you might need a special door arm. See your dealer. 4.
12 Position the Header Bracket 17 Attach Emergency Release Rope & Handle The header bracket must be rigidly fastened to a structural support of the garage. Reinforce the wall or ceiling with a 50 mm (1-1/2") board if necessary. Failure to comply may result in improper operation of safety reverse system. Thread one end of rope (1) through hole in top of red handle so "NOTICE" reads right side up as shown (3). Secure with an overhand knot (2).
Locate door control where the garage door is visible, away from door and door hardware and out of the reach of children. Mount at least 1,5 m (5 feet) above the floor Serious personal injury from a moving garage door may result from misuse of opener. Do not allow children to operate the door control or remote control transmitter. Permanently fasten the caution label permanently to the wall near the door control as a reminder of safe operating procedures.
ADJUSTMENT SECTION Activate the opener only when door is in full view, free of obstruction and properly adjusted. No one should enter or leave garage while door is in motion. Do not allow children to operate push button(s) or remote(s). Do not allow children to play near the door. 25 Setting the Limits NOTE: Your new Keyless Entry must be programmed to operate your garage door opener. Program the Receiver to Match Additional Remote Control Code Using the orange “LEARN” Button: 1.
28 Install the Protector System™ HAVING A PROBLEM? (See accessories) The force, as measured on the closing edge of the door, should not exceed 400 N (40kg). If the closing force is more than 400 N, the Protector System must be installed. After opener has been installed and adjusted, The Protector System™ accessory can be installed. Instructions are included with this accessory. The Protector System™ provides an additional measure of safety against a small child being caught under a garage door.
12. Opener strains: Door may be unbalanced or springs are broken. Close door and use manual release rope and handle to disconnect trolley. Open and close door manually. A properly balanced door will stay in any point of travel while being supported entirely by its springs. If it does not, call for professional garage door service to correct the problem. 13. Opener motor hums briefly, then won't work: • Garage door springs are broken. SEE ABOVE.
OPERATION OF YOUR OPENER SPECIFICATIONS Your opener can be activated by any of the following devices: • The Lighted Door Control Button. Hold the button down until door starts to move. • The Outside Keylock or Keyless Entry System (if you have installed either of these accessories). • The Remote Control Transmitter. Hold the push button down until the door starts to move. Opening the Door Manually: Door should be fully closed if possible. Weak or broken springs could allow an open door to fall rapidly.
114A2805E-en © 2010, Chamberlain GmbH
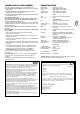
de Anleitungen – Garagentorantriebe Modell LM60/ LM80XX/ K700XX fr Instructions – Modèle LM60/ LM80XX/ K700XXde ouvre-por te de gar age en Instructions – Garage Door Oper ator Model LM60/ LM80XX/ K700XX da Instruktioner – Model LM60/ LM80XX/ K700XX Gar ageportsåbner 5 4 2 1 5 es Instrucciones – Abridor de la puer ta de gar age, Modelo LM60/ LM80XX/ K700XX el O‰ËÁ›Â˜ – M˯·ÓÈÛÌfi˜ AÓÔ›ÁÌ·ÙÔ˜ °Î·Ú·˙fiÔÚÙ·˜, MÔÓÙ¤ÏÔ LM60/ LM80XX/ K700XX – 6 Istruzioni Apriporta per gar age Mode
16 A 2 22 4 1 24 2 1 3 3 1 1 1 1 1 23 B 2 1 6 LOCK LIGHT 6 LOCK 1 1 2 C 2 3 5 4 7 6 LIGHT 3 2 LOCK 5 LIGHT LOCK LIGHT 22 2 1 5 1 B 16 17 1 NOT ICE 4 7 1 4 4(4x) NOTIC E 1 29 8 (1x) C 7 5 4 6 6 1 5 7 3 2 4 6 9 1 6 7 3 30 3 4 * B 8 8 1 A B 5 2 3 2 2 9(10x) * 4 2 B 1 2 3 6 4 3 2 (2x) 3 3 A 5 4 12 41A4166 14 (4x) 21 Pb 12B374 12C810 3 Cd 3 41A589-1 41A5801 (2.3m) 41A5801-2 (2.