
Owner's Manual

Page 6 H&(%$*4.8"4,7%N'*#$"&8#O%/7*,#*%4,77%PMQQQMQRRMSTUT1 Item 58979
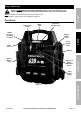
J=H6DE @B6>=DF@V A=FVD6V=V;6J6DIB
;.,(3"83%$.*%`'5/%B,4_
W=>VFV?[%%D@%B>6!6VD%J6>F@IJ%FV`I>E- Always charge on a non-flammable surface.
Press and hold the Battery Test Button on the front
of the unit to check the battery power level.
a. Green light is ready for use.
b. Yellow light needs to be charged.
c. Red light should be charged "55*9",$*7K1
Turn the Clamp Power Switch on front
of unit to the OFF position.
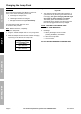
V&$*- Before initial use, completely
charge the Jump Pack.
1. Plug the 120VAC Adapter into a 2 or 3-prong outlet.
2. Slide the Adapter socket onto the 120VAC Charging
Input Plug on the back of the Jump Pack.
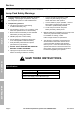
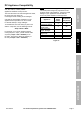
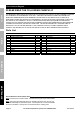
=//(&a"5,$*%
=;%;.,(3*%D"5*
Initial Charge:
Up to 48 hours
Recharge:
Up to 30 hours
H"3'(*%X-%%
3. The Charging Indicator lights will illuminate in a
cycle from red, to yellow, to green while the unit
is charging. D.*%3(**8%;.,(3"83%F89"4,$&(%7"3.$%
)"77%(*5,"8%&8%,2$*(%4.,(3"83%"#%4&5/7*$*1
The battery power level must be checked
periodically when charging, and the Jump Pack
must be unplugged when it is fully charged.
V@D6- H=FCI>6%D@%>6;<=>?6%`IAB%
B=;]%WFCC%!@FG%W=>>=VDE1
4. Recharge:
a. When yellow light comes on while
pressing the Battery Test Button.
b. After each Jump-Start.
c. Once a month.
G@ V@D%6^;66G%A=^FAIA%;<=>?FV?%DFA61