
User's Manual

Camera 25
Camera option menu
When the camera mode is activated and before a
picture is taken, you can change a number of
settings by pressing
L
Options.
Once you have activated the camera, simply press
,to take a picture. The picture is automatically
saved. Once the picture is saved, you can then press
L
Options to access the following list:
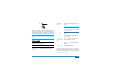
Options Description
Preview
screen
Select to view with a Large/Small
screen.
Picture
resolution
Adjust from five image sizes:
160X120, 320X240, 640X480,
800X600 and 1280X1024.
Picture
Quality
Select among three image quality:
Super fine, Fine and Normal.
View
pictures
Select to view the pictures taken.
Flash light To activate or deactivate the flash
mode.
Mode Three modes for selection: Night
mode, Self-timer and Multi-shot.
Multi-shot is only available when the
picture resolution is 800X600 or
lower.
Colour
effects
Select to add special colour effects
to the picture.
Advanced Edit more detailed information:
• Default name: Enter default name
for the picture.
• Reset settings: Restore default
values.
• Anti-Flicker: Select between 50Hz
or 60Hz.
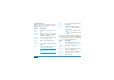
Options Description
Send To send the picture Via multimedia msg,
Via Bluetooth, Via infrared or Via e-mail.
Take new
picture
Return to the viewfinder screen.
As contact
ID
To set as the display image when
there is an incoming call.
As
wallpaper
To set the picture as a wallpaper to
be either Full Screen or Fit Screen.
Delete Delete the picture.