
Manual


Configuring Main System
1
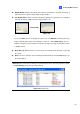
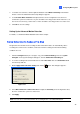
3. To enable noise tolerance, click the right-arrow button next to Motion Sensitivity in the Motion
Detect section. The Motion Detection Setup dialog box appears.
4. Select Activate Noise Tolerance and adjust tolerance level. The higher the level, the more
tolerant the system is to video noise. If your surveillance area may produce much video noise, set
the level to 3. Conversely, set the level to 1 if the surveillance area may produce less video noise.
5. Click OK to save the settings.
Setting Up for Advanced Motion Detection
For details, see Advanced Motion Detection earlier in this chapter.
Noise Detection to Reduce File Size
Designed for the round-the-clock recording, the Noise Detection feature can automatically reduce
recording size on video noise conditions, and restore normal recording size when the disturbing
conditions are over.
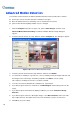
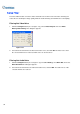
1. Click the Configure button (No. 14, Figure 1-2), point to General Setting, and select System
Configure. In the System Configure dialog box, click the Camera Record Setting tab.
2. To set the recording mode to Round-the-Clock, enable Rec Video and select Round-the-clock
from the drop-down list.
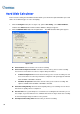
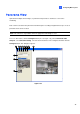
3. Enable Apply Advanced Codec Setting and click the
button. This dialog box appears.
Figure 1-91
4. Select Noise detection to reduce file size and adjust the Sensitivity level. The higher the value,
the more sensitive the system is to video noise.
5. Click Apply.
Note: You can also use this function when the recording mode is set to Motion Detection.
93