
Specifications


Pg 12
Installation (Continued)
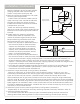
Install the ducting onto the range hood
(body) duct adaptor. Use certified ducting
tape or fastening devices.
Install power plug:
Plug in the power cord into your power
socket. DO NOT turn on main power
supply until installation is complete; or if a
function test is desired (should be done
before starting installation); clear
workspace; ensure workspace is safe, and
then temporarily supply power to unit and
then test functions. Please ensure to
completely SHUT OFF POWER SUPPLY
after testing and before continuing
installation.
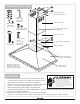
Install the upper chimney cover:
Having the installation hardware readily
available, align the upper chimney cover
with the pre-installed (upper chimney)
mounting bracket and then screw the
hardware through the chimney into the
mounting bracket. Remove any finish
protection wrapping.
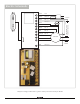
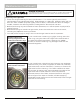
Install the lower chimney cover:
8.
9.
10.
11.
Confirm the orientation of the lower chimney cover; pull, stretch or flex the rear opening of
the chimney so it is temporarily larger than the upper chimney cover, carefully install or
wrap the lower chimney over the upper chimney cover and range hood body. Screw in the
mounting hardware through the lower chimney cover into the range hood body. Remove
any finish protection wrapping.
Install remaining accessories and operation check:
Install grease cup and aluminum (or optional stainless steel baffle) filters then check the
operation of the range hood. Remove any other finish protection wrapping. Use stainless
steel cleaner to remove any finger prints or marks.
Hold in position and
secure lower chimney
to range hood
Fasten mounting
bracket
Slide up and secure
upper chimney to
mounting bracket
Figure 5