
Use and Care Guide
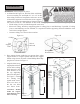
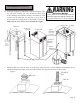
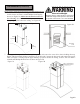
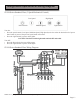
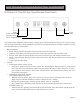
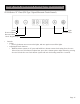
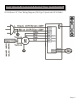

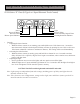

Figure 7A
Page 12
Due to excessive weight, two or more person is recommended for this step.
Install the hood body onto the support frame and secure 6.
it with sixteen (16) 4mm x 16mm Phillips Head Tapping
Screw, see Figure 6A. Make sure the hood is secure be-
fore releasing. Run the duct tube and power cord through
the top support plate above the ceiling, see Figure 6B.
Push
Upward
Push
Upward
Power Cord
Figure 6A
Hold upper chimney and lower chimney into position and remove the screw driver that is holding them up. 7.
Slowly slide down both chimneys until they sit on the hood. Connect the duct work and connect the power
cable, see gure 7A. Bring only the upper chimney up until it reaches the ceiling, secure it with two 4mm x
16mm Round Phillips Head Screws as shown in Figure 7B.
4mm x 16mm Round
Phillips Head Screws
Page 12
Figure 7B
Installation (Continued)
WARNING
Excessive Weight
Require three or more person to move and
install this range hood. Spinal or other bodi-
ly injuries could occur if it is not followed.
Aluminum
Tube
Figure 6B