
Use and Care Guide


Page 9
Advanced Preparations:
Read the entire installation guide and users manual thoroughly, understand instructions and warnings.1.
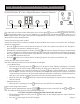
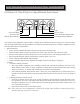
Be familiar with the controls of the range hood by reading through 2. Range Hood Operations, Page 12.
Place the range hood on a at, stable surface. Connect the range hood to a designated standard outlet (please 3.
refer the product label for the suitable voltage of this unit) and verify no debris has entered the vent openings,
then turn on the range hood. Verify all operations of the range hood by referring to Range Hood Operations,
Page 12.
Place all supplied parts and required hardware on a at, stable surface and verify the existence of all supplied 4.
parts listed on Page 4.
Carefully remove the white plastic protective coat from the chimney covers and range hood if any.5.
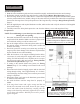
WARNING
Severe Injury
Hood may have very shape edges. Please wear
protective gloves if it is necessary to remove
any parts for installing, cleaning or servicing.
Preparation
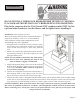
WARNING
Excessive Weight
Require three or more person to move and
install this range hood. Spinal or other bodi-
ly injuries could occur if it is not followed.
Preparations:
NOTE: To avoid damage to your hood, prevent debris from
entering the vent opening.
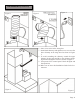
Determine and mark the center line on the ceiling where the 1.
range hood will be installed. Make sure there is proper clear-
ance within the ceiling or wall for exhaust vent.
Due to the weight and size of this unit, please make sure that 2.
the support system or framework being used is stable and
secure in the ceiling.
Put a thick, protective covering over counter top, cook top or 3.
range to protect from damage or dirt. Remove any hazardous
objects around the area when installing.
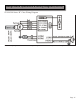
Mark the locations of the support mounting bracket holes, 4.
vent cutout (if used) and power supply cable cutout on the
ceiling. Use drill and saber saw or keyhole saw to cut open-
ings for power supply cable and vent (see Venting Methods
and Electrical requirements, Pages 7-8).
If venting to the outside install vent system (see 5. Venting
Methods, Page 7). Use caulking to seal exterior wall or roof
openings.
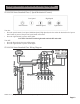
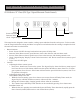
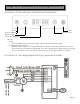
Disconnect main electrical supply, prepare and run electrical 6.
wiring through ceiling. Leave approximately 12” of electri-
cal cord hanging from the ceiling. Do not restore power until
wiring is completed.
Disconnect power cord, remove the aluminum grease lters 7.
or stainless steel bafe lter..
Set aside the lters until the range hood is properly in-8.
stalled.
If the range hood comes with a glass canopy and has not 9.
already been mounted to the hood, loosen the four canopy
screws and washers from the hood top, carefully place the
canopy on the hood top, and loosely tighten the four canopy
screws along with washers. DO NOT put excessive pressure
against the glass.