
User Manual
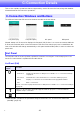


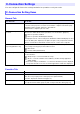

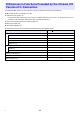


Table Of Contents
- Contents
- Establishing a Network Connection Between the Projector and a Computer
- Establishing a Direct Wireless LAN Connection Between a Computer and the Projector
- Using a Wired LAN Connection to Connect the Projector to an Existing Network
- Connecting the Projector to an Existing Wireless LAN Access Point
- Using the Projector as a NAT Router (Simultaneous Use of Wireless LAN and Wired LAN)
- Using the Remote Controller to Configure Projector Network Settings
- Using a Computer to Configure Projector Network Settings
- Preparing for C-Connection
- Network Projecting a Computer Screen Image (Using C-Connection)
- C-Connection Details
- Advanced Operations
- Controlling the Projector from an External Network Device
- Ports Used for TCP/UDP

47
Settings can be configured even if there is no network connection between the computer and
projector.
To configure C-Connection settings
1.
On the computer, start up C-Connection.
2.
Display the Preferences dialog box.
Windows:
(1) Display the info panel or list panel (full).
See “C-Connection Windows and Buttons” (page 41).
(2) In the upper left corner of the C-Connection window, click . On the menu that appears,
select “Preferences”.
macOS:
(1) On the menu bar, click the following in sequence: “C-Connection”
3 “Preferences”.
3.
Use the Preferences dialog box to configure settings.
For information about the setting items on each tab, see “C-Connection Setting Items” (page
45).
4.
To apply all of the setting changes you have made on all tabs, click the close (×)
button in the upper right corner of the Preferences dialog box.
Configuring Settings