
User Manual

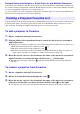
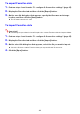

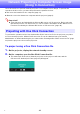
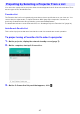
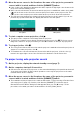
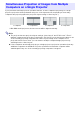
Table Of Contents
- Contents
- Establishing a Network Connection Between the Projector and a Computer
- Establishing a Direct Wireless LAN Connection Between a Computer and the Projector
- Using a Wired LAN Connection to Connect the Projector to an Existing Network
- Connecting the Projector to an Existing Wireless LAN Access Point
- Using the Projector as a NAT Router (Simultaneous Use of Wireless LAN and Wired LAN)
- Using the Remote Controller to Configure Projector Network Settings
- Using a Computer to Configure Projector Network Settings
- Preparing for C-Connection
- Network Projecting a Computer Screen Image (Using C-Connection)
- C-Connection Details
- Advanced Operations
- Controlling the Projector from an External Network Device
- Ports Used for TCP/UDP

33
Network Connection Between a Single Projector and Multiple Computers
A C-Connection installer file and One Click Connection file downloaded to a particular computer can
be copied to and used by another computer. Distributing these files to other users simplifies the task
of connecting multiple computers to the same projector.
To use a copied file on other computers, perform the operation under “To project using a One Click
Connection file” (page 36) on each of the computers.
C-Connection includes a function that lets you add multiple projectors on a network to a Favorites list.
A Favorites list can be exported to a file, which can then be distributed among other users on the
same network. This helps to simplify network projection to specific projectors.
To add a projector to Favorites
1.
On the computer, start up C-Connection.
2.
Perform either of the operations below to search for the projector you want to
add for Favorites.
Normally you should use operation (a). Use operation (b) when the projector you want is on a
subnet that is different from the computer you are using.
(a) On the C-Connection list panel (page 41), click .
(b) On the C-Connection list panel, perform the procedure from step 2 under “To project by
using a projector name or IP address to search for a projector” (page 39).
3.
Move the mouse cursor to the line where the name of the projector you want to
add to Favorites is located, and then click the star ( ) on the right.
This will cause the star to change to , which indicates that the projector was added to
Favorites.
To remove a projector from Favorites
1.
On the computer, start up C-Connection.
2.
On the C-Connection list panel (page 41), click .
3.
Move the mouse cursor to the line where the name of the projector you want to
remove from Favorites is located, and then click the star ( ) on the right.
This removes the projector from Favorites and removes the projector name from the list.
Creating a Projector Favorites List