
User Manual
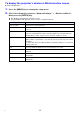

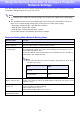


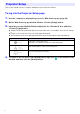
Table Of Contents
- Contents
- Establishing a Network Connection Between the Projector and a Computer
- Establishing a Direct Wireless LAN Connection Between a Computer and the Projector
- Using a Wired LAN Connection to Connect the Projector to an Existing Network
- Connecting the Projector to an Existing Wireless LAN Access Point
- Using the Projector as a NAT Router (Simultaneous Use of Wireless LAN and Wired LAN)
- Using the Remote Controller to Configure Projector Network Settings
- Using a Computer to Configure Projector Network Settings
- Preparing for C-Connection
- Network Projecting a Computer Screen Image (Using C-Connection)
- C-Connection Details
- Advanced Operations
- Controlling the Projector from an External Network Device
- Ports Used for TCP/UDP

19
To display the Web Service page
You can use either of the operations below to display the Web Service page.
Important!
Depending on the setup of your web browser, attempting to open the Web Service page may
cause a dialog box warning you about security and privacy issues. Note that there are no
security or privacy issues to worry about, so you can ignore the warning message and open
the projector’s Web Service.
For this type of connection: Perform this operation:
Computer and projector
connected to a network*
1
1. On the projector’s network standby screen, note the projector’s IP address.
2. Start up the computer’s browser, input the projector’s IP address into the
address bar, and then press the computer’s [Enter] key.
Connection with the projector
from a computer using
C-Connection*
2
1. Display the C-Connection list panel and then click .
2. Move the mouse cursor to a projector name that is marked with a blue
check mark ( ), which indicates a currently connected projector. Click the
mark to the right of the projector name.
*1 This operation can be used to display the Web Service page even if the projector and computer are
connected by LAN cable, while both of them are assigned fixed IP addresses. For information
about specifying the projector’s fixed IP address, see step 2 of the procedure under “To use a
wired LAN connection to connect the projector to an existing network with a fixed IP” (page 8).
*2 See “Network Projecting a Computer Screen Image (Using C-Connection)” (page 36).
B