
User Manual
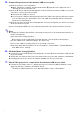
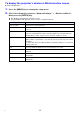


Table Of Contents
- Contents
- Establishing a Network Connection Between the Projector and a Computer
- Establishing a Direct Wireless LAN Connection Between a Computer and the Projector
- Using a Wired LAN Connection to Connect the Projector to an Existing Network
- Connecting the Projector to an Existing Wireless LAN Access Point
- Using the Projector as a NAT Router (Simultaneous Use of Wireless LAN and Wired LAN)
- Using the Remote Controller to Configure Projector Network Settings
- Using a Computer to Configure Projector Network Settings
- Preparing for C-Connection
- Network Projecting a Computer Screen Image (Using C-Connection)
- C-Connection Details
- Advanced Operations
- Controlling the Projector from an External Network Device
- Ports Used for TCP/UDP

17
To use the projector’s Setup Menu to initialize network settings
Note
The procedure below can be used to initialize all items included in the “Network Settings” of
the projector’s Setup Menu. Though it also initializes most of the items included in “Projector
Setup” on the Web Service page (see “Projector Setting Items” on page 23), the current
settings of the items below are maintained.
Projector name, User List, Crestron Control, Firmware Update
1.
Perform steps 1 through 3 of the procedure under “To use the projector’s Setup
Menu to configure network settings” (page 16).
2.
Select “Initialize Network Settings” and then press the [ENTER] key.
This displays a confirmation dialog box asking if you want to perform initialization.
3.
Use the [S] and [T] keys to select “Yes”, and then press the [ENTER] key.
This restarts the network system. Restarting initializes settings and then displays the network
standby screen.
B