
User Manual
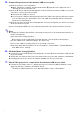


Table Of Contents
- Contents
- Establishing a Network Connection Between the Projector and a Computer
- Establishing a Direct Wireless LAN Connection Between a Computer and the Projector
- Using a Wired LAN Connection to Connect the Projector to an Existing Network
- Connecting the Projector to an Existing Wireless LAN Access Point
- Using the Projector as a NAT Router (Simultaneous Use of Wireless LAN and Wired LAN)
- Using the Remote Controller to Configure Projector Network Settings
- Using a Computer to Configure Projector Network Settings
- Preparing for C-Connection
- Network Projecting a Computer Screen Image (Using C-Connection)
- C-Connection Details
- Advanced Operations
- Controlling the Projector from an External Network Device
- Ports Used for TCP/UDP

14
To connect a computer to the projector via wireless LAN, and to
connect the projector to an existing network at the same time
1.
Perform steps 1 through 3 under “To connect the projector and a computer via
wireless LAN” (page 6).
2.
Use a LAN cable to connect the projector to the existing network.
Depending on the existing network environment, perform either of the following operations:
“To use a wired LAN connection to connect the projector to an existing network that has a
DHCP server” (page 8) or “To use a wired LAN connection to connect the projector to an
existing network with a fixed IP” (page 8).
Note
If you want to change the SSID display name or other projector wireless LAN access point
settings, use the procedure under “To configure projector settings” (page 21) to change the
settings of the items included under “Access Point Mode” (page 24).
If the projector is simultaneously connected to both a wireless LAN and wired LAN with the
above type of connection, the wireless LAN computer will be able to access the wired LAN
under initial default projector settings. “Access Filter” settings (page 29) can be configured to
completely block wired LAN access from the wireless LAN, or to allow internet access only
from the wireless LAN.