
User's Manual
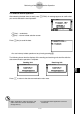
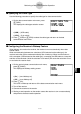
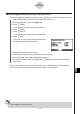

Table Of Contents
- Quick-Start
- Precautions when Using this Product
- Contents
- Getting Acquainted— Read This First!
- Chapter 1 Basic Operation
- Chapter 2 Manual Calculations
- Chapter 3 List Function
- Chapter 4 Equation Calculations
- Chapter 5 Graphing
- 5-1 Sample Graphs
- 5-2 Controlling What Appears on a Graph Screen
- 5-3 Drawing a Graph
- 5-4 Storing a Graph in Picture Memory
- 5-5 Drawing Two Graphs on the Same Screen
- 5-6 Manual Graphing
- 5-7 Using Tables
- 5-8 Dynamic Graphing
- 5-9 Graphing a Recursion Formula
- 5-10 Changing the Appearance of a Graph
- 5-11 Function Analysis
- Chapter 6 Statistical Graphs and Calculations
- Chapter 7 Financial Calculation (TVM)
- Chapter 8 Programming
- Chapter 9 Spreadsheet
- Chapter 10 eActivity
- Chapter 11 System Settings Menu
- Chapter 12 Data Communications
- Appendix
20070201
k Auto Image Transfer to an OHP Unit (OH-9860*
1
)
The following procedure sends the screen of this calculator to an OHP unit at fi xed intervals.
1. Use the USB cable to connect the calculator to the OHP unit.
2. From the Main Menu, enter the LINK mode.
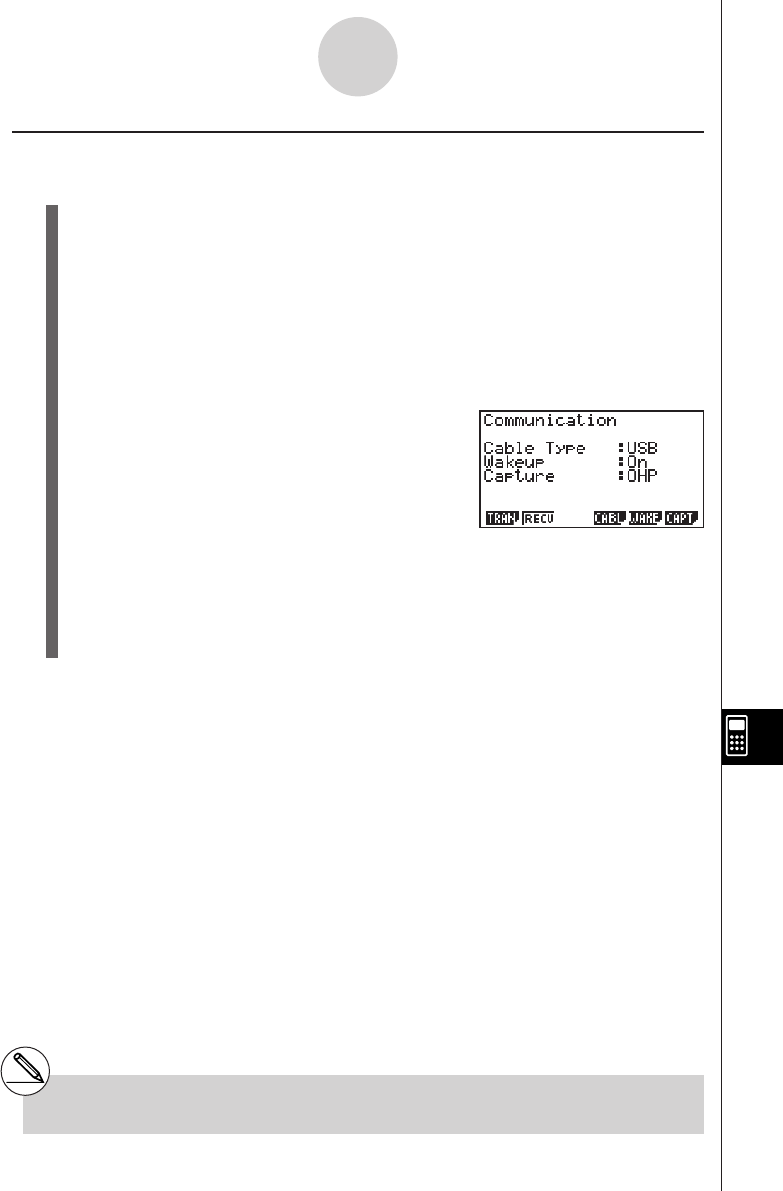
3. Press 4(CABL).
• This displays the cable type selection screen.
4. Press 1(USB).
5. Press 6(CAPT).
• This displays the image transfer setting screen.
6. Press 3 (OHP).
This turns on auto image transfer and returns of
the data communication main menu.
7. Display the image you want to send.
8. The displayed image is sent automatically to the OHP unit.
9. To continue with auto image transfer, return to step 7.
10. To stop auto image transfer, press 6 (CAPT)1 (Mem) on the data communication
main menu.
See the User’s Guide that comes with the OHP unit for information about connecting the
OHP unit and how to use the calculator while the OHP unit is attached.
12-5-2
Image Transfer
*
1
The OH-9860 is available separately.