
Electronic Keyboard User Manual

E-56
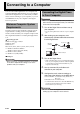
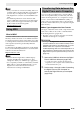
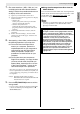
Connecting to a Computer
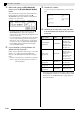
3.
While holding down the
cs
(FUNCTION)
button, press the
dr
(USB DEVICE MODE)
button.
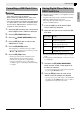
This will enter the storage mode, which enables data
transfer with the connected computer. The
cs
(FUNCTION) button lamp will flash and the display
will appear as shown below.
• To exit the storage mode at any time, press the
cs
(FUNCTION) button. This is the only button
operation that is supported while the Digital Piano is
in the storage mode.
• You will not be able to enter the storage mode while
any one of the following operations is in progress.
Metronome, Auto Accompaniment, song playback,
recorder (on), Auto Accompaniment editing, Music
Preset editing, data transfer between the Digital
Piano and USB flash drive.
4.
If your computer is running Windows XP,
double-click “My Computer”.
*
Under “Devices with Removable Storage”, you should
be able to see a folder representing Digital Piano
memory or the USB flash drive loaded in the Digital
Piano.
*
Windows Vista, Windows 7: Double-click “Computer”.
Mac OS: Skip step 4 and double-click “PIANO” on
your Mac desktop.
5.
Double-click “PIANO”.
You now should see five data folders, one for each data
type.
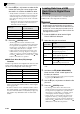
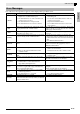
6.
Referring to the table below, open the folder
that corresponds to the type of data you want
to transfer.
• Data types and contents are the same as those when
saving Digital Piano data to or loading it from a USB
Flash Drive. See “USB Flash Drive” (page E-47) for
more information.
To load this
type of data
Open this data
folder
Data File Name
User rhythms
(page E-21)
RHYTHMAC
BIDRHYnn.AC7
(nn: 01 to 10)
BIDRHYnn.Z00
(nn: 01 to 10)
BIDRHYnn.CKF
(nn: 01 to 10)
User songs
(page E-25)
MUSICLIB
BIDSNGnn.MID
(nn: 01 to 10)
(SMF Format 0 or
Format 1)
BIDSNGnn.CM2
(nn: 01 to 10)
(CASIO format)
User Music Presets
(page E-29)
MUSICPST
BIDMPSnn.MPS
(nn: 01 to 50)
Recorder songs
(page E-35)
RECORDER
BIDRECnn.CSR
(nn: 01 to 05)
Registration
(page E-33)
REGISTMR BIDREGAL.CR6