
Electronic Keyboard User Manual


English
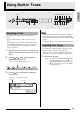
Using Built-in Tones
E-11
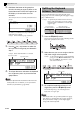
Moving the Keyboard Split Point
You can use the procedure below to specify the
location on the keyboard where it splits between the
left side and the right side. That location is called the
“split point”.
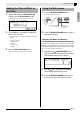
1.
Hold down the
dq
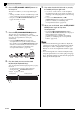
(SPLIT) button until the
split point setting screen appears on the
display as shown below.
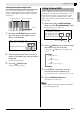
2.
Press the keyboard key where you want to
specify as the leftmost key of the right (upper
range) tone.
This specifies the split point.
3.
Press the
dq
(SPLIT) button.
This exits the split point screen.
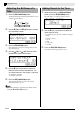
After you split the keyboard (page E-10), you may find
out that the lower range notes on the left are too low or
that the upper range notes on the right are too high.
You can use octave shift to shift the octaves of the
upper range and lower range upwards or downwards
in octave units.
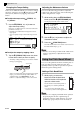
1.
While holding down the
cs
(FUNCTION)
button, press the
cm
(GRAND PIANO) button.
This displays the octave shift screen.
2.
Use the
bt
(PART) button to select the range
whose octave you want to change.
• Each press of
bt
(PART) cycles through the ranges
below.
3.
Use the
ct
(w, q) buttons to shift the
octave of the currently selected range.
• You can shift the octave within the range of –2 to 0 to
2.
4.
Press the
cs
(FUNCTION) button.
This exits the octave shift screen.
NOTE
• Octave shift also can be performed as described for
“Octave Shift” (page E-44).
Left (Lower Range) side Right (Upper Range) side
Split point
Current split point key name
Using Octave Shift
Shift amount
Currently selected range
U1 (Upper1): Main tone
U2 (Upper2): Layered tone
L1 (Lower1): Left (lower range) tone