
User Manual
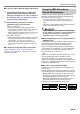

Table Of Contents
- Cover
- Contents
- Overview and Setup
- Operations Common to All Modes
- Digital Piano Operations
- Listening to Demo Play
- Selecting a Tone
- Changing Keyboard Response to Touch Pressure (Touch Response)
- Changing the Pitch
- Using the Sound Mode Effects (Hall Simulator/Reverb and Surround)
- Using a DSP
- Using Chorus
- Using Brilliance
- Adjusting Acoustic Piano Sound Characteristics (Acoustic Simulator)
- Using the Knobs
- Using the Pitch Bend Wheel
- Using the Arpeggiator
- Splitting the Keyboard for Duet Play
- Changing the Scale Tuning (Temperament) of the Keyboard
- Using Auto Accompaniment
- Selecting a Rhythm
- Playing Auto Accompaniment
- Auto Accompaniment Pattern Variations
- Triggering Auto Accompaniment Play with Accompaniment Keyboard Input (Synchro Start)
- Using the Keyboard to Control the Auto Accompaniment Pattern (Keyboard Controller Mode)
- Selecting a Chord Input Mode
- Using One-Touch Preset
- Using Auto Harmonize
- Changing the Auto Accompaniment and Song Tempo
- Using Music Preset
- Registering and Restoring a Setup (Registration)
- Using the MIDI Recorder to Record Performances
- Using the Audio Recorder to Record Performances
- Listening to Songs (MIDI Player)
- Configuring Function Settings (FUNCTION Mode)
- Using Operation Lock
- Configuring MIDI Settings
- Deleting All Data in Digital Piano Memory
- USB Flash Drive
- Supported USB Flash Drives
- USB Flash Drive and USB Type A Port Handling Precautions
- Connecting a USB Flash Drive to and Detaching It from the Digital Piano
- Formatting a USB Flash Drive
- USB Flash Drive Operations
- Using a Computer to Copy General Song Data to a USB Flash Drive
- Storing Standard Audio Data (WAV Files) to a USB Flash Drive
- Linking with a Smart Device (APP Function)
- Troubleshooting
- Reference
- MIDI Implementation Chart

Digital Piano Operations
EN-46
■ To select a track number before recording
1.
Use the 3 mode selector button to cycle
through settings until the “SONG” (SONG
Mode) indicator is lit.
2.
Use the bk – and bl + buttons to select a song
number.
• Song numbers 11 through 15 are MIDI recorder areas.
If necessary, you can touch 8a to check whether
or not the selected area already has something
recorded to it.
• To record to the song number you select here, perform
the procedure under “To record to the system track”
(page EN-45). If the system track of the selected song
number already has recorded data, it will be
overwritten by the new recording.
■ To overdub record a solo track over a recorded
system track
• If you are performing the procedure below immediately
following the procedure under “To record to the system
track” (page EN-45), you do not need to enter the SONG
Mode or select a song. Therefore, you should skip steps 1
and 2 below.
1.
Use the 3 mode selector button to cycle
through settings until the “SONG” (SONG
Mode) indicator is lit.
2.
Use the bk – and bl + buttons to select the
song number of a MIDI recorder song that was
recorded to the system track.
• Song numbers 11 through 15 are for songs recorded
with the MIDI recorder. If necessary, you can touch
8a to play back the song and check its contents.
3.
Configure tone and other settings you want to
use for recording.
• For setting items that can be recorded at the beginning
of a recording, see the “Solo” column in the table
under “Recorded Data for Each Track” (page EN-44).
4.
Touch bo REC0.
This enters record standby, indicated by bo REC0
flashing red.
5.
Hold down the bo REC0 button until “[MIDI
REC SETTING]” appears on the display.
6.
After confirming that “Rec Track” is displayed,
touch bm ENTER.
7.
Use the bk – and bl + buttons to select a
track.
• The display will show “Solo 1” or “Solo 2” depending
on the solo track you select.
8.
To start recording, play something on the
keyboard or touch 8 START/STOP.*
This simultaneously starts playback of the system track
and recording to the solo track you selected in step 7
above.
This causes bo REC0 to stop flashing and remain lit
red, which indicates that recording is in progress.
* Recording can also be started using other operations.
For details, see “Operations that Start Recording”
(page EN-45).
9.
To stop recording, touch bo REC0.
10.
To play back the song you just recorded, touch
8a.
• This will play back the contents of both the system
track and the solo track.
• If you want to overdub record the other solo track,
perform steps 3 through 10 again, selecting the
remaining (unrecorded) solo track in step 7.
[
M
IDI REC SETTING
]
–
Sys t e
m
+
Rec Tr ack