
User Manual
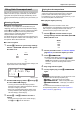
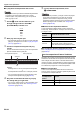
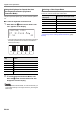

Table Of Contents
- Cover
- Contents
- Overview and Setup
- Operations Common to All Modes
- Digital Piano Operations
- Listening to Demo Play
- Selecting a Tone
- Changing Keyboard Response to Touch Pressure (Touch Response)
- Changing the Pitch
- Using the Sound Mode Effects (Hall Simulator/Reverb and Surround)
- Using a DSP
- Using Chorus
- Using Brilliance
- Adjusting Acoustic Piano Sound Characteristics (Acoustic Simulator)
- Using the Knobs
- Using the Pitch Bend Wheel
- Using the Arpeggiator
- Splitting the Keyboard for Duet Play
- Changing the Scale Tuning (Temperament) of the Keyboard
- Using Auto Accompaniment
- Selecting a Rhythm
- Playing Auto Accompaniment
- Auto Accompaniment Pattern Variations
- Triggering Auto Accompaniment Play with Accompaniment Keyboard Input (Synchro Start)
- Using the Keyboard to Control the Auto Accompaniment Pattern (Keyboard Controller Mode)
- Selecting a Chord Input Mode
- Using One-Touch Preset
- Using Auto Harmonize
- Changing the Auto Accompaniment and Song Tempo
- Using Music Preset
- Registering and Restoring a Setup (Registration)
- Using the MIDI Recorder to Record Performances
- Using the Audio Recorder to Record Performances
- Listening to Songs (MIDI Player)
- Configuring Function Settings (FUNCTION Mode)
- Using Operation Lock
- Configuring MIDI Settings
- Deleting All Data in Digital Piano Memory
- USB Flash Drive
- Supported USB Flash Drives
- USB Flash Drive and USB Type A Port Handling Precautions
- Connecting a USB Flash Drive to and Detaching It from the Digital Piano
- Formatting a USB Flash Drive
- USB Flash Drive Operations
- Using a Computer to Copy General Song Data to a USB Flash Drive
- Storing Standard Audio Data (WAV Files) to a USB Flash Drive
- Linking with a Smart Device (APP Function)
- Troubleshooting
- Reference
- MIDI Implementation Chart

Digital Piano Operations
EN-38
There are two ways to change the tempo (beats per minute)
setting: using buttons to specify a tempo value, and tapping a
beat with a keyboard key or a pedal.
• You can specify use of a letter (T) or an icon (2) as the
display indicator to the left of the tempo value. To specify
the indicator type, use FUNCTION parameter 113 (“Tempo
Indicator”). For information about FUNCTION parameters,
see “Configuring Function Settings (FUNCTION Mode)”
(page EN-53).
■ To specify a tempo value
1.
Touch bm TEMPO.
The current tempo value will be shown on the display.
2.
Use the bk – and bl + buttons to adjust the
tempo value.
• You can specify a tempo value in the range of 20 to
255.
• To return the currently selected song, rhythm pattern,
or music preset to its recommended tempo setting,
touch bk – and bl + at the same time.
3.
To exit the setting screen, touch bm TEMPO or
bp EXIT.
■ To use the keyboard key or a pedal to adjust the
tempo
1.
Hold down the bm TEMPO button.
This causes “TAP” to appear to the right of [TEMPO] on
the display.
2.
Press a keyboard key or a pedal at least twice
in succession.
• This will set a tempo that corresponds to the speed at
which you pressed the keyboard key or pedal.
3.
Release bm TEMPO.
• You can use the above steps to set an approximate
tempo and then use the steps under “To specify a
tempo value” to fine tune the setting.
• Note that an expression pedal cannot be used to set a
tempo using the above procedure.
Selecting a Music Preset instantly changes the Digital Piano
to a preset setup (tone, rhythm, chord progression, etc.) for
play of songs of various genres/categories. The press of a
button sets up the Digital Piano so those songs sound exactly
the way you thought they should. See the separate “Built-in
Music Data Lists” for a complete list of the 310 Music Presets
that are available.
■ To perform using a music preset
1.
Use the 3 mode selector button to cycle
through setting until the “RHYTHM” or
“ACCOMP” indicator is lit.
2.
Use the bp^ button to cycle through settings
until the “^RHYTHM” indicator to the right of
the button is lit.
3.
Hold down the bq POPS button until “[MUSIC
PRESET]” appears on the display.
This enters the Music Preset Mode and causes the 3
mode selector button “ACCOMP” indicator to flash.
• The name and number of the currently selected music
preset will be shown on the display.
• This enters synchro start standby, which is indicated
by the flashing yellow and red LEDs above the
8 START/STOP button.
Changing the Auto
Accompaniment and Song Tempo
[
TE
M
PO
]
T : 120
120
Using Music Preset
or
[
M
US I C PRESET
]
T : 124
001 :So f t Po
p
Music preset number Music preset name