
User manual
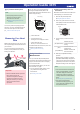
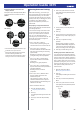
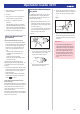

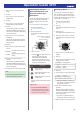
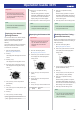
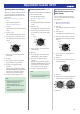

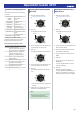
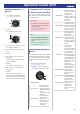
Table Of Contents
- Before Getting Started...
- Time Adjustment
- Using Mobile Link with a Mobile Phone
- Getting Ready
- Auto Time Adjustment
- Viewing Training Records
- Viewing Life Log Related Data
- Setting Target Values
- Creating a Training Plan
- Specifying Checkpoints Along a Running Course (Altitude Navigation)
- Specifying the Alert Interval (Target Alert)
- Specifying the Distance for Auto Lap Timing
- Setting Up Programmable Timers
- Configuring World Time Settings
- Setting the Alarm
- Phone Finder
- Configuring Watch Settings
- Connection
- Measuring Your Heart Rate
- Using the Training Function
- Run Timing
- Changing Display Information During Run Timing
- Changing the GPS Receive Interval
- Checking the Altitude Differential Between Your Current Location and a Checkpoint
- Setting Up Alerts
- Displaying Your Actual Running Distance
- Specifying the Distance Unit
- Enabling Auto Run Timing (Auto Run Detection)
- Enabling Auto Lap Timing
- Enabling Auto Pause
- Specifying the Screen to be Displayed During Running (RUN FACE)
- Settings Configured with the Application
- Run Timing Precautions
- Viewing Training Log Records
- Viewing Your Training Performance Condition
- Receiving Phone Notifications
- Digital Compass
- Altitude Measurement
- Barometric Pressure and Temperature Measurement
- Checking the Current Barometric Pressure and Temperature
- Barometric Pressure Change Indications
- Calibrating Barometric Pressure Readings
- Calibrating Temperature Readings
- Changing Displayed Information
- Specifying the Barometric Pressure Unit
- Specifying the Temperature Unit
- Barometric Pressure and Temperature Reading Precautions
- Timer
- Stopwatch
- World Time
- Alarms
- Pedometer
- Other Settings
- Other Information
- Troubleshooting

Important!
●
To specify the alert interval for each
item, use G-SHOCK MOVE. Note that
you cannot configure settings using
watch operations.
Note
●
You can also use G-SHOCK MOVE to
enable or disable alerts.
Displaying Your Actual
Running Distance
You can select either of two distance display
types: horizontal distance (straight-line
distance) or surface distance (actual
distance).
The surface distance display is calculated by
taking horizontal travel as well as vertical
movement into consideration.
1. Enter the Timekeeping Mode.
l
Navigating Between Modes
2. Press (C).
This displays the GPS signal receive start
screen.
3. Press (A) or (D).
This displays the Training Mode screen.
4. Hold down (A) for at least two seconds.
This displays the Training Mode setting
screen.
Pointer
5. Use (A) and (D) to move the pointer to
[DISTANCE].
6. Press (C).
7. Use (A) and (D) to move the pointer to [3D
DISTANCE].
8. Press (C).
9. Use (A) and (D) to select a setting.
[OFF] Displays horizontal distance.
[ON] Displays surface distance.
10. Press (C) to complete the setting
operation.
After the setting operation is complete,
[SETTING COMPLETED] will appear for
a few seconds, and then the distance
display setting screen will re-appear.
11. Press (E) twice to exit the setting screen.
Note
●
You can also use G-SHOCK MOVE to
change the distance display type.
Specifying the Distance Unit
Important!
●
When Tokyo (TOKYO) is the Home
City, the distance unit is fixed as
kilometers (km) and cannot be
changed.
1. Enter the Timekeeping Mode.
l
Navigating Between Modes
2. Hold down (A) for at least two seconds.
This displays the Timekeeping Mode
setting screen.
Pointer
3. Use (A) and (D) to move the pointer to
[UNIT].
4. Press (C).
5. Use (A) and (D) to move the pointer to
[DISTANCE].
6. Press (C).
7. Use (A) and (D) to select a distance unit.
[KILOMETER] Kilometers
[MILE] Miles
8. Press (C) to complete the setting
operation.
After the setting operation is complete,
[SETTING COMPLETED] will appear for
a few seconds, and then the unit setting
screen will re-appear.
9. Press (E) twice to exit the setting screen.
Note
●
You can also use G-SHOCK MOVE to
change the distance unit.
Enabling Auto Run Timing
(Auto Run Detection)
Starting to run while Auto Run Timing (auto run
detection) is enabled will cause run timing to
start automatically.
1. Enter the Timekeeping Mode.
l
Navigating Between Modes
2. Hold down (A) for at least two seconds.
This displays the Timekeeping Mode
setting screen.
Pointer
3. Use (A) and (D) to move the pointer to
[AUTO RUN DETECTION].
4. Press (C).
5. Use (A) and (D) to move the pointer to
[ON] (enabled) or [OFF] (disabled).
6. Press (C) to complete the setting
operation.
After the setting operation is complete,
[SETTING COMPLETED] will appear for
a few seconds, and then the Timekeeping
Mode setting screen will re-appear.
7. Press (E) to exit the setting screen.
Note
●
You can also use G-SHOCK MOVE to
enable or disable Auto Run Timing
(auto run detection).
Operation Guide 3475
26