
User manual - EXZS20_Z690_M29_FC


Table Of Contents
- Accessories
- Read this first!
- Contents
- General Guide
- Monitor Screen Contents
- Quick Start Basics
- What you can do with your CASIO camera
- First, charge the battery prior to use.
- Configuring Basic Settings the First Time You Turn On the Camera
- Preparing a Memory Card
- Turning the Camera On and Off
- Holding the Camera Correctly
- To shoot a snapshot
- Viewing Snapshots
- Deleting Snapshots and Movies
- Snapshot Shooting Precautions
- Snapshot Tutorial
- Recording Movie Images and Audio
- Using BEST SHOT
- Advanced Settings
- Using On-screen Menus
- REC Mode Settings (REC)
- Selecting a Focus Mode (Focus)
- Changing the Focus Frame Shape (Focus Frame)
- Using Continuous Shutter (CS)
- Reducing the Effects of Camera and Subject Movement (Anti Shake)
- Specifying the Auto Focus Area (AF Area)
- Assigning Functions to the [<] and [>] Keys (L/R Key)
- Displaying the On-screen Grid (Grid)
- Using Icon Help (Icon Help)
- Configuring Power On Default Settings (Memory)
- Image Quality Settings (Quality)
- Viewing Snapshots and Movies
- Other Playback Functions (PLAY)
- Printing
- Using the Camera with a Computer
- Other Settings (Set Up)
- Turning off Eye-Fi Card Communication (Eye-Fi)
- Configuring Camera Sound Settings (Sounds)
- Configuring a Startup Image (Startup)
- Specifying the File Name Serial Number Generation Rule (File No.)
- Configuring World Time Settings (World Time)
- Time Stamping Snapshots (Timestamp)
- Setting the Camera’s Clock (Adjust)
- Specifying the Date Style (Date Style)
- Specifying the Display Language (Language)
- Configuring Sleep State Settings (Sleep)
- Configuring Auto Power Settings (Auto Power Off)
- Configuring [_] and [>] Settings (REC/PLAY)
- Disabling File Deletion (_ Disabled)
- Configuring USB Protocol Settings (USB)
- Selecting the Screen Aspect Ratio and Video Output System (Video Out)
- Formatting Built-in Memory or a Memory Card (Format)
- Resetting the Camera to Factory Defaults (Reset)
- Appendix
95
Using the Camera with a Computer
Install the required software in accordance with what version of the Macintosh OS
you are running and what you want to do.
IMPORTANT!
• The camera does not support operation with Mac OS X 10.0. Operation is
supported with Mac OS 10.1, 10.2, 10.3, 10.4, 10.5, 10.6, and 10.7 (using the OS
standard USB driver) only.
NOTE
• You also can use your computer’s card slot (if it has one) or a commercially
available card reader to access image files directly from the camera’s memory
card. For details, see the user documentation that comes with your computer.
. To connect the camera to your computer and save files
1. Turn on the camera. Next, press [SET] and then display the REC menu
(page 55) or the PLAY menu (page 71).
2. On the “Set Up” tab, select “USB” and then press [6].
3. Use [8] and [2] to select “Mass Storage”, and then press [SET].
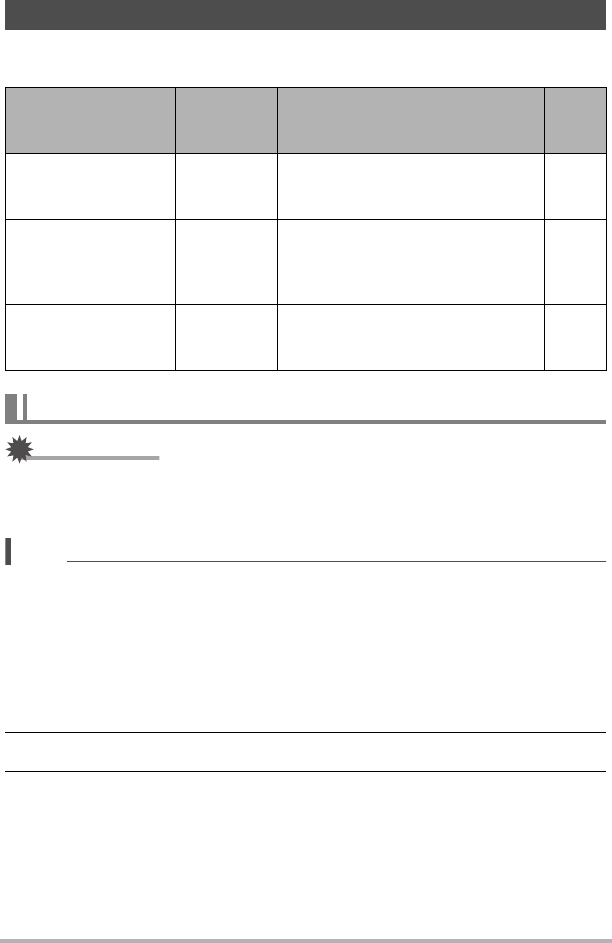
Using the Camera with a Macintosh
When you want to do
this:
Operating
System
Version
Install this software:
See
page:
Save images to your
Macintosh and view
them there manually
OS X Installation not required. 95
Save images to your
Macintosh
automatically/Manage
images
OS X
Use iPhoto, which comes bundled
with some Macintosh products.
–
Play movies OS X
You can playback with QuickTime,
which comes bundled with your
operating system.
98
Connecting the Camera to Your Computer and Saving Files