
User manual - EXFS10_M10_FB
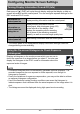
Table Of Contents
- Unpacking
- Read this first!
- Contents
- General Guide
- Monitor Screen Contents
- Quick Start Basics
- What is a digital camera?
- What you can do with your CASIO camera
- First, charge the battery prior to use.
- Configuring Basic Settings the First Time You Turn On the Camera
- Preparing a Memory Card
- Turning the Camera On and Off
- To shoot a snapshot
- Holding the Camera Correctly
- Viewing Snapshots
- Deleting Images
- Snapshot Shooting Precautions
- Snapshot Tutorial
- Using the Control Panel
- Changing the Image Size (Size)
- Specifying ISO Sensitivity (ISO)
- Adjusting White Balance (White Balance)
- Correcting Image Brightness (EV Shift)
- Shooting with Slow Motion View
- Using Lag Correction (Lag Correction)
- Using Flash (Flash)
- Changing the Control Panel Date/Time Style
- Shooting with Zoom
- Using Continuous Shutter
- Recording Movies
- Using BEST SHOT
- What is BEST SHOT?
- To shoot with BEST SHOT
- Shooting with High Speed Night Scene (High Speed Night Scene)
- Shooting with High Speed Anti Shake (High Speed Anti Shake)
- Isolating Moving Subjects (Multi-motion image)
- Shooting with Priority on Subject Faces (High Speed Best Selection)
- Shooting an Image in Accordance with Subject Movement (Move Out CS/Move In CS)
- Advanced Settings
- Using On-screen Menus
- REC Mode Settings (REC)
- Selecting a Focus Mode (Focus)
- Using the Self-timer (Self-timer)
- Reducing the Effects of Camera and Subject Movement (Anti Shake)
- Specifying the Auto Focus Area (AF Area)
- Using the Auto Focus Assist Light (AF Assist Light)
- Shooting with Face Detection (Face Detection)
- Shooting with Continuous Auto Focus (Continuous AF)
- Changing the Continuous Shutter Mode (CS)
- Configuring the Continuous Shutter Image Save Method (Save CS Images)
- Turning Digital Zoom On or Off (Digital Zoom)
- Assigning Functions to the [<] and [>] Keys (L/R Key)
- Shooting with Quick Shutter (Quick Shutter)
- Displaying the On-screen Grid (Grid)
- Turning on Image Review (Review)
- Using Icon Help (Icon Help)
- Configuring Power On Default Settings (Memory)
- Image Quality Settings (Quality)
- Specifying Snapshot Image Quality (_ Quality (Snapshot))
- Movie Image Quality Settings (_ Quality (Movie))
- Setting the High Speed Movie Frame Rate (HS _ Speed)
- Specifying the Metering Mode (Metering)
- Optimizing Image Brightness (Lighting)
- Specifying Flash Intensity (Flash Intensity)
- Using Built-in Color Filters (Color Filter)
- Controlling Image Sharpness (Sharpness)
- Controlling Color Saturation (Saturation)
- Adjusting Image Contrast (Contrast)
- Viewing Snapshots and Movies
- Other Playback Functions (PLAY)
- Playing a Slideshow on the Camera (Slideshow)
- Creating a Snapshot of Movie Frames (MOTION PRINT)
- Editing a Movie on the Camera (Movie Editing)
- Adjusting White Balance (White Balance)
- Adjusting the Brightness of an Existing Snapshot (Brightness)
- Selecting Images for Printing (DPOF Printing)
- Protecting a File Against Deletion (Protect)
- Rotating an Image (Rotation)
- Resizing a Snapshot (Resize)
- Cropping a Snapshot (Trimming)
- Copying Files (Copy)
- Dividing Up a Continuous Shutter Group (Divide Group)
- Editing a CS Image (CS Frame Edit)
- Printing
- Using the Camera with a Computer
- Other Settings (Set Up)
- Adjusting Monitor Screen Brightness (Screen)
- Turning off Eye-Fi Card Communication (Eye-Fi)
- Configuring Camera Sound Settings (Sounds)
- Specifying the File Name Serial Number Generation Rule (File No.)
- Configuring World Time Settings (World Time)
- Time Stamping Snapshots (Timestamp)
- Setting the Camera’s Clock (Adjust)
- Specifying the Date Style (Date Style)
- Specifying the Display Language (Language)
- Configuring Sleep State Settings (Sleep)
- Configuring Auto Power Off Settings (Auto Power Off)
- Configuring [_] and [>] Settings (REC/PLAY)
- Configuring USB Protocol Settings (USB)
- Selecting the Screen Aspect Ratio and Video Output System (Video Out)
- Configuring a Startup Image (Startup)
- Formatting Built-in Memory or a Memory Card (Format)
- Resetting the Camera to Factory Defaults (Reset)
- Configuring Monitor Screen Settings
- Appendix

159
Appendix
. Data Error Precautions
Your digital camera is manufactured using precision digital components. Any of the
following creates the risk of corruption of data in camera memory.
– Removing the battery or memory card while the camera is performing some
operation
– Removing the battery or memory card while the back lamp is flashing green after
turning off the camera
– Disconnecting the USB cable while communication is in progress
– Using a battery that is low
– Other abnormal operations
Any of the above conditions can cause an error message to appear on the monitor
screen (page 174). Perform the action indicated by the message that appears.
. Operating Environment
• Operating Temperature: 0 to 40°C (32 to 104°F)
• Operating Humidity: 10 to 85% (non condensation)
• Do not place the camera in any of the following locations.
– In an area exposed to direct sunlight, or large amounts of moisture, dust, or
sand.
– Near an air conditioner or in other areas subjected to extreme temperature or
humidity
– Inside of a motor vehicle on a hot day, or in an area subjected to strong vibration
. Condensation
Sudden and extreme temperature changes, such as when the camera is moved from
the outdoors on a cold winter day into a warm room, can cause water droplets called
“condensation” to form on the interior and the exterior of the camera, which creates
the risk of malfunction. To prevent condensation from forming seal the camera in a
plastic bag before changing locations. Then leave the bag sealed to allow the air
inside to naturally change to the same temperature as the air in the new location.
After that, remove the camera from the bag and open the battery cover for a few
hours.
. Lens
• Never apply too much force when cleaning the surface of the lens. Doing so can
scratch the lens surface and cause malfunction.
• You may sometimes notice some distortion in certain types of images, such as a
slight bend in lines that should be straight. This is due to the characteristics of
lenses, and does not indicate malfunction of the camera.