
User Manual
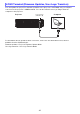
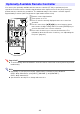

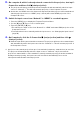
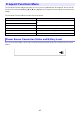
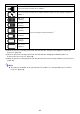
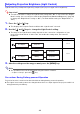
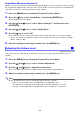
Table Of Contents
- Contents
- Safety Precautions
- Operating Precautions
- About the Light Source Unit
- Do not block light output or look directly into the lens!
- Laser Precautions (See the label on the projector)
- AC Adapter Precautions
- Battery (Optional YA-B10) Precautions
- Soft Inner Case (Optional YB-3) Precautions
- Other Precautions
- Precautions when Handling the Projector after Use
- Getting Ready
- Operating the Projector
- Cleaning the Projector
- Troubleshooting
- Appendix
- Specifications

50
(Network model only)
The procedure below toggles the current input source setting between “Network” and “HDMI”.
1.
Press the [MENU] key to display the Frequent Functions Menu.
2.
Use the [] and [] keys to select “Switch Input”.
3.
Press the [ENTER] or [] key.
This toggles the input source setting and closes the menu.
Note
The operation below can be performed using the remote controller.
– In place of steps 1 and 2, press the [INPUT] key.
This displays the Frequent Functions Menu with “Switch Input” selected.
You can use the Setup Menu to adjust the projected image (brightness, contrast, etc.) and to change
other projector settings.
1.
Press the [MENU] key to display the Frequent Functions Menu.
2.
Press the [] key, select “Setup Menu”, and then the [ENTER] key.
This displays the Setup Menu.
Changing the Input Source N
Using the Setup Menu
Displaying the Setup Menu