BE-300 Getting Started with the CASSIOPEIA (Hardware Manual) User documentation consists of two manuals: CASSIOPEIA User’s Guide and this booklet. Be sure to read this manual first. Be sure to read the Safety Precautions contained in this manual to ensure proper operation of this product. Keep this manual in a safe place for future reference.
• Microsoft, Outlook, Windows, Windows NT and the Windows logo are either registered trademarks or trademarks of Microsoft Corporation in the United States and/or other countries. • Pentium is a registered trademark of Intel Corporation. • CompactFlash is a registered trademark of SanDisk Corporation. • All other product and company names mentioned herein may be the trademarks of their respective owners.
Safety Precautions Congratulations upon your selection of the CASSIOPEIA. Be sure to read the following Safety Precautions before trying to use it for the first time. Note All mentions of “the unit” in the following precautions refer to the CASSIOPEIA. Markings and Symbols The following are the meanings of the markings and symbols used in these Safety Precautions. Danger This symbol indicates information that, if ignored or applied incorrectly, creates the danger of death or serious personal injury.
Precautions During Use Warning Abnormal Conditions • Continued use of the unit while it is emitting smoke or strange odor creates the danger of fire and electrical shock. Immediately turn off power, unplug the AC adapter from the wall outlet, remove batteries, and contact your original dealer or an authorized CASIO service provider to request servicing.
Caution Memory Protection • Be sure to keep separate copies of all important data by saving it on a computer hard disk or other medium. Note that all data stored in unit memory is deleted whenever batteries go dead. Memory contents can also become lost or corrupted due to malfunction and repair of the unit. Location • Do not locate the unit in an area subjected to large amounts of humidity or dust. Doing so can create the danger of fire and electrical shock.
AC Adapter Warning • Never use a voltage that is different from that for which the AC adapter is rated. Also, do not plug the unit into a power outlet that is shared by other devices. Doing so creates the danger of fire and electrical shock. • Never modify the power cord or excessively bend, twist, or pull it. Doing so creates the danger of fire and electrical shock. • Do not allow the power cord to become damaged. Do not place heavy objects on the power cord or expose it to heat.
Display Screen Precautions Caution • Never apply strong pressure to the LCD screen or subject it to strong impact. Doing so can cause the LCD panel glass to crack or break. • Should the LCD panel glass ever crack or break, never touch the liquid inside of the panel. LCD liquid can lead to skin irritation. • Should LCD panel liquid ever get into your mouth, gargle with water and contact your physician immediately.
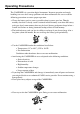
Operating Precautions The CASSIOPEIA is a precision digital instrument. Incorrect operation and rough handling can cause data storage problems and other malfunction. Be sure to read the following precautions to ensure proper operation. • Charge the battery pack as soon as possible when its power goes low.
• Never insert foreign objects into connectors, slots, or other openings. • Take care to avoid spilling water or drinks on the CASSIOPEIA. • Use only the stylus that comes with the CASSIOPEIA to press the [RESET] button. • Never use a pen, pencil, or other sharp writing implement. Doing so can scratch the touch screen and cause malfunction. • Never use thinner, benzene, cosmetics, or other volatile agents to clean the exterior of the CASSIOPEIA.
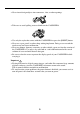
Built-in Battery Pack Service Life Though the built-in battery pack is rechargeable, it requires periodic replacement after it is used for a long time. If the message “Internal Battery Warning The internal battery is low. Continued use may result in loss of ability to store data. Charge the battery as soon as possible.
2. Disconnect the battery pack connector and remove the battery pack.
Contents Safety Precautions ............................................................................................ 3 Health Precautions .................................................................................................. 3 Precautions During Use .......................................................................................... 4 Built-in Battery Pack .............................................................................................. 5 AC Adapter .......................
Using a CompactFlash Card ................................................................................. 27 To install a CompactFlash card ...................................................................... 28 Using a PC Card Unit ........................................................................................... 29 To connect your CASSIOPEIA to the PC Card Unit ..................................... 29 To remove the CASSIOPEIA from the PC Card Unit ...................................
Getting Ready Initial Setup After you first unpack your CASSIOPEIA, perform the following initial setup procedure before using it for the first time. 1. Use the AC adapter to charge the battery pack. Important • Make sure you charge the battery pack before using your CASSIOPEIA for the first time. The CASSIOPEIA will not work until you charge its battery pack. 2. While holding down the [Power] button, use the stylus to press the [Reset] button. • This displays the initialization startup screen.
Where to go for information... Your CASSIOPEIA comes with two manuals: this Hardware Manual and a separate CASSIOPEIA User’s Guide. Be sure to read the contents of this Hardware Manual first. What should I do after reading this Hardware Manual? Read the CASSIOPEIA User’s Guide next to find out about the powerful software features and functions available on the CASSIOPEIA.
Operations General Guide Charge indicator (Amber) Lights amber when the battery pack is charging and goes off when full charge is achieved. Card slot Stylus Strap hole Touch screen Perform operations and input data by tapping and writing directly on the screen. Fixed Icons Tap an icon to launch the program assigned to it. See the CASSIOPEIA User’s Guide for details. Power button Turns power on and off. Top Menu button Press to display the Top Menu. See the CASSIOPEIA User’s Guide for details.
Using the Stylus Data input and virtually all other operations are performed using a stylus, which is housed inside the stylus holder in the higher right corner of the CASSIOPEIA. The following defines the various operations that you can perform with the stylus. Tap ...................... Touch the screen once with the stylus to select a screen item. Drag .................... Hold the stylus on the screen and drag across the screen to select text and images. Drag in a list to select multiple items.
Removing the cover Gently pull outwards on either of the cover hinges indicated by the arrows in the illustration until the hinge is free, and then remove the cover. Make sure you do not apply excessive force when removing the cover. Recalibrating the Touch Screen You should recalibrate the touch screen whenever touch screen response is bad, or when the operation performed is different from the operation you expected when tapping on the touch screen.
Adjusting Display Brightness Use the following operations to adjust display brightness to make it easier to read. 1. Press the [Top Menu] button to display the Top Menu, and then tap Settings Brightness. 2. On the dialog box that appears, tap the Brightness tab. 3. Follow the instructions that appear on the screen for adjusting the brightness. • You can also adjust brightness as follows.
Changing the Cradle Configuration The cradle has a back board which you can set to any one of the three positions shown in the illustration below. Use the position that suits the configuration of the CASSIOPEIA unit you are setting on the cradle. CASSIOPEIA + PC Card Unit CASSIOPEIA + External Power Pack CASSIOPEIA Only Important Make sure that CASSIOPEIA power is turned off before you place it onto or remove it from the cradle. Use the following procedure to place the unit onto the cradle. 1.
4. Orient the CASSIOPEIA in relation to the cradle as shown in the illustration below. 5. Taking care to align the serial connector on the bottom of the CASSIOPEIA with the connector on the cradle, lower the CASSIOPEIA into the cradle as shown in the illustration below. Important • Make sure the CASSIOPEIA lowers securely into the cradle as far as it can go. • While the CASSIOPEIA is on the cradle, take care to keep its serial connector cover in a safe place.
Connecting the Cradle to a Computer The cradle has a USB cable for connection to a computer. Connect the end of the cable to a USB port of the computer to which you want to connect. Important • See “Required System Configuration” on page 24 for details on the type of computer system required for use with the cradle. USB port • The above illustration is one example of possible connection configurations. The locations and layouts of USB ports vary from computer to computer.
To connect to a computer using the CASSIOPEIA USB cable Important Before connecting your CASSIOPEIA to a computer, make sure you first install the PC Connect software on your computer. Use the steps below to connect the CASSIOPEIA to your computer when prompted to do so during the software installation procedure. 1. Plug the USB cable into the USB port of your computer. 2. Turn off your CASSIOPEIA. 3. Connect the other end of the USB cable to your CASSIOPEIA.
To connect to a computer using the CASSIOPEIA serial cable Important Before connecting your CASSIOPEIA to a computer, make sure you first install the PC Connect software on your computer. Use the steps below to connect the CASSIOPEIA to your computer when prompted to do so during the software installation procedure. 1. Plug the serial cable into the serial port of your computer. 2. Turn off your CASSIOPEIA. 3. Connect the other end of the serial cable to your CASSIOPEIA.
• 16 MB of memory for Windows 95/98 (more memory will give improved performance) or Windows NT Workstation 4.
Using the AC Adapter You can use the AC adapter to directly power the CASSIOPEIA or to supply power through the cradle. The battery pack charges while the CASSIOPEIA is directly connected to a power source by the AC adapter or while it is on the cradle. See page 32 for more information. ■ Direct Connection ■ Cradle Connection Warning Use only the AC adapter that is specified for this unit. Use of another type of AC adapter creates the danger of malfunction and bursting of the battery pack.
Using a CompactFlash Card Your CASSIOPEIA supports Type I and Type II CompactFlash Cards (3.3V). The following describes the types of CompactFlash card you can use with your CASSIOPEIA. Storage Card A storage card functions the same as the CASSIOPEIA’s data storage memory. You can use a storage card to store the various files created by your CASSIOPEIA, and you can even install programs on a storage card.
Important • Your CASSIOPEIA comes with a dummy card installed in its card slot. Be sure to remove the dummy card before trying to insert another card. • An empty card slot creates the risk of damage to the slot when pressure is applied to the CASSIOPEIA. Always insert the dummy card when you are using the CASSIOPEIA without a card. To install a CompactFlash card 1. Make sure your CASSIOPEIA is turned off. • Press the [Power] button to turn off power. 2.
Using a PC Card Unit Connecting your CASSIOPEIA to an optional PC Card Unit (JK-865PU) makes it possible for you to use PCMCIA card type PC cards with your CASSIOPEIA. Important • The PC Card Unit has a built-in lithium battery that provides power to the PC card. It comes with an AC adapter that can be used to charge its built-in battery or to connect to a wall outlet for power supply. See the user documentation that comes with the PC Card Unit for details about the built-in battery and the AC adapter.
To remove the CASSIOPEIA from the PC Card Unit 1. Make sure your CASSIOPEIA is turned off. • Press the [Power] button to turn off power. 2. Pulling on your CASSIOPEIA in the direction indicated by the arrow in the illustration, remove it from the PC Card Unit. About Modem Adapter (U.S. and Canada Only) Use of a modem adapter lets you use your CASSIOPEIA to access the Internet over an analog dial-up connection. See the documentation that comes with the modem card for information about how to use it.
User Maintenance About the CASSIOPEIA’s built-in rechargeable battery Note the following precautions concerning the CASSIOPEIA’s rechargeable battery. • We recommend that you use the Power dialog box to keep informed about the current levels of your battery. See the separate CASSIOPEIA User’s Guide for more information about this dialog box. • Icons appear along the bottom of the screen to let you know when battery power is low.
Important Be sure to observe the following important battery handling precautions. Failure to do so can cause batteries to leak, resulting in damage to surrounding items and create the danger of fire and electrical shock. • Charge the battery pack in an area where the temperature is between 10°C (50°F) and 35°C (95°F). Charging in areas that are very cold or exposed to direct sunlight can cause deterioration and leaking of the battery pack.
Remove the CASSIOPEIA from the cradle after charging is complete. The following illustration shows how to connect the AC adapter directly to the CASSIOPEIA for charging. • Charging starts automatically as soon as you attach the AC adapter to the CASSIOPEIA. • Direct connection charging conditions are the same as those described for cradle charging above.
Resetting the CASSIOPEIA and Restoring Data What does resetting the CASSIOPEIA do? Resetting your CASSIOPEIA is the same as restarting your computer. Performing a reset causes any data you are working on but have not saved yet to be lost, but data saved in memory and other settings are basically left unchanged. You should perform the reset operation whenever your CASSIOPEIA behaves abnormally due to operational error or some other problem. The reset operation is required in the following cases.
• The Top Menu should appear on the display after a short while. Since this procedure does not affect data and settings stored in memory, you can now continue using the CASSIOPEIA. What to do if resetting does not solve the problem Perform the following steps if resetting the CASSIOPEIA does not restore normal operation. 1. While holding down the [Power] button, use the stylus to press the [Reset] button. • This displays the initialization startup screen. 2. The message “Starting...
To restore data backed up to a computer 1. Connect the AC adapter to the CASSIOPEIA. 2. Press the [Power] button. 3. While holding down the [OK] button, use the stylus to press the [Reset] button. • This enters the Safe Mode. 4. Tap the [OK] button. • This displays the touch screen calibration screen. Follow the instructions on the display to calibrate the touch screen. • The following screen appears after you finish touch screen calibration. 5.
7 On the PC Connect initial screen, select [Restore] on the [Tool] menu. • This displays the [Restore] dialog box. 8. Select the back up file you want to restore, and then click [OK]. • This starts restoration, which is indicated by messages on the screens of your computer. • After restoration is complete, a message appears on your computer screen asking if you want to restart your CASSIOPEIA. 9. Click [OK]. • This restarts your CASSIOPEIA. 10.
• This displays the touch screen calibration screen. Follow the instructions on the display to calibrate the touch screen. • The following screen appears after you finish touch screen calibration. 5. Insert the storage card that contains the backed up data into the CASSIOPEIA’s card slot. 6. Tap [Storage Card]. • This starts the backup operation. 7. Tap [Restore]. • This displays the dialog box shown below. If you protected data with a password when backing it up, input the password here.
8. Tap [Yes] to start the restore operation. 9. In response to the “Restore complete” message that appears after restoration is complete, tap [OK]. • This automatically resets the CASSIOPEIA, so wait a few moments until it starts up. Restoring Factory Defaults You can use the procedure below to restore the CASSIOPEIA to its factory defaults in the following cases.
5. Start up your computer (which should have PC Connect installed on it), start up PC Connect, and establish a connection between the computer and your CASSIOPEIA. 6. Tap [PC Connection]. • This establishes a connection between your CASSIOPEIA and computer. In response to the dialog box that appears to ask if you want to start up by restoring backup data, tap [OK]. • The following steps are performed in PC Connect on your computer. 7.
Troubleshooting Before assuming malfunction and contacting your service provider when experiencing operational problems, be sure to check the following information as well as the troubleshooting section of the CASSIOPEIA User’s Guide first. Nothing happens when the [Power] button is pressed. Possible Cause Recommended Action Page The battery is weak. Charge the battery pack. 32 Internal malfunction Reset the unit. 34 Operation is disabled when the AC adapter is connected.
The screen is locked up. Possible Cause Internal malfunction Recommended Action Reset the unit. Page 34 A message about a data error is on the screen. Possible Cause Internal malfunction Recommended Action Follow the instructions that appear on the screen. Page – Some other warning message is on the screen. Possible Cause Internal malfunction Recommended Action Follow the instructions that appear on the screen.
Appendix Button Operations The following shows the function of each button under various conditions. Unit Power Off [Power] Button ........................... Turns on power. Unit Power On [Power] Button + [OK] Button ............................ Launches the touch screen calibration procedure. [Power] Button + Cursor up ................................ Makes contrast darker. [Power] Button + Cursor down ........................... Makes contrast lighter. [Power] Button + Cursor right ......................
Specifications Model: Display: BE-300 240 × 320 dots STN Color LCD (32,768 colors) CPU: VR4131 Memory: ROM 16MB Flash ROM RAM 16MB Interfaces: Serial: RS-232C, 115.2 kbps max. USB (Client) Card Slot: CompactFlash card, 3.3V Type I/TypeII Headphone jack: ø 3.5 mm stereo output Accepts monaural earphone, stereo earphones/headphones Power Supply Rechargeable battery (Lithium-Ion battery) AC adapter (AD-C59200) Power Consumption: 3.
Regulatory Information GUIDELINES LAID DOWN BY FCC RULES FOR USE OF THIS UNIT IN THE U.S.A. (not applicable to other areas). NOTICE This equipment has been tested and found to comply with the limits for a Class B digital device, pursuant to Part 15 of the FCC Rules. These limits are designed to provide reasonable protection against harmful interference in a residential installation.
CASIO ELECTRONICS CO., LTD. Unit 6, 1000 North Circular Road London NW2 7JD, U.K.
CASIO COMPUTER CO., LTD.