
User Manual


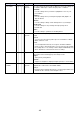
Table Of Contents
- Contents
- Projector Overview
- Operation During Projection
- Configuring Advanced Projector Settings
- Basic Setup Menu Operations
- Password Protecting the Projector
- Restoring Projector Settings to Their Initial Factory Defaults
- Setup Menu Contents
- Image Adjustment 1 Main Menu
- Image Adjustment 2 Main Menu
- Volume Adjustment Main Menu
- Screen Settings Main Menu
- Input Settings Main Menu
- Option Settings 1 Main Menu
- Option Settings 2 Main Menu
- Wired LAN Settings Main Menu (USB Port Models Only)
- USB Settings Main Menu (USB Port Models Only)
- Operational Info Main Menu
- Restore All Defaults Main Menu
- Cleaning the Projector
- Error Indicators and Warning Messages
- Appendix
- Connecting to a Video Device
- Connecting the HDMI Output of a Video Device or Computer to the Projector
- Remote Controller Signal Range
- Hanging the Projector from a Ceiling
- Projection Distance and Screen Size
- Aspect Ratio Setting and Projection Image
- Supported Signals
- Using Wired LAN to Control the Projector (XJ-H1650, XJ-H1750, XJ-ST145, XJ-ST155)
- Projector RS-232C Control
- Specifications
28
To restore all settings on the setup menu to their initial factory defaults
1.
Press the [MENU] key to display the setup menu.
2.
Use the [T] key to select “Restore All Defaults” and then press the [ENTER] key.
3.
After confirming that “Restore All Defaults” sub-menu is selected, press the
[ENTER] key.
z This displays a confirmation message asking if you want to initialize all settings.
4.
Use the [S] key to select “Yes”.
5.
To restore all settings on the setup menu to their initial defaults, press the
[ENTER] key.
z This will restore all of the settings to their initial factory defaults, except for the Language,
Light Time, Unit Operating Time and password settings.
z To exit the operation without doing anything, press [ESC] instead of [ENTER].
6.
After you are finished, press the [MENU] key to exit the setup menu.