
User Manual

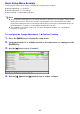


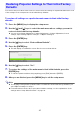


Table Of Contents
- Contents
- Projector Overview
- Operation During Projection
- Configuring Advanced Projector Settings
- Basic Setup Menu Operations
- Password Protecting the Projector
- Restoring Projector Settings to Their Initial Factory Defaults
- Setup Menu Contents
- Image Adjustment 1 Main Menu
- Image Adjustment 2 Main Menu
- Volume Adjustment Main Menu
- Screen Settings Main Menu
- Input Settings Main Menu
- Option Settings 1 Main Menu
- Option Settings 2 Main Menu
- Wired LAN Settings Main Menu (USB Port Models Only)
- USB Settings Main Menu (USB Port Models Only)
- Operational Info Main Menu
- Restore All Defaults Main Menu
- Cleaning the Projector
- Error Indicators and Warning Messages
- Appendix
- Connecting to a Video Device
- Connecting the HDMI Output of a Video Device or Computer to the Projector
- Remote Controller Signal Range
- Hanging the Projector from a Ceiling
- Projection Distance and Screen Size
- Aspect Ratio Setting and Projection Image
- Supported Signals
- Using Wired LAN to Control the Projector (XJ-H1650, XJ-H1750, XJ-ST145, XJ-ST155)
- Projector RS-232C Control
- Specifications

23
To configure the “Image Adjustment 1 J Color Mode” setting
5.
Use the [T] key to select “Color Mode”.
6.
Press the [ENTER] key.
z This displays the color mode menu.
7.
Use the [T] and [S] keys to select the color mode you want, and then press the
[ENTER] key.
8.
After selecting the color mode you want, press the [ESC] key.
To configure the “Input Settings J Signal Name Indicator” setting
9.
Press the [ESC] key.
10.
Use the [T] key to select “Input Settings”.
11.
Press the [ENTER] key.
12.
Use the [T] key to select “Signal Name Indicator”.
13.
Use the [W] and [X] keys to select “On” or “Off”.
14.
After you are finished, press the [MENU] key to exit the setup menu.
Direct Power On
You can configure the projector so it powers up automatically as soon as you plug it into a power
source. With this “Direct Power On” feature, you do not even need to press the [P] (Power) key. To
enable Direct Power On, display the setup menu, and then change the “Direct Power On” setting to
“On”.
Important!
When you have Direct Power On enabled, do not leave the projector plugged into an electrical
outlet while it is turned off. If you do, there is the chance that it (and the light source unit) might
turn on automatically when power is restored after being cut off by a power outage, tripping of a
breaker, etc.
Note
z Direct Power On causes the projector to turn on automatically as soon as it is plugged into a
power outlet. This greatly reduces the amount of time it takes until you are ready to start
projecting. Note, however, that the actual startup sequence (Standby State J Power On J
Projection Starts) that the projector performs is the same, regardless of whether Direct Power
On is enabled or disabled. The only difference is what triggers the sequence (plugging in or
pressing the [P] (Power) key).
z For details about configuring the Direct Power On setting, see “Direct Power On” under
“Option Settings 1 Main Menu” on page 35.