
User Manual

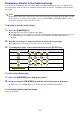


Table Of Contents
- Contents
- Projector Overview
- Operation During Projection
- Configuring Advanced Projector Settings
- Basic Setup Menu Operations
- Password Protecting the Projector
- Restoring Projector Settings to Their Initial Factory Defaults
- Setup Menu Contents
- Image Adjustment 1 Main Menu
- Image Adjustment 2 Main Menu
- Volume Adjustment Main Menu
- Screen Settings Main Menu
- Input Settings Main Menu
- Option Settings 1 Main Menu
- Option Settings 2 Main Menu
- Wired LAN Settings Main Menu (USB Port Models Only)
- USB Settings Main Menu (USB Port Models Only)
- Operational Info Main Menu
- Restore All Defaults Main Menu
- Cleaning the Projector
- Error Indicators and Warning Messages
- Appendix
- Connecting to a Video Device
- Connecting the HDMI Output of a Video Device or Computer to the Projector
- Remote Controller Signal Range
- Hanging the Projector from a Ceiling
- Projection Distance and Screen Size
- Aspect Ratio Setting and Projection Image
- Supported Signals
- Using Wired LAN to Control the Projector (XJ-H1650, XJ-H1750, XJ-ST145, XJ-ST155)
- Projector RS-232C Control
- Specifications

11
3D Input Mode
Your projector supports projection of 3D images. To project a 3D image, first enter the projector’s 3D
input mode, and then select the input source.
Important!
z Separately available 3D glasses (YA-G30) are required in order to view a projected 3D image in
3D.
z Separately available special software (CASIO 3D Converter) is required to project a 3D image
with the projector when a computer (analog RGB) is the input source.
The input sources described below can be selected for projection in the 3D Input Mode.
Note
See “3D Signals (3D Input Mode)” (page 54) for a list of 3D image signals supported by this
projector.
Entering the 3D Input Mode
1.
Press the [INPUT] key to display the input source selection screen.
2.
Select Computer 1 (RGB), Computer 2 (RGB), S-video, or Video as the input
source.
3.
Use the [T] and [S] keys to move the highlighting to “To 3D input mode” and
then press the [ENTER] key.
z This enters the 3D input mode and closes the input source selection screen.
Important!
z You cannot select HDMI or USB as the input source in the 3D input mode. To use either of
these input sources, change the input source setting back to normal input mode.
z When Computer 1 (or Computer 2) is selected as the input source in the 3D input mode, a
component video signal input through the projector’s COMPUTER IN 1 (or COMPUTER IN 2)
terminal is treated as an RGB signal resulting in abnormal image projection.
z Except when using the projector for 3D image projection, you should normally leave it in the
normal input mode.
Input Source Projection Conditions
Computer (Analog RGB) z Any of the following types of 3D image data played back using separately available
special software (CASIO 3D Converter).
– 2D image file converted to a 3D image file using CASIO 3D Converter
– Side-by-side 3D format files
z Signal with 60Hz/120Hz vertical scan frequency
Composite Video, S-video z Field sequential 3D format files recorded with field sequential DVD software, etc.
z Signal with 60Hz vertical scan frequency