Pocket PC CASSIOPEIA IT-10series User s Manual Thank you for purchasing the CASSIOPEIA Rugged PDA. This Manual describes the basic operations of the CASSIOPEIA IT-10 series Rugged PDA. Read this Manual in its entirely before handling or operating the product, and keep it close at hand so it can be easily referenced. DT-10̲0̲Cover.p65 Page 1 04.9.30, 17:27 Adobe PageMaker 6.
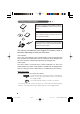
Power Plug and AC Adaptor AC cord plug and wall outlet illustrated in this User's Manual shows the two-pin plug type. It may not be the same shape of AC cord plug used in your area. Rugged PDA AC adaptor has an automatic voltage switching circuit (input: 100 to 240VAC, 50/60Hz) and lets you use your Rugged PDA under AC power virtually anywhere in the world without having an extra power-transformer. Note, however, that AC cord plug shape differs according to area you are in.
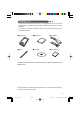
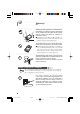
Packing List Thank you for purchasing the Pocket PC "Rugged PDA". A list of the items included with this product is given below. Confirm that nothing is missing or damaged. If anything is missing or damaged, contact the dealer from which you purchased this product. ●Rugged PDA ●Betting Pack ●AC Adoptor ×1 ×1 ●Stylus ●CD-ROM ● User's Manual Us Ma er's nu al Companion ×1 CD Printed materials other than those listed here may be included with the product also.
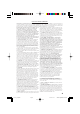
Finding Information... Us ma er's nu al Companion Be sure to read the following END-USER LICENSE AGREEMENT and the "Safety Precautions." You can find more detailed information in the User's Guide; an online manual you can access on a personal computer. ユ ガイーザー ド ズ CD For information on Rugged PDA related products and repairs, refer to the "Contact information" noted later in this manual. The manuals included with your Rugged PDA contain useful information depending on what you want to do.
END-USER LICENSE AGREEMENT PLREASE READ CAREULLY BEFORE USING THIS EQUIPMENT: This End-User license Agreement ("EULA") is a legal agreement between (a) you (either an individual or a single entity) and (b) CASIO COMPUTER CO., LTD. ("CASIO"), that is not otherwise subject to a written license agreement between you and CASIO or its suppliers. The term "Software Product" means computer software and may include associated media, printed materials and "online" or electronic documentation.
EULA for Pocket PC 2003 Operating System You have acquired a device ("Rugged PDA") that includes software licensed by CASIO COMPUTER CO., LTD. (CASIO) in the United States from Microsoft Licensing Inc. or its affiliates ("MS") . Those installed software products of MS origin, as well as associated media, printed materials, and "online" or electronic documentation ("SOFTWARE") are protected by international intellectual property laws and treaties. The SOFTWARE is licensed, not sold. All rights reserved.
3. UPGRADES AND RECOVERY MEDIA DEVICE Software. If the DEVICE Software is provided by the Manufacturer separate from the Rugged PDA on media such as a ROM chip, CD ROM disk(s) or via web download or other means, and is labeled "For Upgrade Purposes Only" or "For Recovery Purposes Only" you may install one copy of such DEVICE Software onto the Rugged PDA as a replacement copy for the existing DEVICE Software and use it in accordance with Section 1 of this EULA. Desktop Software.
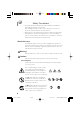
Safety Precautions • To use this product safely and correctly, read this User’s Manual thoroughly and operate as instructed. After reading this guide, keep it close at hand for easy reference. Please keep all informations for future reference. • Always observe the warnings and cautions indicated on the product. • If this Manual is misplaced or damaged so as to be unreadable, a new one can be ordered. To obtain a new User’s Manual, contact the dealer from which this product was purchased.
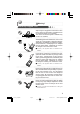
Warning! Handling Rugged PDA ○ ○ ○ ○ ○ ○ ○ ○ ○ ○ ○ ○ ○ ○ ○ ○ ○ ○ ○ ○ ○ ○ ○ ○ ○ ○ ○ ○ ○ ○ ○ ○ ○ ○ ○ ○ ○ ○ ○ ○ ○ ○ Stop using the Rugged PDA and turn it off in places where its operation is prohibited such as on board airliners or in hospitals. The effects of electromagnetic radiation may result in an accident.
Warning! ○ ○ ○ ○ ○ ○ ○ ○ ○ ○ ○ ○ ○ ○ ○ ○ ○ ○ ○ ○ ○ ○ ○ ○ ○ ○ ○ ○ ○ ○ ○ ○ ○ ○ ○ ○ ○ ○ ○ ○ ○ ○ Should you drop Rugged PDA and damage it, immediately shut down the power and unplug the AC adaptor from the power outlet. Continued use creates the danger of shorting, fire and electric shock. ■ Attempting to repair Rugged PDA yourself is ex- tremely dangerous. Contact your authorized distributor for all repair and maintenance.
Warning! ○ ○ ○ ○ ○ ○ ○ ○ ○ ○ ○ ○ ○ ○ ○ ○ ○ ○ ○ ○ ○ ○ ○ ○ ○ ○ ○ ○ ○ ○ ○ ○ ○ ○ ○ ○ ○ ○ ○ ○ ○ ○ Do not place bedding materials on top of the AC adaptor while it is on or place the Rugged PDA on heated flooring or near other heating apparatus during charging. Doing so might cause it to deform, or result in a fire or malfunction.
Warning! Battery Pack ○ ○ ○ ○ ○ ○ ○ ○ ○ ○ ○ ○ ○ ○ ○ ○ ○ Battery (included) ○ ○ ○ ○ ○ ○ ○ ○ ○ ○ ○ ○ ○ ○ ○ ○ ○ ○ ○ ○ ○ ○ ○ ○ ○ ○ ○ ○ ○ ○ ○ ○ Use only the battery pack that comes with Rugged PDA. When the battery pack reaches the end of its life, replace it with a new battery pack as specified by CASIO. Other types of batteries have different voltage rating and polarity, which creates the danger of fire and bursting of the batteries.
Caution! Rugged PDA ○ ○ ○ ○ ○ ○ ○ ○ ○ ○ ○ ○ ○ ○ ○ ○ ○ ○ ○ ○ ○ ○ ○ ○ ○ ○ ○ ○ ○ ○ ○ ○ ○ ○ ○ ○ ○ ○ ○ ○ ○ ○ Do not place Rugged PDA on an unstable or uneven surface. Doing so can cause Rugged PDA to fall, creating the danger of malfunction, fire, and electric shock. ○ ○ ○ ○ ○ ○ ○ ○ ○ ○ ○ ○ ○ ○ ○ ○ ○ ○ ○ ○ ○ ○ ○ ○ ○ ○ ○ ○ ○ ○ ○ ○ ○ ○ ○ ○ ○ ○ ○ ○ ○ ○ Do not leave Rugged PDA in the following areas.
Caution! Power Cord and Peripherals ○ ○ ○ ○ ○ ○ ○ ○ ○ ○ ○ ○ ○ ○ ○ ○ ○ ○ ○ ○ ○ ○ ○ ○ ○ ○ ○ ○ ○ ○ ○ ○ ○ ○ ○ ○ ○ ○ ○ ○ ○ ○ Do not overly bend the power cord, do not allow it to be caught between desks or other furniture, and never place heavy objects on the power cord. Doing so can cause shorting or breaking of the power cord, creating the danger of fire and electric shock.
Before Using Rugged PDA ・This product has been designed and manufactured under stringent quality control. Should you suspect Rugged PDA is defective or malfunctioning, contact your original dealer or authorized distributor. Repair and maintenance are subject to the terms and conditions of the Warranty. The mis-operation of electronic product may create a risk of injury caused by a fire or electric shock, etc. To avoid the accident, be sure to follow the instructions below.
The bottom of Rugged PDA on the AC adaptor becomes warm during use. ・ This is caused by the CPU operation or the current when Rugged PDA's bat- tery is charged. This is not malfunction. The heating value charges according to the condition of use. ・ When Rugged PDA or the AC adaptor is warmer than usual, shut down the power, unplug the power cord of the AC adaptor and remove the battery packs. Contact your original retailer or authorized distributor.
● Cautions when carrying the Rugged PDA ・ Do not put the Rugged PDA into the hip pocket of your trousers and then sit down. Doing so may break it and cause a malfunction. ・ Do not carry Rugged PDA around in a bag containing hard objects with protru- sions. If these objects bump against Rugged PDA or force is applied from above, the display may be scratched or Rugged PDA may malfunction.
● Notes on transfer of ownership of this product Transferring ownership (selling) this product should be done in compliance with item 1 below. Accepting ownership (buying) this product should be done in compliance with item 2 below.
Maintenance and Care ● Normal Care Shut down the power and unplug the power cord from the power outlet before cleaning Rugged PDA. Cleaning Rugged PDA with the power on creates the danger of electric shock. ・ Clean Rugged PDA by wiping it with a soft, dry cloth. If Rugged PDA is very dirty, wipe it with a cloth that has been moistened with a weak solution of water and a mild neutral detergent. Wring out all excess of moisture before wiping.
Storage Follow the procedure below to put the Rugged PDA into storage. Note If you have used the Rugged PDA for a long period, it will have become dusty. We recommend cleaning it before putting it into storage. You can find information about cleaning in the previous section "Maintenance and Care." 1. Back up all the data on the Rugged PDA to a computer if it is necessary. 2. Turn off the power, remove all cables and remove the Rugged PDA from the Basic Cradle and AC adaptor. 3.
Contents Packing List ............................................................................................................... 1 Finding Information ................................................................................................. 2 Safety Precautions .................................................................................................. 6 Before Using Rugged PDA ................................................................................. 13 Maintenance and Care ......
20 DT-10̲19-20.p65 Page 20 04.9.30, 17:27 Adobe PageMaker 6.
G R etting eady 21 DT-10̲1章/21-35.p65 Page 21 04.9.30, 17:27 Adobe PageMaker 6.
Names of Parts and Their Functions Names of Parts and Their Functions Front !7CF card slot !6SD card slot !8Stylus holder !5Eject button qPower switch !4Hand strap hole wIndicator lamp eLCD screen !3Headphone jack !2Reset switch !1Action button rCursor button !0UP/DOWN button tSpeaker oBattery pack cover iInfrared communication port yProgram buttons uMicrophone q Power switch ( ) Press this key to turn the power on or off.
t Speaker Sounds such as the alarm come out of the speaker. Sound does not come out of the speaker when earphones or headphones are connected to the headphone jack. y Program buttons Pushing the program buttons starts the program assigned to that button. The four default settings are, from the upper left, Menu [ ], Calendar [ ], Contents [ ], and Inbox [ ]. u Microphone (MIC) Direct your voice here when recording on the Pocket Word or Memo screen.
Rear !9Stylus !9Stylus @0Hand strap hole @7Power adaptor port @2Battery pack cover lock switch @1Battery pack cover @6Serial connector cover @3Infrared communication port @5Basic Cradle connector @4Serial connector !9 Stylus Use this pen for entering items on the touch panel screen. @0 Hand strap hole You can attach a commercially available hand strap. @1 Battery pack cover This is the cover for the battery pack. @2 Battery pack cover lock switch Be sure to keep the lock switch locked.
@6 Serial connector cover Use this rubber cover when not using the serial I/F. @7 Power adaptor port ( ) Connect the power cord from the AC adaptor to this port. Remove the rubber cover to use it. Operating the Rugged PDA About buttons on the side The buttons on the side of the Rugged PDA can be used for the following operations. Pressing the Action button Operates as the Enter key on the computer. For example, press the Action button to accept the item selected on the menu.
Important • Take care to avoid misplacing the stylus. • Take care to avoid damaging or breaking the tip of the sty- lus. • Keep the tip of the stylus and the Rugged PDA screen clean and free of dirt. Performing stylus operations when the stylus or screen is dirty can damage the screen. Stylus operations Your device has hardware buttons that control actions and scroll functions, and a stylus for selecting items and entering information.
Connecting the strap It is possible to attach a commercially available hand strap. Attaching the Screen Protect Sheet Follow the procedure below to attach the screen protect sheet (No. HA-C90PS5). Important • Do not press strongly on the LCD screen when attaching the screen protect sheet. Doing so may break the screen. 1. Turn off the power, remove any dust from the LCD screen. 2. Remove the film (green) from the front of the screen protect sheet.
3. Hold the screen protect sheet with the front side facing forward, position the cut out part to the lower left of the screen, and insert it into the screen edges. • Be careful not to let dust or dirt get in between the screen protect sheet and the screen. Using the Rugged PDA while dust or dirt is under the screen protect sheet may damage the screen. 28 DT-10̲1章/21-35.p65 Page 28 04.9.30, 17:27 Adobe PageMaker 6.
Power Supply The Rugged PDA uses an AC adaptor to connect to an outside power source or to recharge the batteries. Attach the battery pack and charge the Rugged PDA's battery until it is full to do the initial setup when using it for the first time or after not using it for a long period, and when the battery is low. Caution! Use the battery pack provided or a battery pack specified by the manufacture. Using a battery pack that is not specified by the manufacturer may cause a fire.
Attaching and Removing the Battery Pack Attaching 1. Turn the Rugged PDA over. slide the battery pack cover lock switches with the end of the stylus to FREE (q), and remove the battery pack cover. q LOCK→FREE 2. Align the battery pack with the slot and insert it into the slot (w). Next, reattach the battery pack cover, and slide the lock switch from FREE to LOCK (e). w Insert battery pack e FREE→LOCK • Be sure to slide the battery pack cover lock switch to the LOCK position.
Removing 1. Turn off the Rugged PDA, and turn it over. 2. Slide the battery pack cover lock switches with the end of the stylus to FREE (q), and remove the battery pack cover. w Remove the battery pack q LOCK→FREE • The internal backup battery can maintain the data in the memory for up to 30 minutes (if the backup battery is full) when the battery pack is removed. If the backup battery is depleted, the data in the mem ory may be lost, it is best to attach or remove the battery pack quickly.
Charging the Battery Pack The AC adaptor is used not only to supply power from the AC power outlet but also to charge the battery pack. The battery pack is also charged while Rugged PDA is in use (power is on) if the AC adaptor (provided) is connected with the battery pack inserted in the Rugged PDA unit. Important • Charge the battery in a location where the temperature is between 5℃ to 35℃.
Charging the Battery with the AC Adaptor Pull back the rubber cover from the AC adaptor jack and insert the cable. The battery pack takes about two hours (when the Rugged PDA is turned off) to fully charge, and then the left side indicator LED lights green. When the battery pack is fully charged, remove the AC adaptor cable and be sure to replace the rubber cover to its original position. Warning! Use the AC adaptor specified by the manufacture.
Checking Remaining Battery Power • You can check the remaining power level in the batteries on the "Power management" screen. The battery loses power slowly even if the Rugged PDA is not being used. The battery may lose all power if the Rugged PDA is stored for a long period of time. We recommend checking the power level in the battery from time to time. • Tap the → Power → Settings → System management icons, in that order, to display the screen on the left.
Using the AC Adaptor The battery attached to the Rugged PDA charges when the AC adaptor is attached. Besides charging the battery, we recommend attaching the Rugged PDA to the AC adaptor when doing operations that use a lot of energy. • When using the Rugged PDA hooked up to a computer. • When using a wireless LAN. • When using the Rugged PDA with a compact flash card (especially when backing up data on the Rugged PDA to the card). Warning! Use the AC adaptor specified by the manufacture.
Initial Setup Initial setup procedure The first time you use the Rugged PDA, fully charge the battery (if possible connect it to the AC adaptor), then do the following procedure, according to the on screen instructions, to do the initial setup. Doing initial setup 1. Push the power switch to turn the power ON. 2. Tap on the screen to display the "Align screen" screen. Use the stylus to tap the center of the (+) in sequence each time it appears. 36 DT-10̲1章/36-52.p65 Page 36 04.9.
3. The "Today" screen appears, you can start using the Rugged PDA. • After initial setup, or after Full reset, set the "Clock," "Owner informa- tion" or "Password" if necessary. Important • If tapping on the screen has no effect, or if the screen is blank, first do a "Full reset (initialize memory)." 37 DT-10̲1章/36-52.p65 Page 37 04.9.30, 17:27 Adobe PageMaker 6.
Various Screen Adjustments Do the following adjustments, if after initial setup the screen is difficult to see or to do operations on. Adjusting screen brightness You can adjust the screen brightness with the Action button and the Cursor button to make the screen easier to see when operating the Rugged PDA in dark locations. Pressing the Action button and the Up button together makes the screen brighter, in the same way, pushing the Down button makes the screen darker.
Button Operation Settings Pushing the Program button on the front of the Rugged PDA while it is turned off automatically turns the power on. You can use the "Button operation settings" to set whether or not pushing the Program button turns on the power. Using the Program button to disable the power on operation can be used to prevent the power from coming on if the Program button is accidentally pressed when the Rugged PDA is in your bag or pocket.
When Initial Setup Is Finished This section describes the Rugged PDA's basic operations after initial setup is finished. Today Screen When you turn on your device for the first time each day (or after 4 hours of inactivity), you'll see the Today screen. You can also display it by tapping and then Today. On the Today screen, you can see at a glance important information for the day. Following are some of the status icons you may see. 40 DT-10̲1章/36-52.p65 Page 40 04.9.30, 17:27 Adobe PageMaker 6.
Status Icon Meaning Turns all sounds on and off Backup battery is low Main batteries are charging Main batteries are low Main batteries are very low Main batteries are full Notification that one or more instant messages were received Notification that one or more e-mail messages were received Note If more notification icons need to be displayed than there is room to display them, the Notification icon, Tap the icon to view all notification icons. , will display.
The following table contains a partial list of programs that are on your device. Look on the Pocket PC Companion CD for additional programs that you can install onto your device. Additional applications can be installed from Club Pocket PC at http://www.pocketpc.com. Icon Program Description ActiveSync Synchronize information between your device and desktop computer. Calculator Perform basic arithmetic and computations Calendar Keep track of your appointments and create meeting requests.
Navigation Bar and Command Bar The navigation bar is located at the top of the screen. It displays the active program and current time, and allows you to switch to programs and close screens. Use the command bar at the bottom of the screen to perform tasks in programs. The command bar includes menu names, buttons, and the Input Panel button. To create a new item in the current program, tap New. To see the name of a button, tap and hold the stylus on the button.
Pop-up Menus With pop-up menus, you can quickly choose an action for an item. For example, you can use the pop-up menu in the contact list to quickly delete a contact, make a copy of a contact, or send an e-mail message to a contact. The actions in the pop-up menus vary from program to program. To access a pop-up menu, tap and hold the stylus on the item name that you want to perform the action on. When the menu appears, lift the stylus, and tap the action you want to perform.
Enter Information on Your Device You have several options for entering new information: • Use the input panel to enter typed text, either by using the soft keyboard or other input method. • Write directly on the screen. • Draw pictures on the screen. • Speak into your device microphone to record a message. Use Microsoft® ActiveSync® to synchronize or copy information from your desktop computer to your device. For more information on ActiveSync, see ActiveSync Help on your desktop computer.
When you use the input panel, your device anticipates the word you are typing or writing and displays it above the input panel. When you tap the displayed word, it is inserted into your text at the insertion point. The more you use your device, the more words it learns to anticipate. To type with the soft keyboard: 1. Tap the arrow next to the Input Panel button and then Keyboard. 2. On the soft keyboard that is displayed, tap the keys with your stylus.
By default, small keyboard with on-screen special commands is provided. This looks much like a standard QWERTY keyboard found on your desktop PC. Here is the large keyboard without gestures enabled. Notice the absence of numerical keys. Finally, here is large keyboard with gestures enabled. 1. To space forward, swipe horizontally in a forward direction with stylus on the keyboard 2. To move backwards, swipe horizontally in a backwards direction with stylus on the keyboard 3.
To use Letter Recognizer: With Letter Recognizer you can write letters using the stylus just as you would on paper. It uses technology similar to that of CIC's Jot® product. 1. Tap the arrow next to the Input Panel button and then Letter Recognizer. 2. Write a letter in the box. As you can see, the screen has been broken into three segments. The first allows you to enter upper-case letters; the second lower-case letters, and the third numbers.
Writing on the Screen In any program that accepts writing, such as the Notes program, and in the Notes tab in Calendar, Contacts, and Tasks, you can use your stylus to write directly on the screen. Write the way you do on paper. You can edit and format what you've written and convert the information to text at a later time. To write on the screen: • Tap the Pen button to switch to writing mode. This action displays lines on the screen to help you write.
If you accidentally write on the screen, tap Tools, then Undo and try again. You can also select text by tapping the Pen button to deselect it and then dragging the stylus across the screen. You can cut, copy, and paste written text in the same way you work with typed text: tap and hold the selected words and then tap an editing command on the pop-up menu, or tap the command on the Edit menu. Drawing on the Screen You can draw on the screen in the same way that you write on the screen.
Connecting to a Computer Connecting to a computer allows you to share data with the computer, transfer files to and from the computer and back up files to the computer. Compatible computers Computers must meet the following minimum conditions to connect to and exchange data with the Rugged PDA.
Connecting to a Computer Do not connect the Rugged PDA to the computer before installing ActiveSync. The Rugged PDA and the computer can be connected in the following way. • When connecting via the optional Basic Cradle or Bridge Satellite Cradle, connect the optional Basic Cradle or Bridge Satellite Cradle to the USB port or RS-232C port on the computer, and then put the Rugged PDA in the optional cradle.
A ppendix 53 DT-10_App.p65 Page 53 04.9.30, 17:28 Adobe PageMaker 6.
Specifications Item OS CPU Display functions Memory Bluetooth Wireless LAN IT-10M20 IT-10M20BR Microsoft® Windows Mobile 2003 second edition software for Pocket PC Intel® PXA270 Application Processor 416MHz 480 × 640 Semi-transparent TFT color LCD (65,536 colors) *1 Resistive film touch panel with built-in LED backlight ROM 48MB Flash memory RAM 64MB (OS, including enough memory to start program) Ver.2 Communication speed 1Mbps, 3dbm max Communication distance: Approximately 10m IEEE802.
* 1 Though TFT screens are made using extremely high-grade technology, uneven brightness or fine dots sometimes occurs on these screens. Also, some dots on the screen do not light or stay continually lit. These, however, are not malfunctions. * 3 Operating time and charging time using the battery pack sometimes differ from the above values depending on the operating environment and the options that are connected.
Options List The useful options shown below are available for use with the Rugged PDA. AC Adaptor:AD-S15050A Basic Cradle:HA-C60IO •Connect AC adapter (ADS15050AE) to use Battery Pack:HA-C21BAT Bridge Satellite Cradle:HA-C61IO AT 21B HA-C h 0mA 230 3.7V odify ation n to m odify ciner m ise try by in try to herw GER ttery. t ot ot rwise DANe of thetobaheatry apar ot othe spos se it e batte ry apar t er di expo .Nevd never to take ththe batte an er try take .Nev er try to い。 .
The CE marking indicates compliance to applicable European Directives and Norms declared by; CASIO Europe GmbH Bornbarch 10, D-22848 Norderstedt, Germany DECLARATION OF CONFIRMITY We CASIO Europe GmbH Bornbarch 10, D-22848 Norderstedt, Germany declare under our sole responsibility that the product Pocket PC, Models: IT-10M20, IT-10M20BR to which this declaration relates is conformity with the following standards and Council Directives; Standards; EMC: EN55022:1994+A1:1995+A2:1997 Limits and methods of
GUIDELINES LAID DOWN BY FCC RULES FOR USE OF THIS UNIT IN THE U.S.A. (not applicable to other areas.) NOTICE This equipment has been tested and found to comply with the limits for a Class B digital device, pursuant to Part 15 of the FCC Rules. These limits are designed to provide reasonable protection against harmful interference in a residential installation.
CASSIOPEIA DT-10series User’s Manual 1st. ed. 2004-10 CASIO COMPUTER CO., LTD. 6-2, Hon-machi 1-chome Shibuya-ku, Tokyo 151-8543, Japan Notes • This guide cannot be reproduced or duplicated in any form, in part or in whole, without written permission from CASIO COMPUTER CO., LTD. • The content of this guide is subject to change without notice. • CASIO has, to the best of its ability, endeavored to make this guide as accurate as possible.
Pocket PC CASIO COMPUTER CO., LTD. 6-2, Hon-machi 1-chome Shibuya-ku, Tokyo 151-8543, Japan DT-10̲cover4.p65 Page 1 04.9.30, 17:28 Adobe PageMaker 6.
IC Statement Operation is subject to the following two conditions: 1) this device may not cause interference and 2) this device must accept any interference, including interference that may cause undesired operation of the device To prevent radio interference to the licenced service, this device is intended to be operated indoors and away from windows to provide maximum shielding.