
User's Manual

Trailblazer Installation and User Manual version 1.02 31
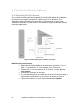
4.5 23dBi 5.8 GHz Directional Flat Panel Antenna
This antenna is similar to the 18dBi 2.4 GHz antenna except that it is properly
polarized when the arrow on the back indicates a vertical line. This results in a
diamond shape presented.
4.6 22dBi 4.9 GHz Directional Flat Panel Antenna
This antenna is similar to the 18dBi 2.4 GHz antenna except that it is properly
polarized when the arrow on the back indicates a vertical line. This results in a
diamond shape presented.
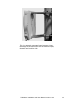
4.7 Weatherproofing RF Connections
Once you have the antenna mounted and secured. Complete the installation by
properly weatherproofing the RF connector. The connector will be waterproof and
durable as well as easy to service if it needs to be removed. You need electrical
tape and a thick, sticky sealing tape commonly known as “vapor wrap”. Start by
connecting the RF cable to the antenna. Cover the entire connector, any visible
threads on the antenna’s RF connector and about ½ inch of the coax cable with
electrical tape. Next, cover the tape with vapor wrap, overlapping the tape on
each end by ¼ inch. Finish by covering the entire vapor wrap with another layer
of black electrical tape. You can easily remove the weatherproofing by cutting
down one side of the wrap and peeling it away.
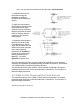
4.8 Antenna Alignment
Rough alignment: This is fairly straight forward. Since it is a prerequisite that
you have line of sight between the two points, here are several ideas that have
worked for installers:
• If you can see the other unit, simply aim the units towards each other.
• During midday, use a mirror or compact disk to create a reflection
approximately towards the other site while someone watches for the flash.
• Plot out the path on a topographical map and set the antennas using a
compass.