
Data Sheet


5/3/2018 Shapeoko 3 T-track installation - Carbide 3D
http://docs.carbide3d.com/assembly/t-tracks/s3/ 4/5
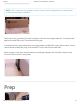
You have two options here.
Option - For the perfectionist:We included a /” drill bit with this kit. If you were so
inclinded, you could transfer all of the holes, as they are laid out. Then remove all of the pieces,
and pre-drill each one.
PROTIP:Pre-drilling the holes will help limit the amount of ‘bubbling’ the MDF will do when
the screw is driven in. these are coarse screws made for particle board, but if you’re really
into being perfect, you can pre-drill the holes.
Option - For the impatient:If you would rather not do the pre-drilling, that’s fine. Just skip
to the next section. We won’t hold it against you.
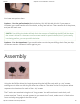
Assembly
Using the # Phillips driver bit, begin by attaching the left filler strip with x -/” screws,
making sure it does not shift as you drive the screws in. The white circles in the photo above
represent the locations for each of the -/” screws.
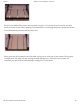
The T-tracks are attached using the /” long screws. You will need one in each hole, so
screws total per T-track, total screws. As you attach the T-track, make sure it is flush to the
front and stays snug against the filler strips.