
Assembly Instructions


16/01/2019 Shapeoko Assembly Guide - Carbide 3D
https://docs.carbide3d.com/assembly/shapeoko/s3/ 29/35
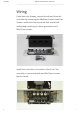
Wiring
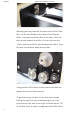
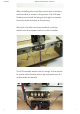
If you have not already, remove the shroud from the
controller by removing the M6x8mm Socket Head Cap
Screws. Inside the shroud you will nd a small self-
sealing bag containing 3 rubber grommets and 2
M6x12mm screws.
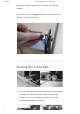
Install the controller on the back of the X-rail. The
controller is connected with two M6x12mm screws
(button head).